Menu Close

Category: Sewing

Daisy Petal Collar and Cuffs – Vintage Sewing Pattern

Searching through Trove the other day, I found this really cute sewing pattern for daisy petal collar and cuffs.

Daisy Collar Sewing Pattern

I’ve never seen a collar treatment like this in any modern drafting books. It could be used as is, or you can play with the shapes of the petals for a number of different effects. I think it would be particularly pretty made with an ombre fabric so the petals are darker near the neckline and lighter at the tips. You could even use a liquid fabric paint to colour them.

Check out the pattern from the Brisbane Courier, January 16th 1932.

* If you’d like to be notified of more free sewing, knitting and embroidery patterns please feel free to sign up on the left where it says “subscribe via email”. I do not sell anyone’s email address and only use it to send notifications of new posts to this blog.

Please let me know if there are any vintage techniques you’d like me to include. I have more plushwork templates to share coming up, plus some exciting vintage sewing leaflets so stay tuned!

signature

Recovering Lampshades

My latest finished project for 2016 is also a first for me! I covered a lampshade 🙂

First it looked like this.

Nasty thrifted lampshade before upcycling

Yech. You can’t tell from this photo how truly disgusting and nasty it was. It reminded me of this scene from Black Books:

Dirty from Black Books - the Cleaner

Now it looks like this, (it’s destined for my bed side table but I need to paint the table first).

Machine and hand sewn lampshade with lining

I bought this thrifted green lamp at one of the many local op shops quite a while ago and it had a tall olive green cylindrical lampshade on it. The shade was a lovely shape, but it didn’t have any supports holding the top and bottom rings together and I didn’t know how to recover it. So I bought the one shown above.

I realised I still had no idea how to cover a lampshade so I googled a lot until I found this tutorial from “The Stitch Sharer” blog.

Then I tested a whole load of colour options with my Singer 401. The orange tape is seam tape, while the others are bias binding. I keep my samples in a notebook for future reference.

Colour Tests for my Lampshade

As you can see, I chose to use the pale mint bias binding as I thought it went best with my other nick-nacks. The thread is Wonderfil Silco 40 tex (which I believe is 35wt?) cotton in colour SCM-08. It has a really lovely satin finish that gives you a bit of shine but not as much as rayon would.

It’s far from perfect but I’m happy enough with it and I did learn a lot should I ever want to make another one.

Things I learnt while recovering a manky old lampshade:

  1. When purchasing remnants from Spotlight, check for tea stains :-/
  2. There is a reason this particular shade was covered in fabric cut on the bias. The seams simply would not lay straight on the upright spokes. They all shifted to one side no matter what I did to control them. Bias cut fabric means you can cut the whole thing in one piece and it will fit even if you have to stretch it a bit. And you can hide the one wonky seam where you won’t see it. Unless you put it in front of a mirror.
  3. Allowing 2.5cm/1″ for the hemmed edges was nowhere near enough. I could have done with at least another 1cm/half inch.
  4. Check that the opening in the shade that goes over the bulb holder is the right size. Thank goodness for that sticky velcro stuff used for hanging pictures.

Now I start TAFE on Tuesday and I need a little bag to keep my tea mug safe in my backpack. I’d better get stitching!

signature

Singer 401 Decorative Stitches – Free Book Download

Back in December I mentioned that I was planning on stitching out every possible stitch that can be made on the Singer 401.

Vintage Singer 401G sewing machine

(My Singer 401G hard at work sewing some Doctor Who bunting).

I put my machine to work, and stitched all of them. And I mean ALL OF THEM. And I made this:

The Singer 401 Stitch Book

If you’ve ever had a burning desire to know exactly what you get when you combine all the settings with all the fashion discs (cams), now you can. Just click here to download the Singer 401 Stitch Book (pdf file). I’ve also included lots of tips on getting your stitch to look beautiful, and some references for further reading and investigation.

I hope all the Singer 401 owners out there will find this useful. I googled my fingers raw trying to find a reference when I first bought my 401 and when there wasn’t one, I thought I’d upload mine in case anyone else was looking for the same information.

I almost forgot to add that I made a pinterest board! My Pinterest board with ideas for decorative stitches. It has some great ideas that I never would have thought of in a million stitches.

signature

20 Days of Crafting in Pictures

I’m going on holidays tomorrow so this post will be short on words but big on pictures. Here are the crafty things I’ve been up to since I last posted. I’ll post more details on the techniques and gadgets when I get back.

Doctor Who bunting from Spoonflower

1: Doctor Who bunting (using this fabric from Spoonflower). I backed mine with plain calico since it will be hanging against a wall and ended up with over 4 metres from only half a yard of fabric!

Iron Man pencil case

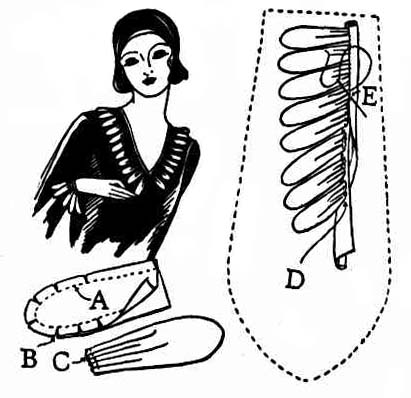
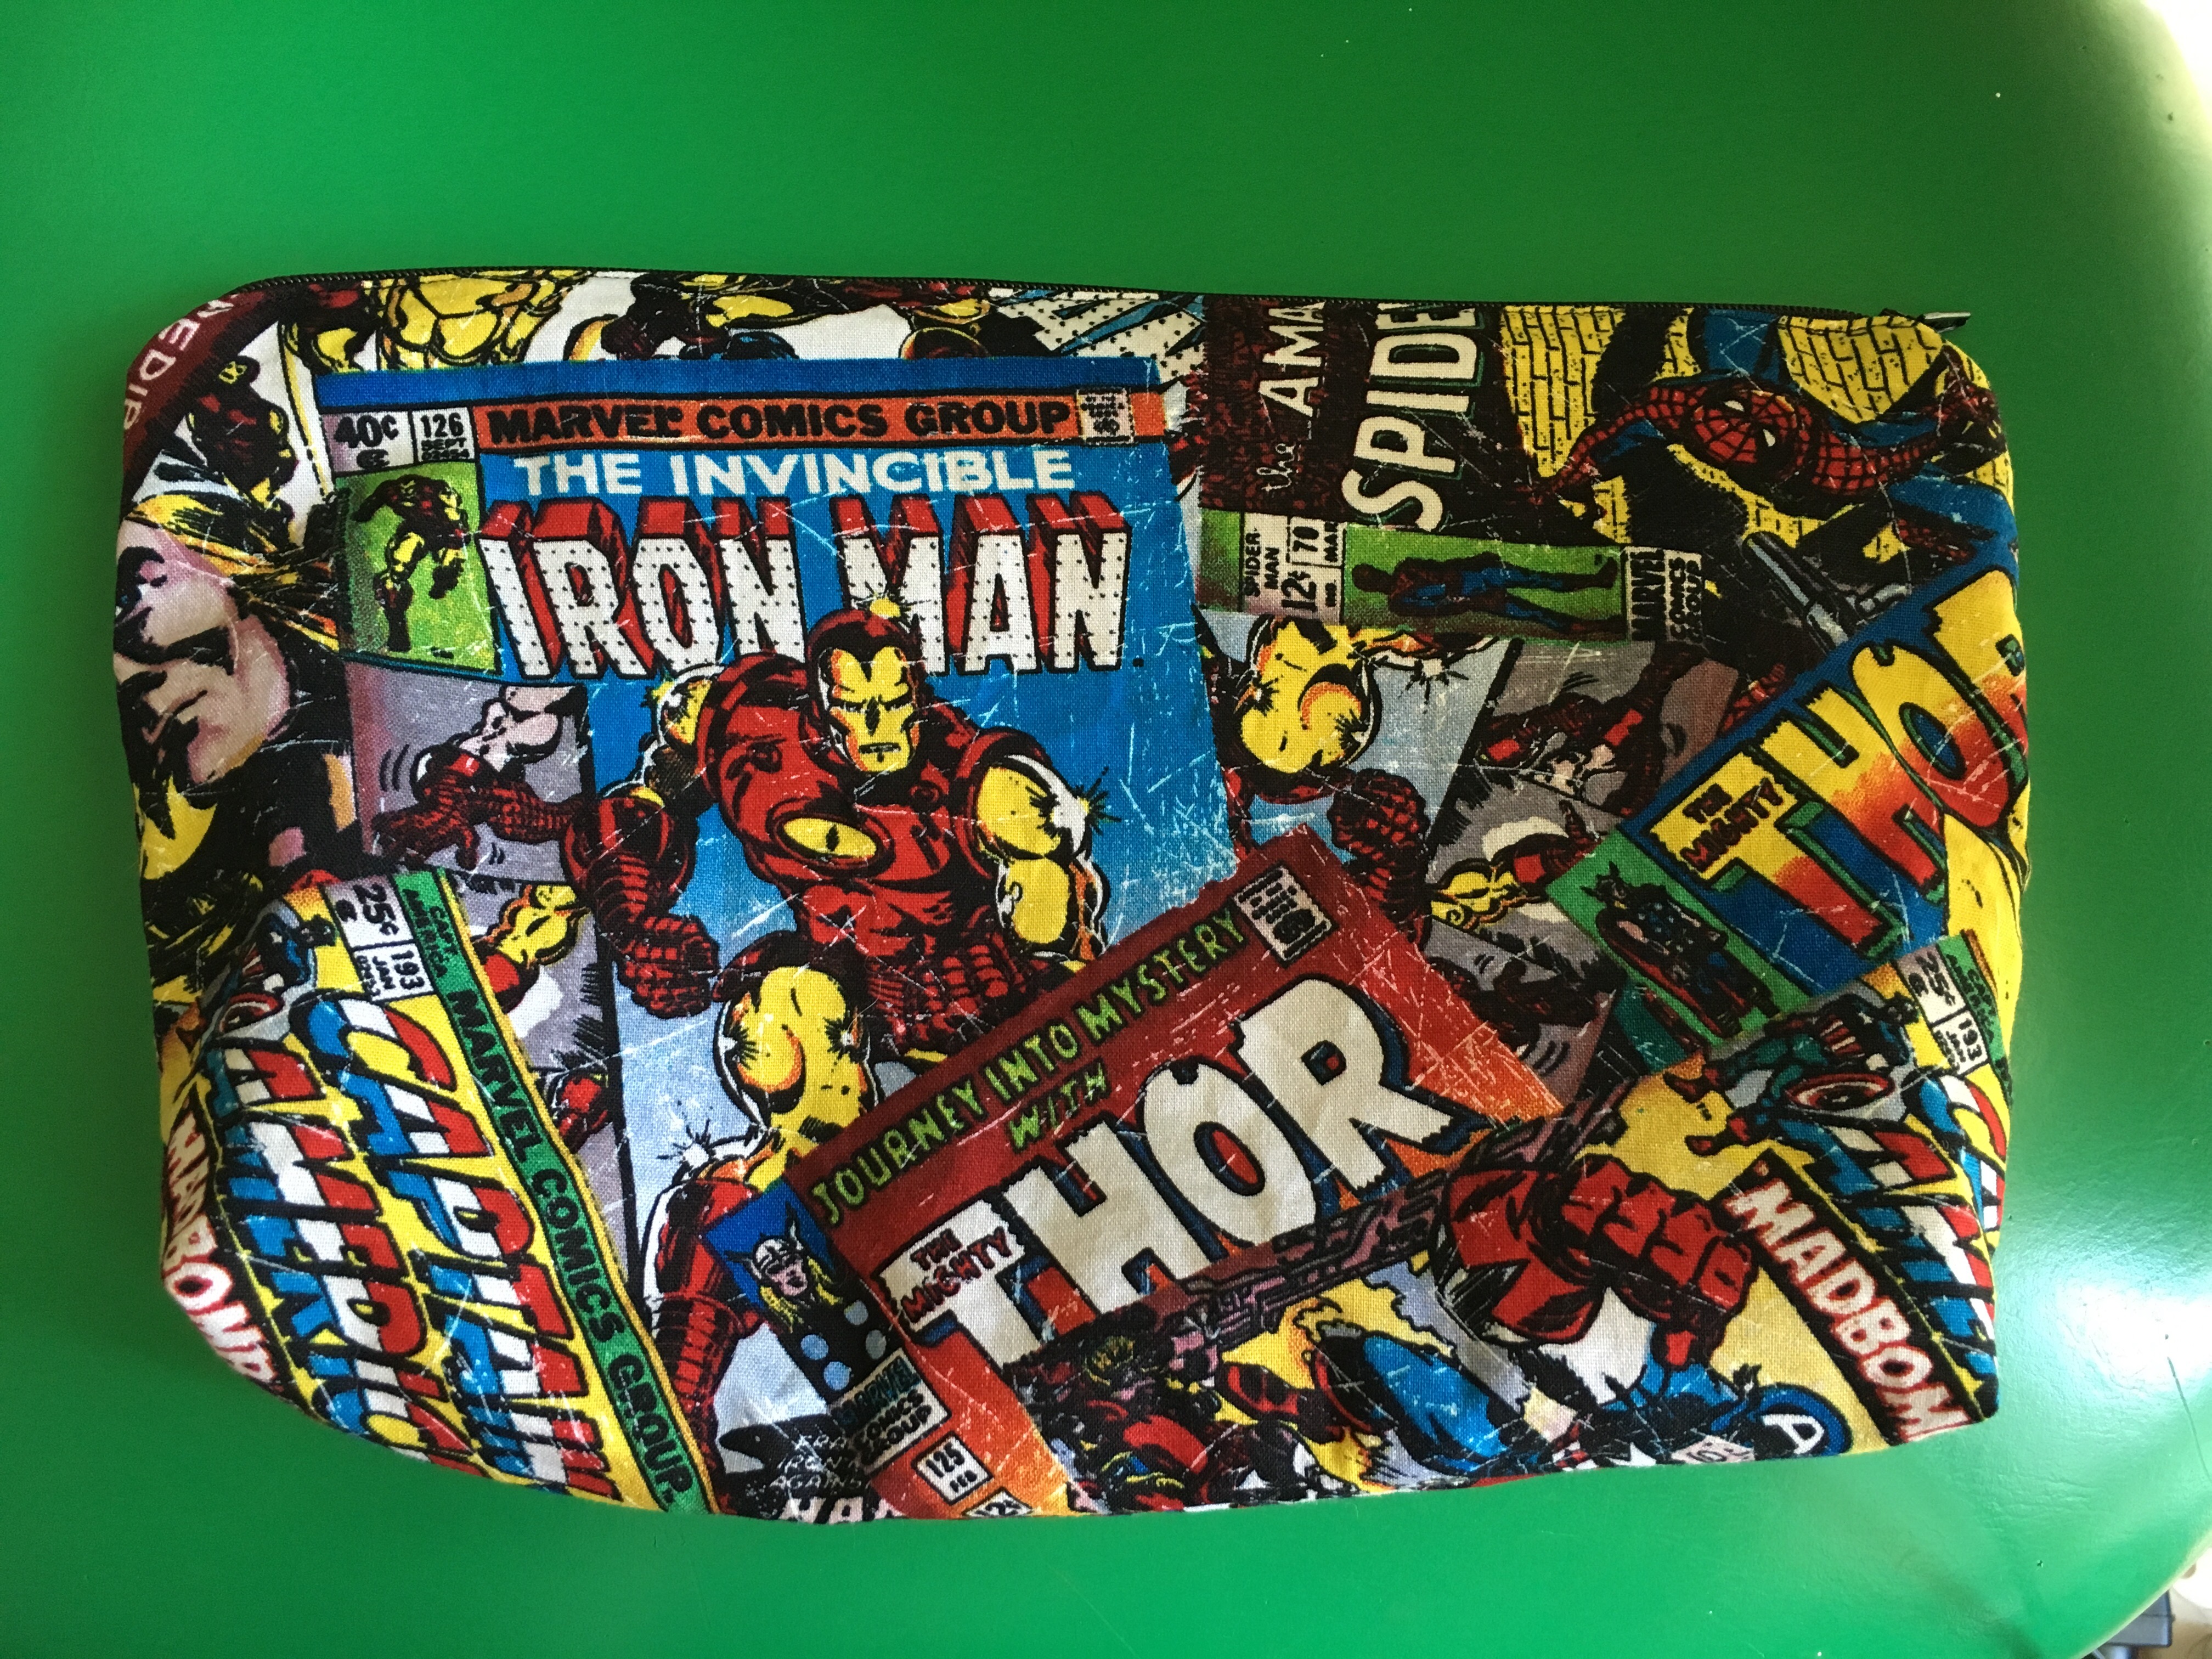
2: Avengers pencil case. The bottom is straight, it just looks wobbly because of the boxed corners.

Twin Needle Stitches from the Singer 401 - Page 1

Twin Needle Stitches from the Singer 401 - Page 2

Twin Needle Stitches from the Singer 401 - Page 3

Twin Needle Stitches from the Singer 401 - Page 4

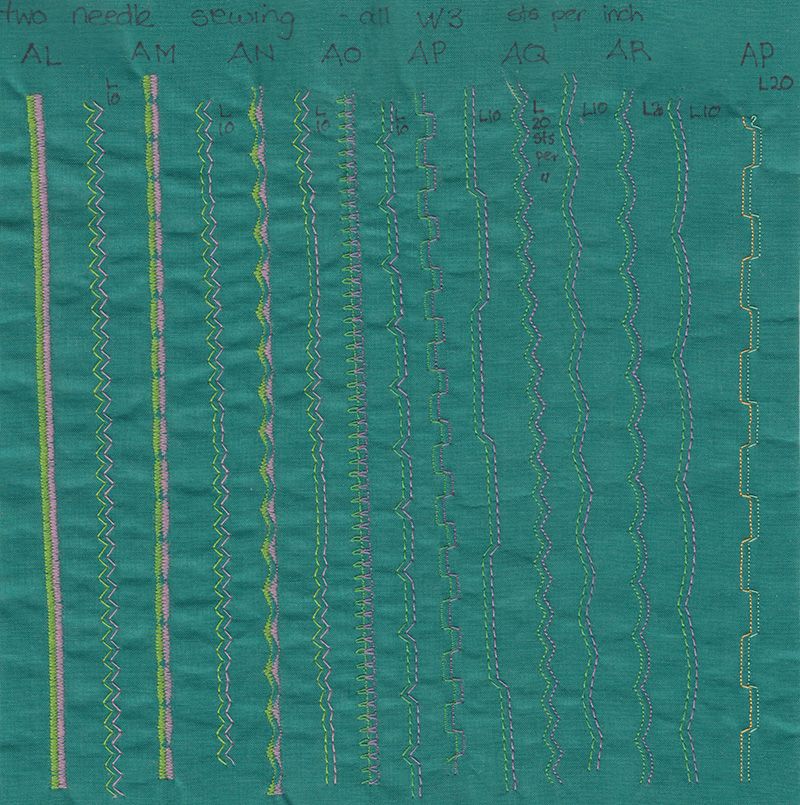
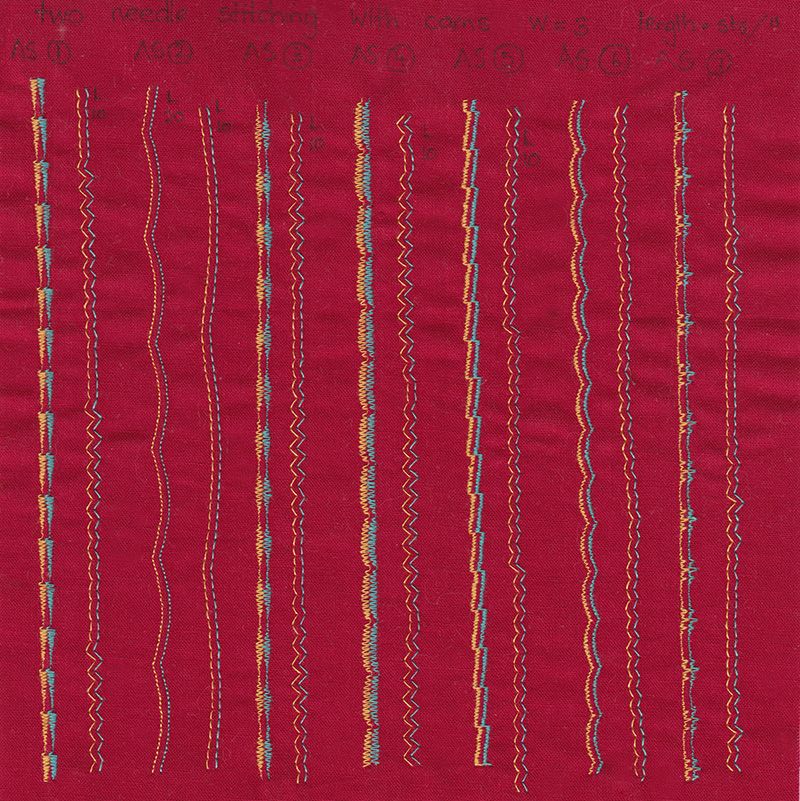
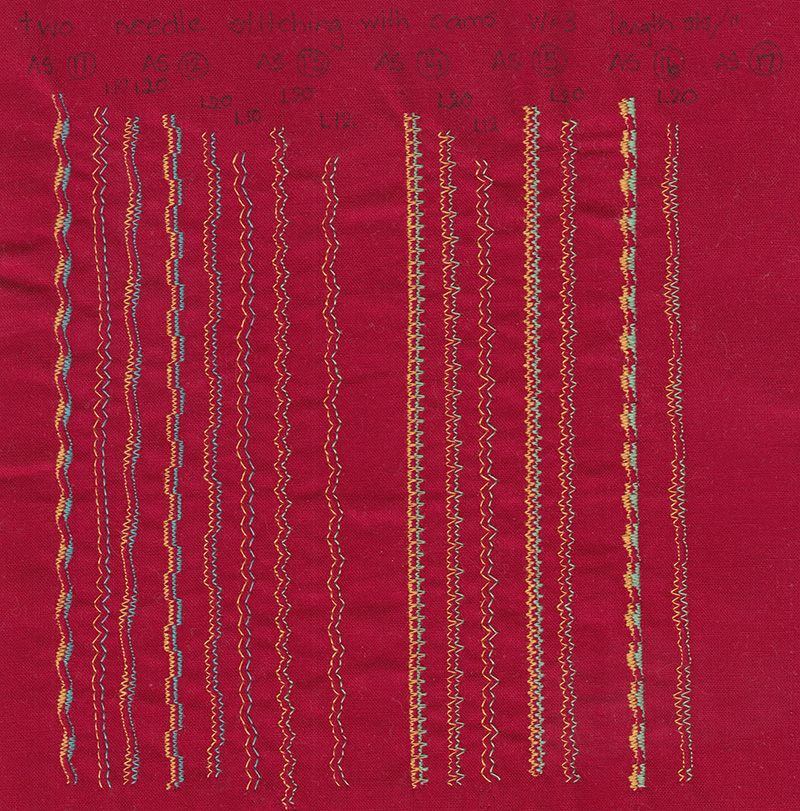
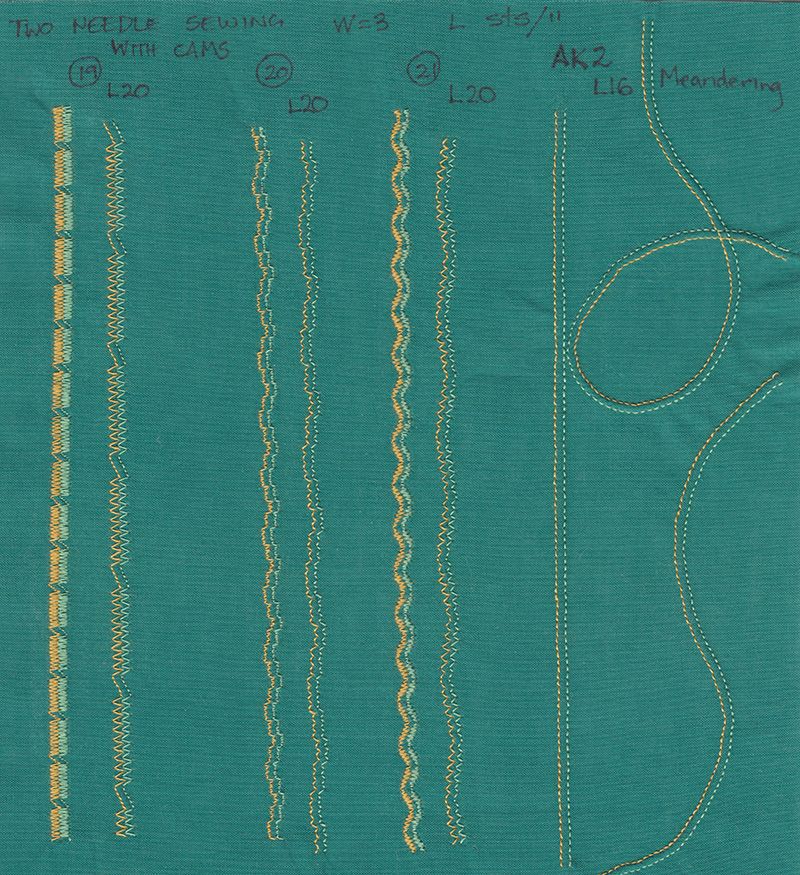
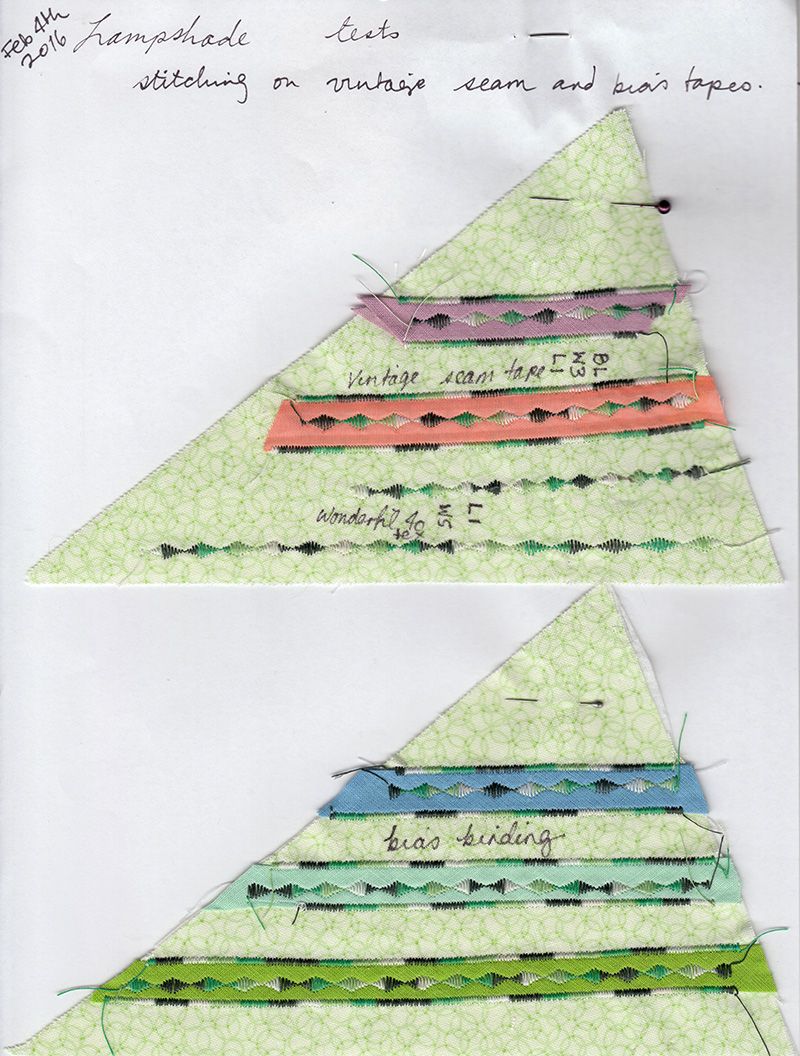
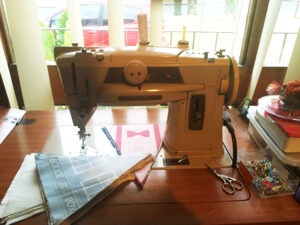
3 – 6: Two needle stitching on my singer 401. I’m going to make a whole stitch book for 401 owners to download after my cam #17 arrives. When I do, I’ll tell you what all those letters and numbers mean 🙂

Pintucks on the Singer 401

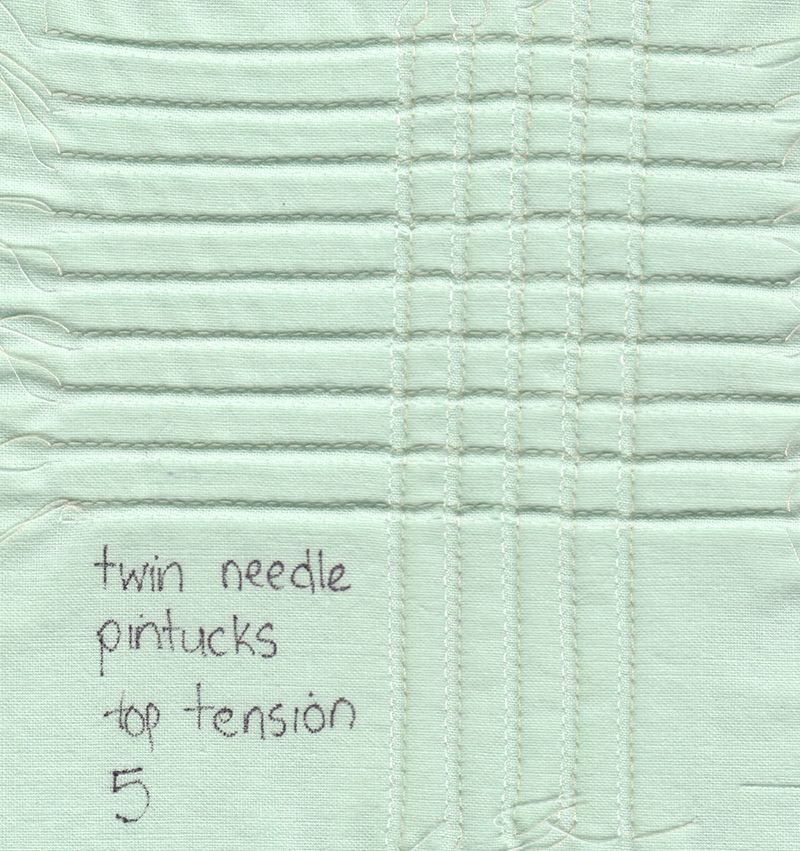
7: My very first pintucks!

Couching on the Singer 401

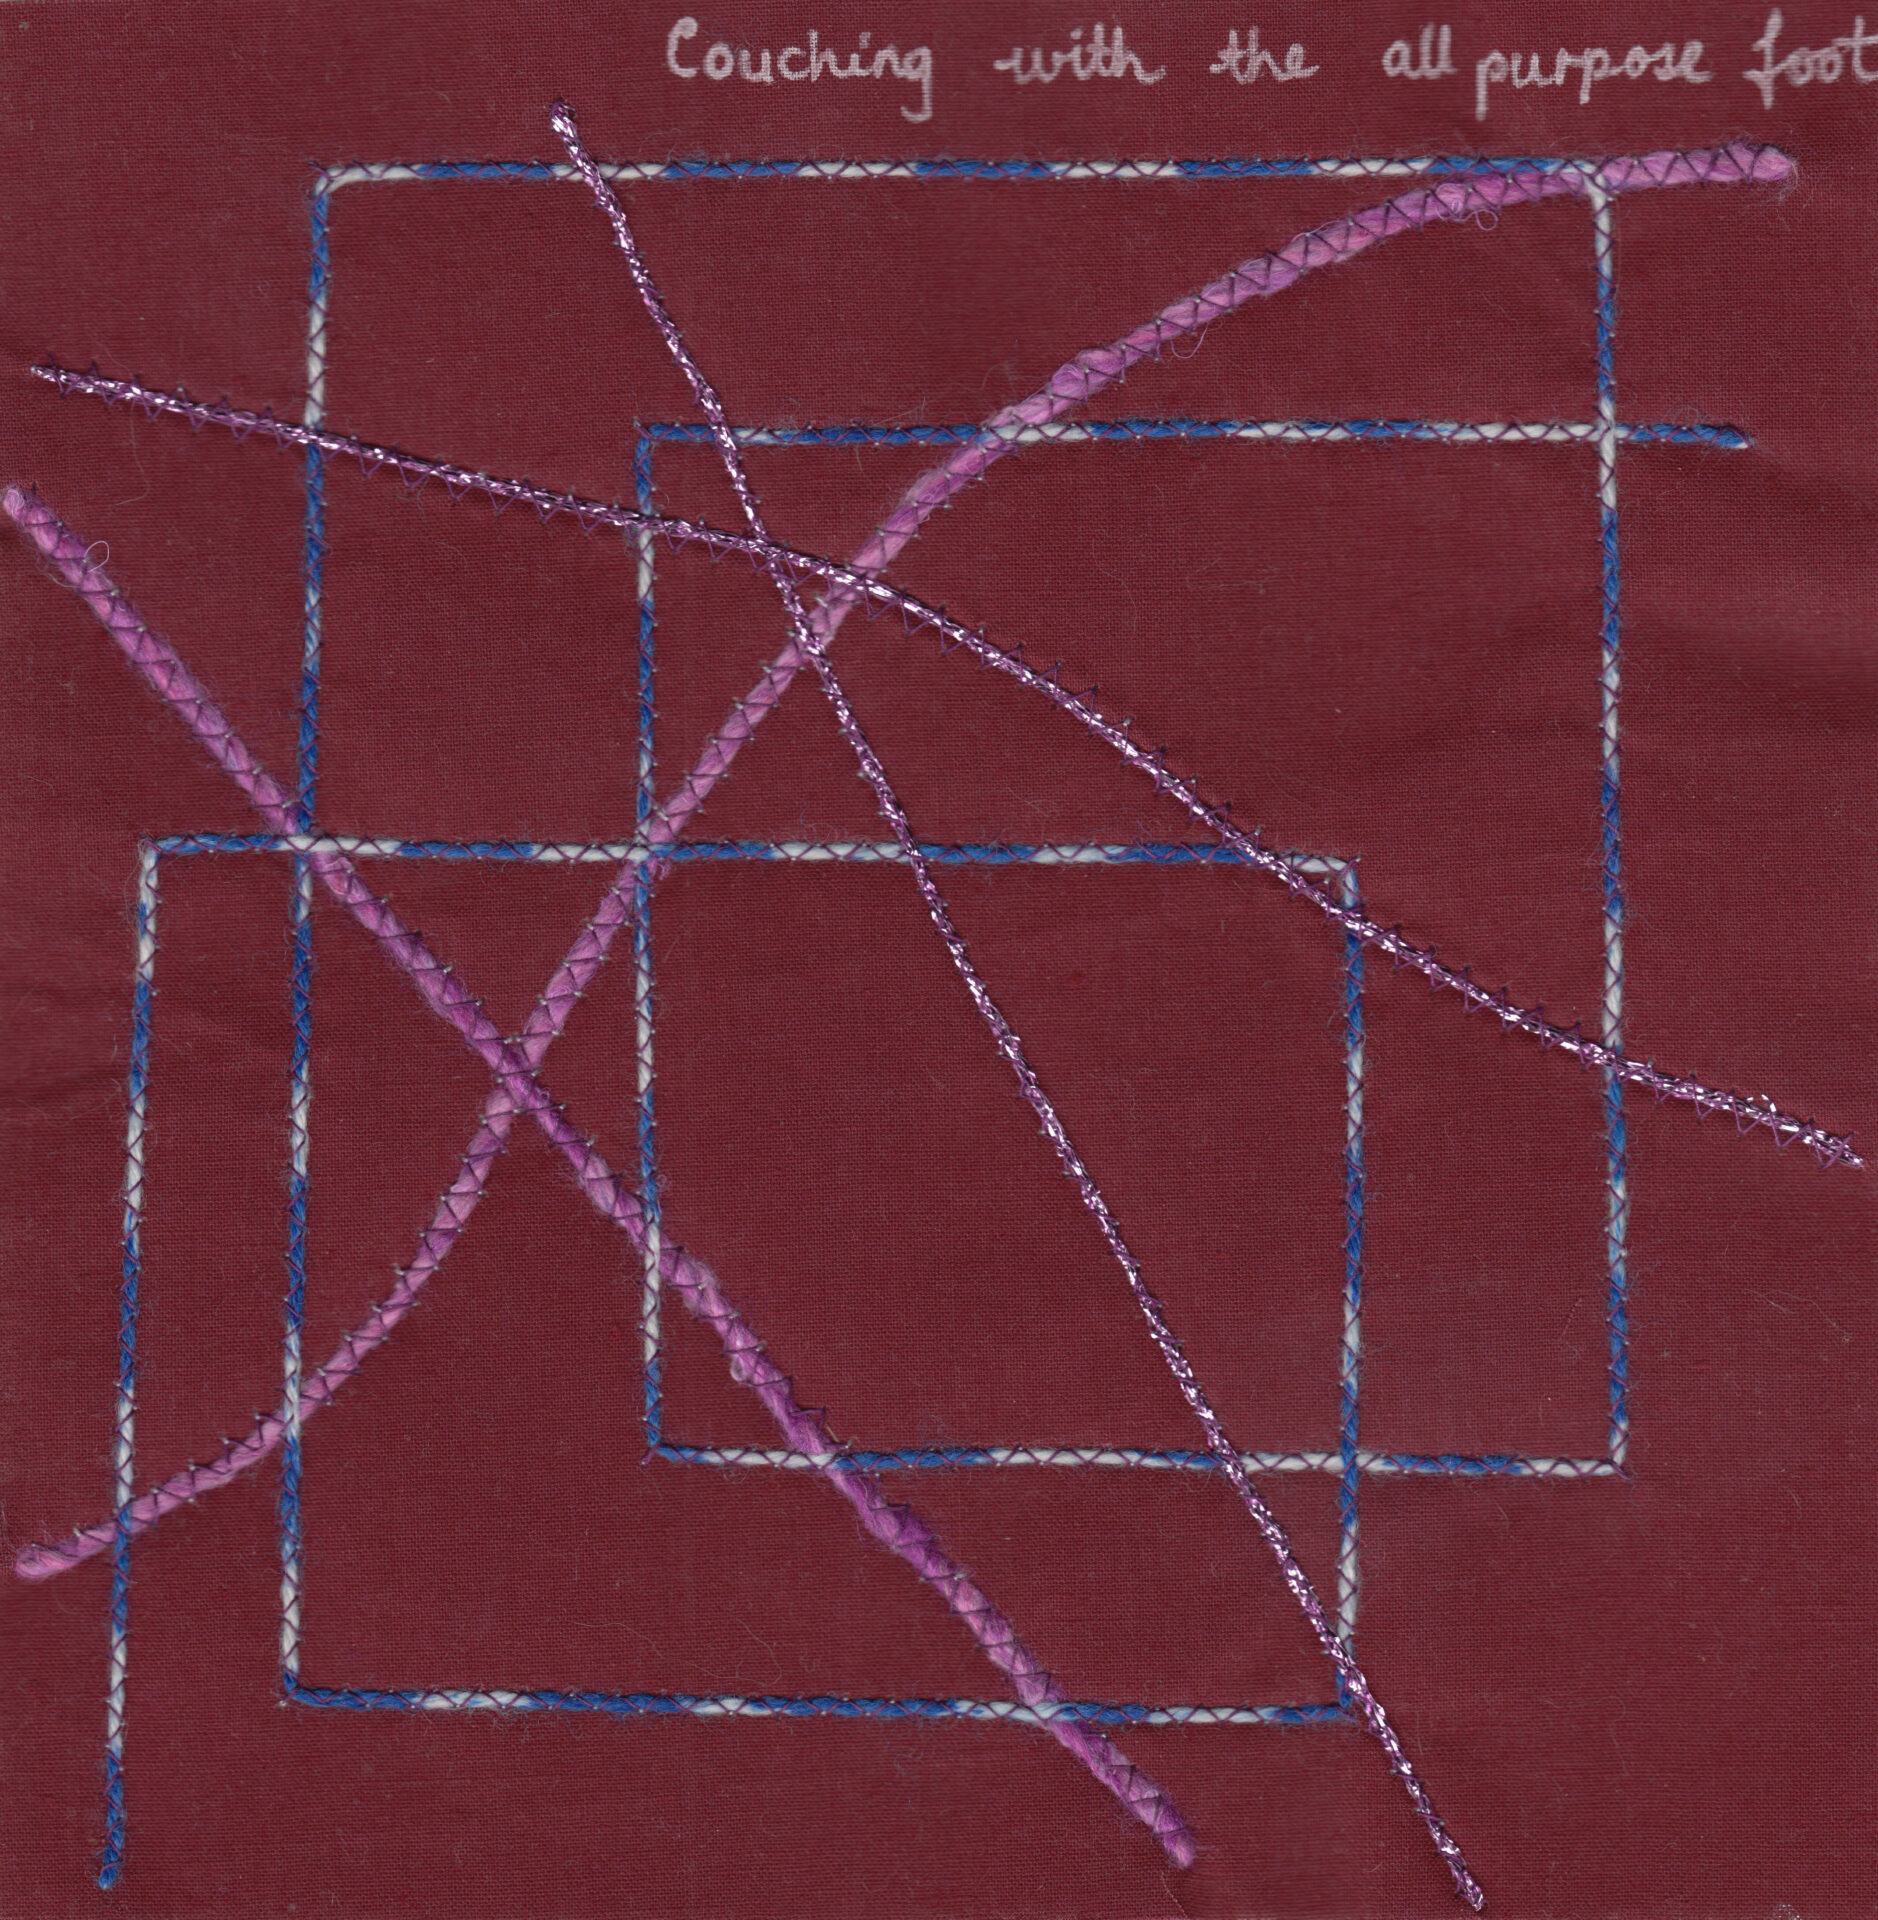
8: Couching on the Singer 401 using the all purpose foot works really well. The only yarn that tried to escape was the metallic knitting yarn.

Thread Test with the Circular Attachment on the Singer 401

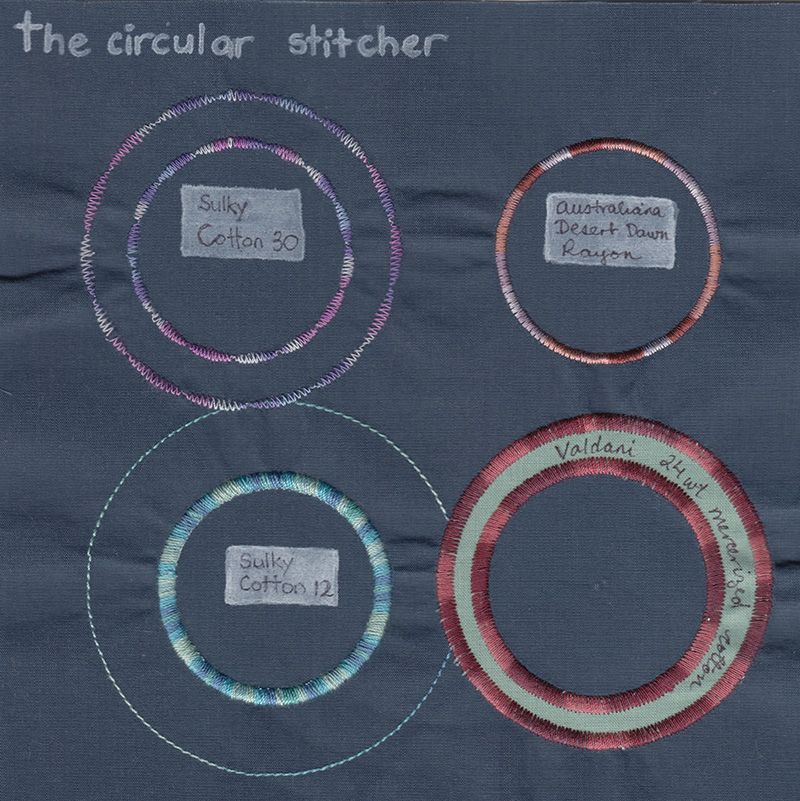
9: Auditioning threads with the circular stitcher attachment

Circular Couching and Appliqué on the Singer 401

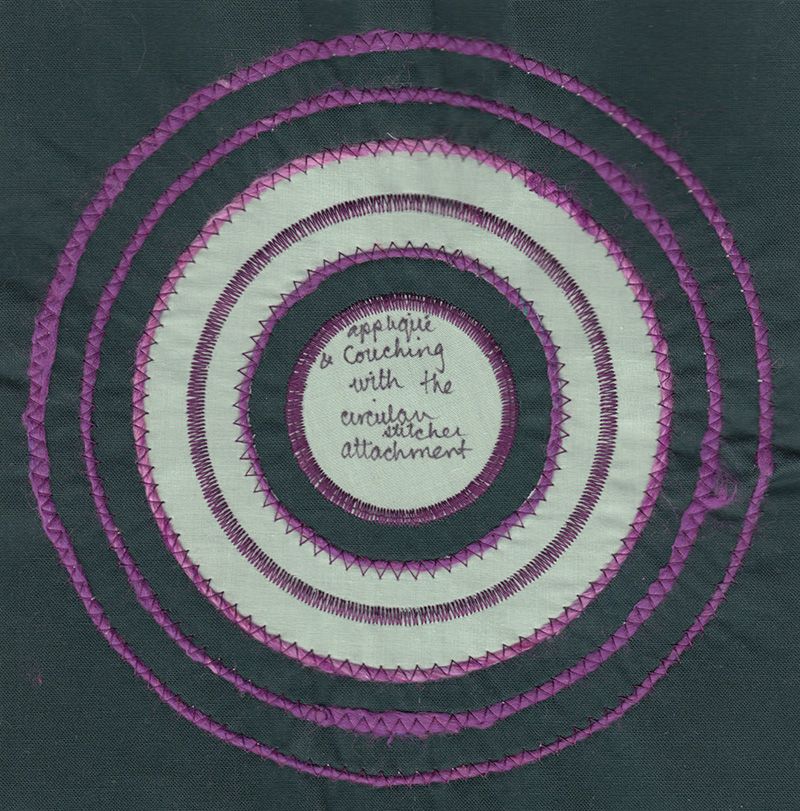
10: Couching and appliqué using the circular stitcher.

Satin Stitch Flower on the Singer 401 with the Circular Attachment

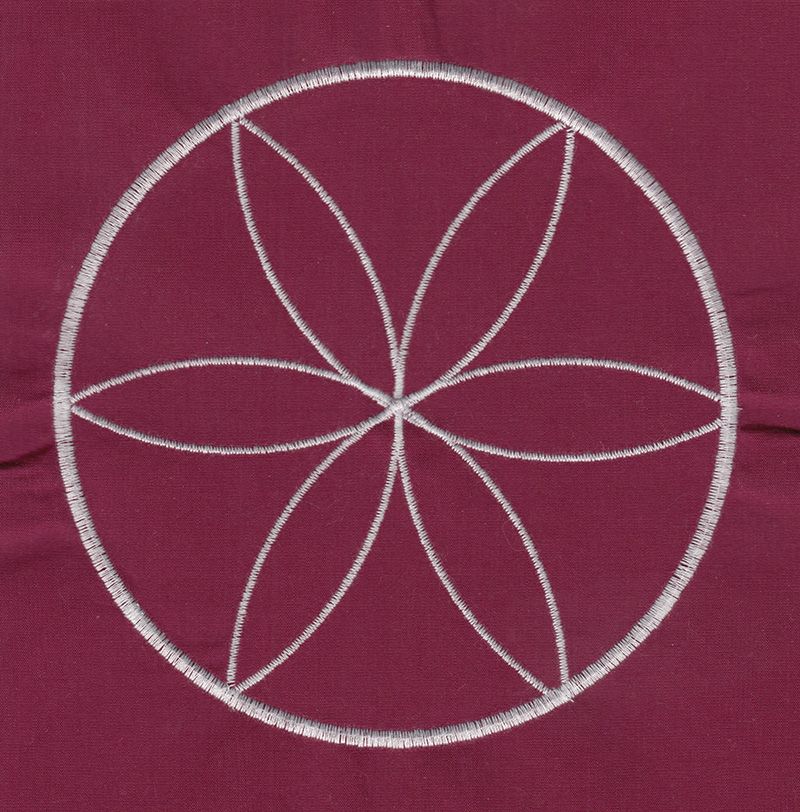
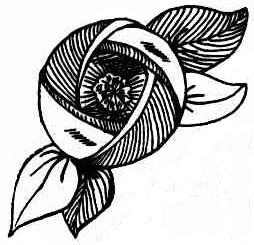
11: A slightly wonky flower using, you guessed it, the circular stitcher attachment. I love this thing 🙂

Appliqué Flower on the Singer 401 with the Circular Attachment

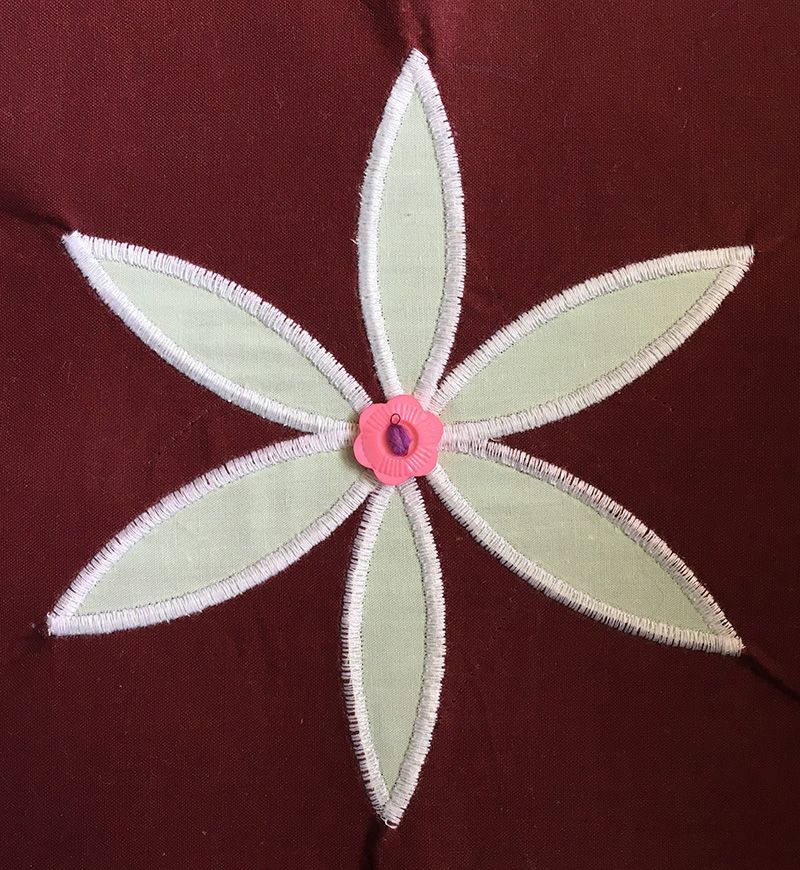
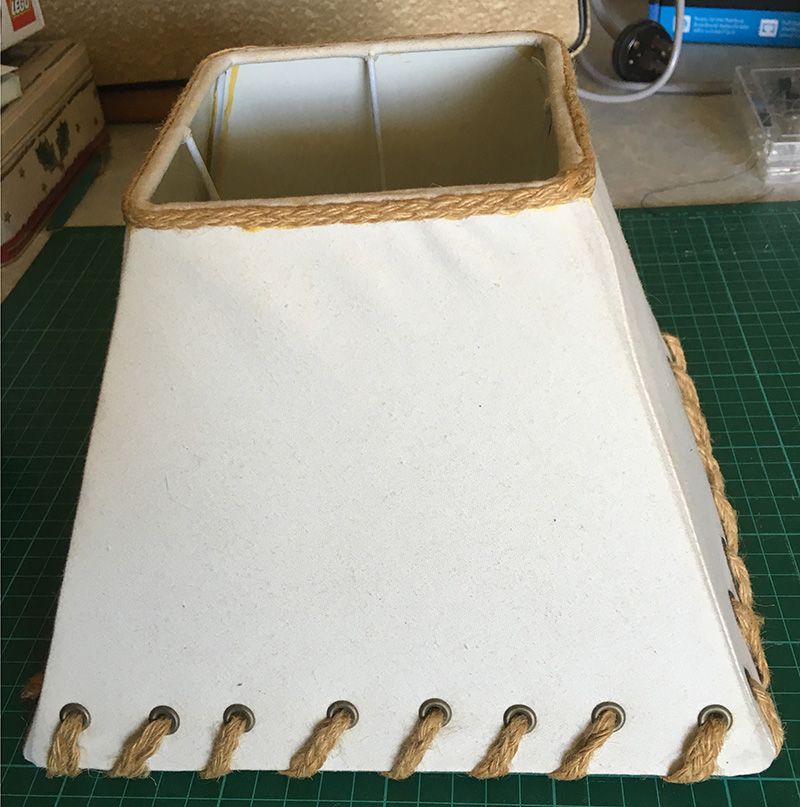
12: At this point I realised my presser foot screw had worked it’s way loose, resulting in an even wonkier appliquĂ© flower using the circular stitcher. I’ve since found out about some templates I can make to ensure everything lines up. I’ll make a post about those later with some downloadable templates.

Those wrinkles at the corners on the petals could be eliminated with some steam pressing BTW.

Circular Pintucks on the Singer 401

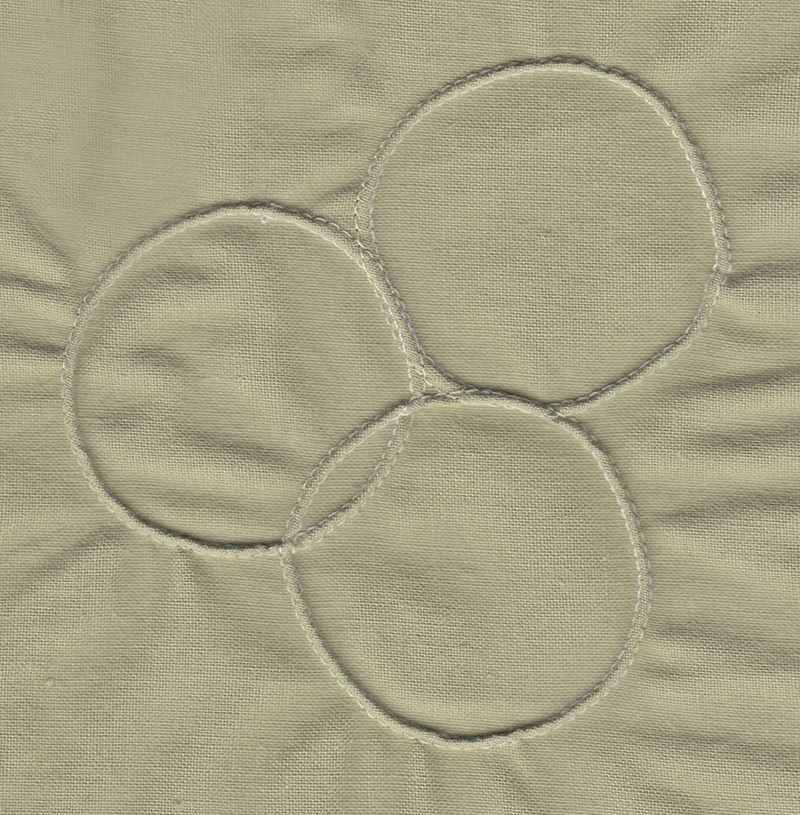
13: Circular pintucks made using the circular stitcher attachment. I took photos for a tutorial.

Multiple circular rounds with the multi-stitch zig zag on the Singer 401

14: and finally I played with working multiple rounds with 2 needle stitching. My thread kept breaking for two reasons – it’s rubbish thread and I accidentally left the top tension set tight for pintucking. Oops.

The result of all this sewing is that I’m totally in love with this machine, I already learnt a whole bunch of new techniques and I’m totally enamoured with both two needle stitching (using 2 needles side by side or a twin needle), and I want to sew circles on everything.

In fact, I made this pinterest board on making things with the circular stitching attachment and flower stitcher (I have one of those too). I had no idea you could use it for so many different techniques!

signature