Menu Close

Category: Sewing

My New Sewing Machine

After old Mr Stitchy the Brother embroidery machine cost me a bucket of money for repairs, he decided to depart in spectacular fashion by blowing a circuit board. A circuit board that is no longer manufactured and of which none existed in the country. Possibly on the planet.

I decided computerised sewing machines suck (the money from your wallet far too easily and often) and to replace him with an all metal Singer. So I bought a tan 306K at the op shop. It sews beautifully, though it has a couple of issues that need a repairman, a can of oil and more knowledge than I have.

Vintage Singer 401G sewing machine

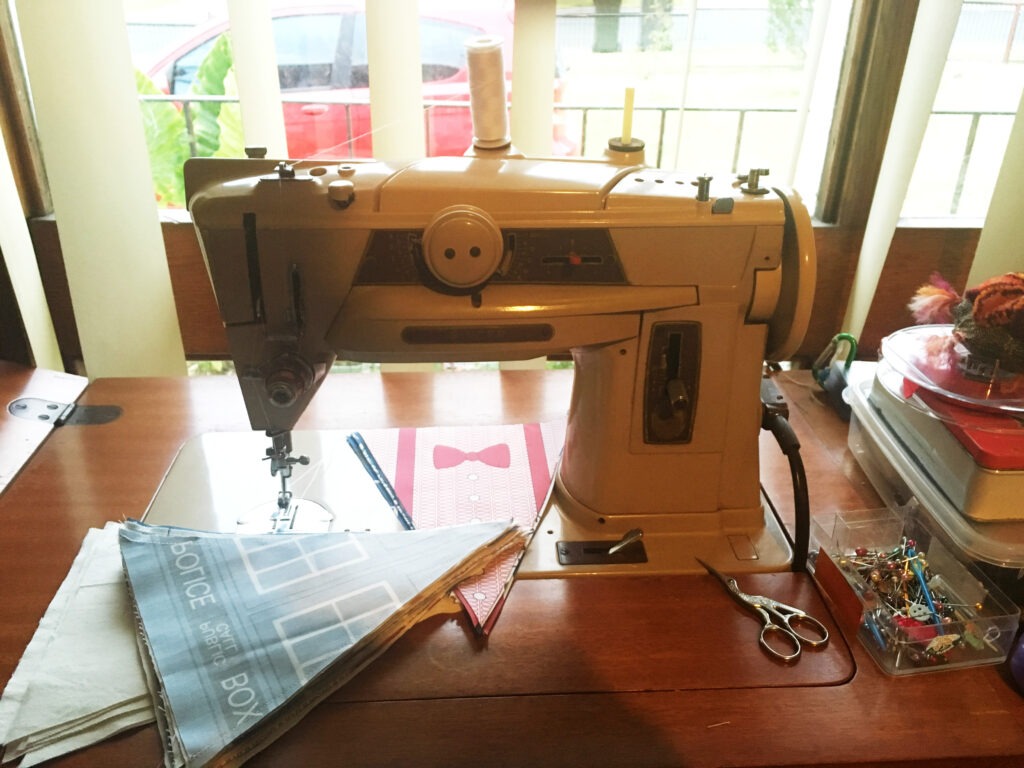
This is not it. This is the Singer 401G that I found in the table I wanted to buy for the 306K. For $25. With all the attachments that originally came with it. For $25.

Twenty five dollars.

After reading about the 401 and it’s reputation as the bestest sewing machine evar, I decided to get it serviced before the 306K so some sewing could be done ASAP. The 306K sews amazingly but the needle position lever is seized and I use that a lot (I like top stitching all the things), so I thought this would be the best option for my budget.

Then I blew my budget buying cams for two needle sewing and attachments, which was fun.

As you know, I’ve been sewing up a storm with it already and you can see a new project underway. It’s almost Christmas, so of course I’m making Doctor Who bunting from this great fabric I found on Spoonflower. Because what is more Christmassy than looking forward to the Doctor Who Christmas special?

That’s right. Nothing.

Since she’s a vintage German Singer, I called her Marlene. She already sews better than Mr Stitchy ever did, even straight out of the box. My sewing machine repair guy almost did that tweenage girl thing where you stand on your tippy toes and clap your hands. I see this as a good sign for the future.

I hope I’m not wrong. I have a lot of Craftsy classes to catch up on!

signature

Christmas Spirit

I know I promised a post about my new sewing machine but I’ll have to keep you in suspense just one day longer because the NBN installation guy is due here any minute (fast intarwebs, YAY!) and I had to put all the sewing away.

**GASP**

I mean really, who does that? Usually not me, that’s for sure.

But I sure have been using the machine a lot. Aside from the three cushions I’ve already shown you (plushy and Christmassy), I’ve also made a pencil case and two Christmas stockings.

I don’t have a photo of the pencil case but here are the Christmas stockings.

Two retro look Christmas stockings.

I found the fabric panel for sewing the stockings at the local op shop (thrift store/charity shop) and thought they were hilarious so I knew I had to make them up. Poor Santa is being sent off for a liver function test this afternoon. I think it’s packed it in, poor fella.

For my thrifty friends who are interested in such things: everything was from the op shop except the thread. Fabric panel, lining, batting, bias binding used for the hanging loops, sewing machine, the sewing machine table, that Christmas card covering up the sticker mark on the sewing machine table…

Now I’m off to find the goo gone to remove the sticker residue before I get started on some Craftsy classes that I bought before old Mr Stitchy blew a circuit board and took a jolly trip to the tip. At least I will be after the NBN installation guy does his thing as all my sewing gear is currently hiding in the bedroom.

signature

Charlie’s Teacher’s Gifts for 2015

Every year our son Charlie likes to make presents for his teacher and their assistant. Last year they were woven, this year printed and sewn.

Charlie printed the fabric using acrylic paint mixed with textile medium and I sewed the finished fabric into a couple of cushions (with zippers thanks to my new old sewing machine. More about that tomorrow)!

Hand printed Christmas cushion

Hand printed Christmas cushion

He’s got a great printmaking technique for a kid who hasn’t even turned seven yet 🙂

signature

Upcycle a Man’s Shirt Into a Woman’s Blouse

If you’ve ever found a high quality man’s shirt while op shopping and wished it was a woman’s shirt, this article from 1936 will help! I’ve copied it here because I had to pull out all my vintage pattern drafting books to find the measurements for making the collar, since the illustration is a bit blurry. (Thankfully Mr Ross Hynes and the 1945 edition of the Home Dressmaker came to the rescue).

“The Shirt Off Father’s Back” from The Queenslander, December 31st 1936.

Home Sewing Hint By Ruth Wyeth Spears

Diagrams for upcycling a man's shirt into a woman's blouse, 1936

THERE have been a number of requests for ideas for using shirts that are worn out in the front at the neckline and that have frayed cuffs. Aprons are some times made from these. A clever mother we know also makes them into sun suits for a wee youngster. One of the most up-to-date ideas is for Mother and the girls to convert old shirts into tailored blouses.

If Father is the broad-shouldered type, it is generally necessary to rip the yoke of the shirt both back and front and add more gathers, as shown here at A, to take up the shoulder width. The yoke is then trimmed off at the arm hole line, as at B, and the sleeve stitched back in place. The neck is cut in a V line, as at C, to eliminate the worn spots. Then the sleeves are cut off straight around on the thread of the goods 5 inches below the bottom of the armhole as at D. This allows for a 2-inch hem. The cut off pieces of the front of the sleeves are used for the blouse collar and the collar facing. Sometimes it is necessary to use the pieces from both sleeves for the outside of the collar with a piecing in the centre back, and then use plain white material for the facing.

If white shirts are being made over, a half yard of white cotton broadcloth will make entirely new collars for six shirts. To make a pattern for the collar cut a piece of paper 3 inches deep, and 1 inch longer than half the portion of the neck edge to which the collar is to be joined. Shape this paper according to the dimensions shown here in diagram E. The short edge of this pattern is placed on a fold of the goods in cutting. When the collar has been cut and faced, sew it to the right side of the neck edge, with a strip of bias tape, as shown at F. Turn the tape down over the seam and sew as at G.

signature