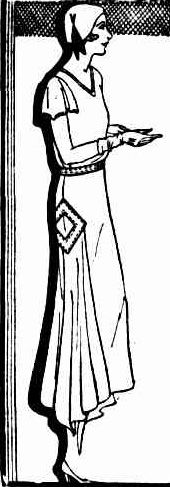
Today’s featured pattern is a clever way to upcycle a sleeveless a-line dress into a vintage look stunner by adding flutter sleeves and a free hanging side drapery with appliqué.
Have you ever gone diving through your stash, only to feel horribly guilty about your unfinished projects that you know will never be worked on again?
Well don’t, because you can always donate them to your local charity shop where someone like me will find them and consider them treasure!
All of which is a very ’round about way of saying, “look at the really cool thing I found at the op shop yesterday!”
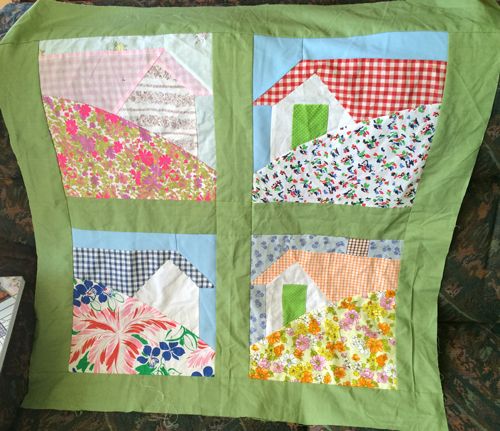
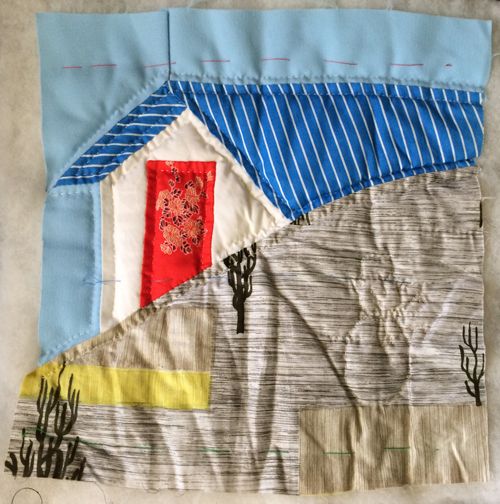
It’s an unfinished patchwork quilt made from 1970’s fabrics. It looks like two different people worked on it as half has been finished in a single piece
Unfinished house patchwork made from 1970’s fabrics
and the other half have been quilted as a quilt-as-you-go quilt.
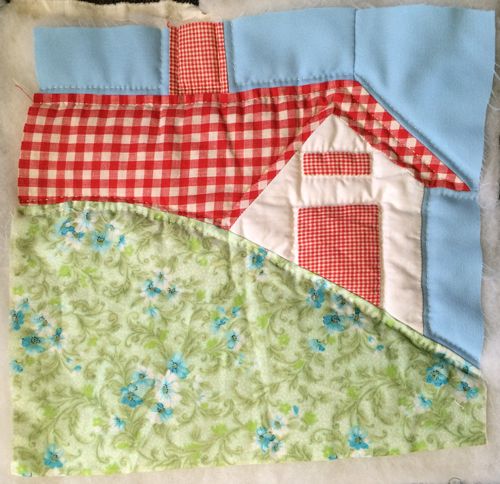
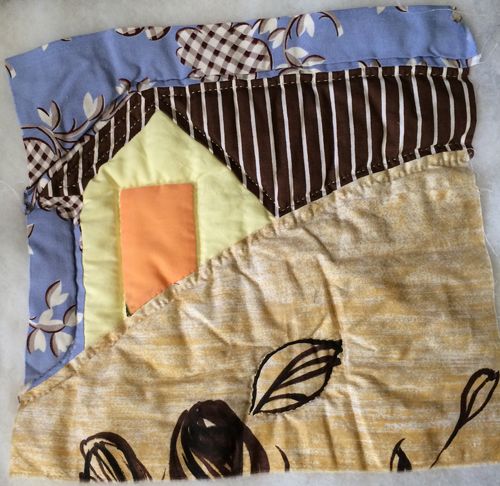
Quilt as you go house block with red gingham roofQuilt as you go house block with green frontQuilt as you go house block with striped roofQuilt as you go house block with quilted surprise
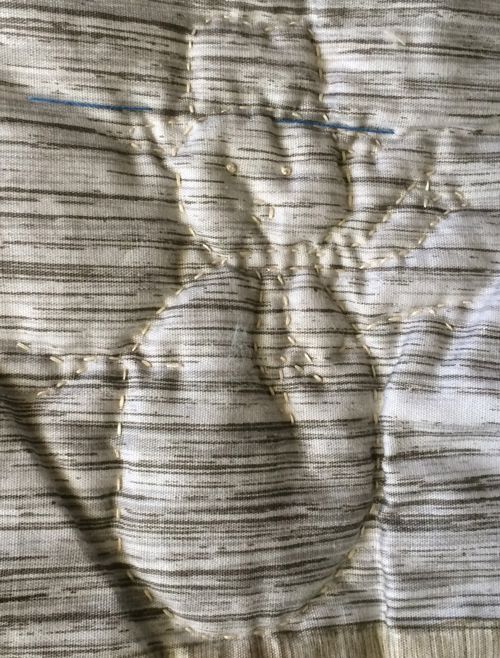
I had intended to take apart the quilted blocks and finish it in one piece with a square of 1970’s patchwork hexagons as the centre but then I found this:
Surprise snowman!
and I’ve now totally changed my mind. I’ll be taking apart the piece with four squares and making it all quilt-as-you-go instead 🙂
I just can’t bring myself to kill the poor innocent snowman.
I wonder what I have that will look good as the two missing doors…
My first two finished projects for 2015! One made from knitting and one a complete travesty. Er, I mean sewn.
These were finished last Friday (January 2nd) after a mad dash to Spotlight for a bag of stuffing. I accidentally came home with a bag of stuffing, a seam roll, an ironing mitt and a new hook for Charlie’s Rainbow loom. Oops. My truly awesome daughter also bought me a copy of “Gertie Sews Vintage Casual”. I’ll review that in a future post when I’ve had time to have a look at it). Here are some links to it on Amazon and Book Depository, in case you’d like to take a look. (For the sake of transparency, those are affiliate links).
So, what have I made?
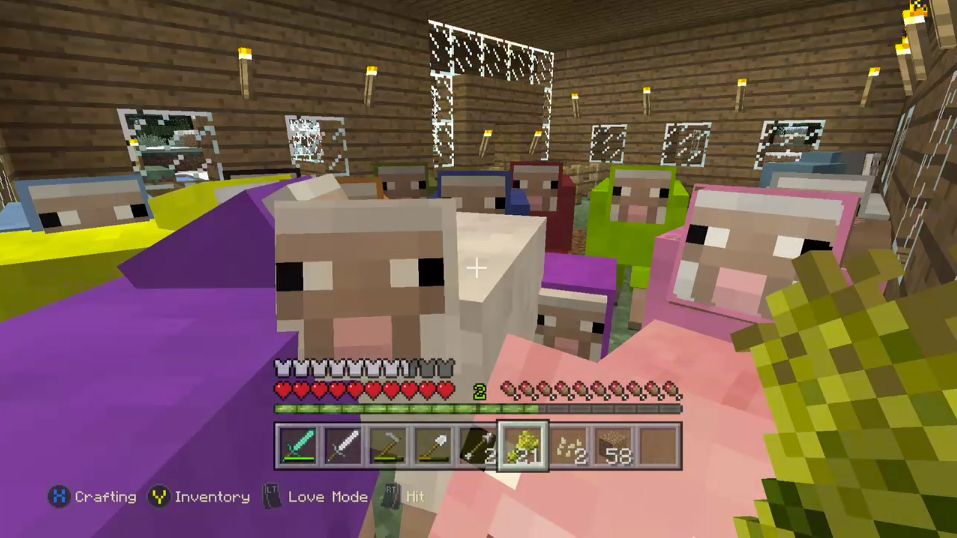
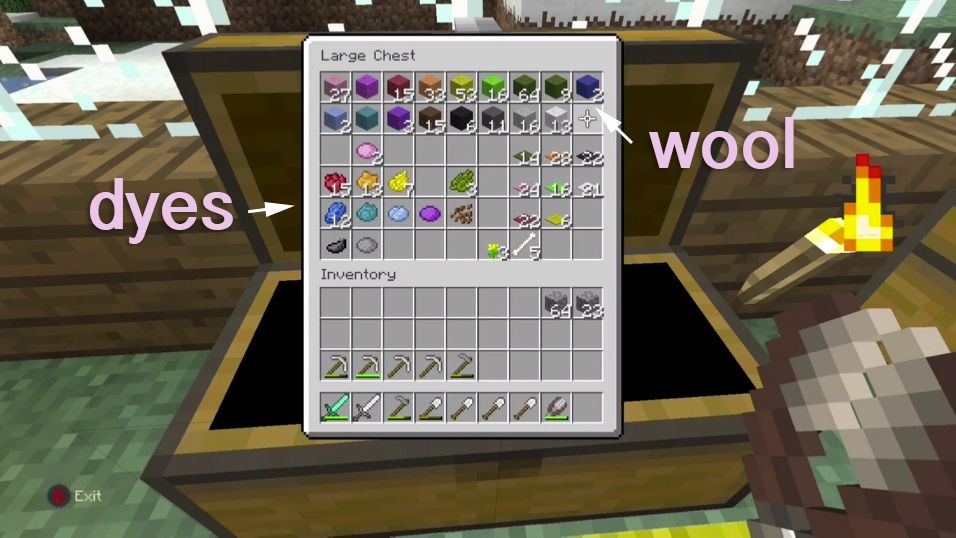
All sixteen colours of sheep in MinecraftThe Minecraft Wool stash. Obviously the most important part of playing Minecraft.
Um, not that. Yes, I have a herd of every colour of sheep in Minecraft and a chest full of stash. Shut up.
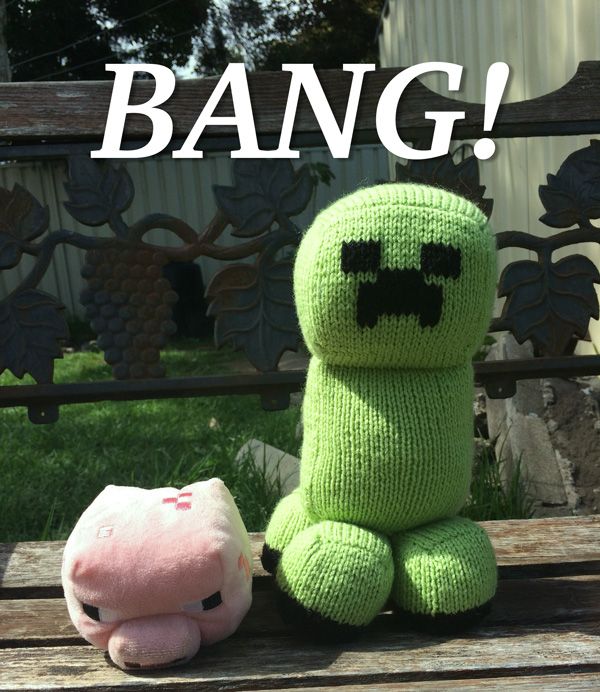
Speaking of Minecraft ~cough~ I knit a Creeper for my son Charlie.
Hand knit Minecraft creeper and his friend, Hopper the pig.
Now I want one. Except the damn things keep blowing up my house. Heaven forbid they should ever let the sheep out.
I used the creeper pattern from Angel’s Knitting Blog, sadly now defunct. I figured out how to do the face by looking at other people’s projects on Ravelry.
There are quite a few comments about the foot section of the pattern being incomprehensible but it’s actually a very clever way to eliminate a few of the seams that toys need to keep their shape. The trick is to not read the pattern first. Knit, trust that it will make sense when you get to that part and it does. Or at least it did for me and seemingly the other people that finished it 🙂
I’ve made many toys over the years and developed my own techniques for stuffing without lumps. I made this video about it a few years ago, in case anyone would like any tips.
Charlie and I also finished this monstrosity charming fellow made from an unfinished (unstarted?) and incomplete teddy bear I found at the op shop.
Meet Mr. Bread WoodenHead.
Mr Bread WoodenHead the bear
Charlie arranged all the pieces but the fabric was pretty tough to sew so I had the honour of stitching him together. Charlie finished him off by sticking on a range of sparkly plastic thingies for his face, ears and paws. Truly, um, unique. It’s staring at me right now from the seat next to me. I’m pretty sure it’s planning to eat my face.
O.O
My next project is already in the works, in fact I started it on the Tuesday before Christmas and have been stitching away on it every time the Xbox gets too hot in our Summer heat.
The Summer flu (well, technically Spring flu but close enough) is currently attempting to kick my voluminous butt, but it hasn’t stopped me almost preparing a Christmas present for my fellow retro style fans.
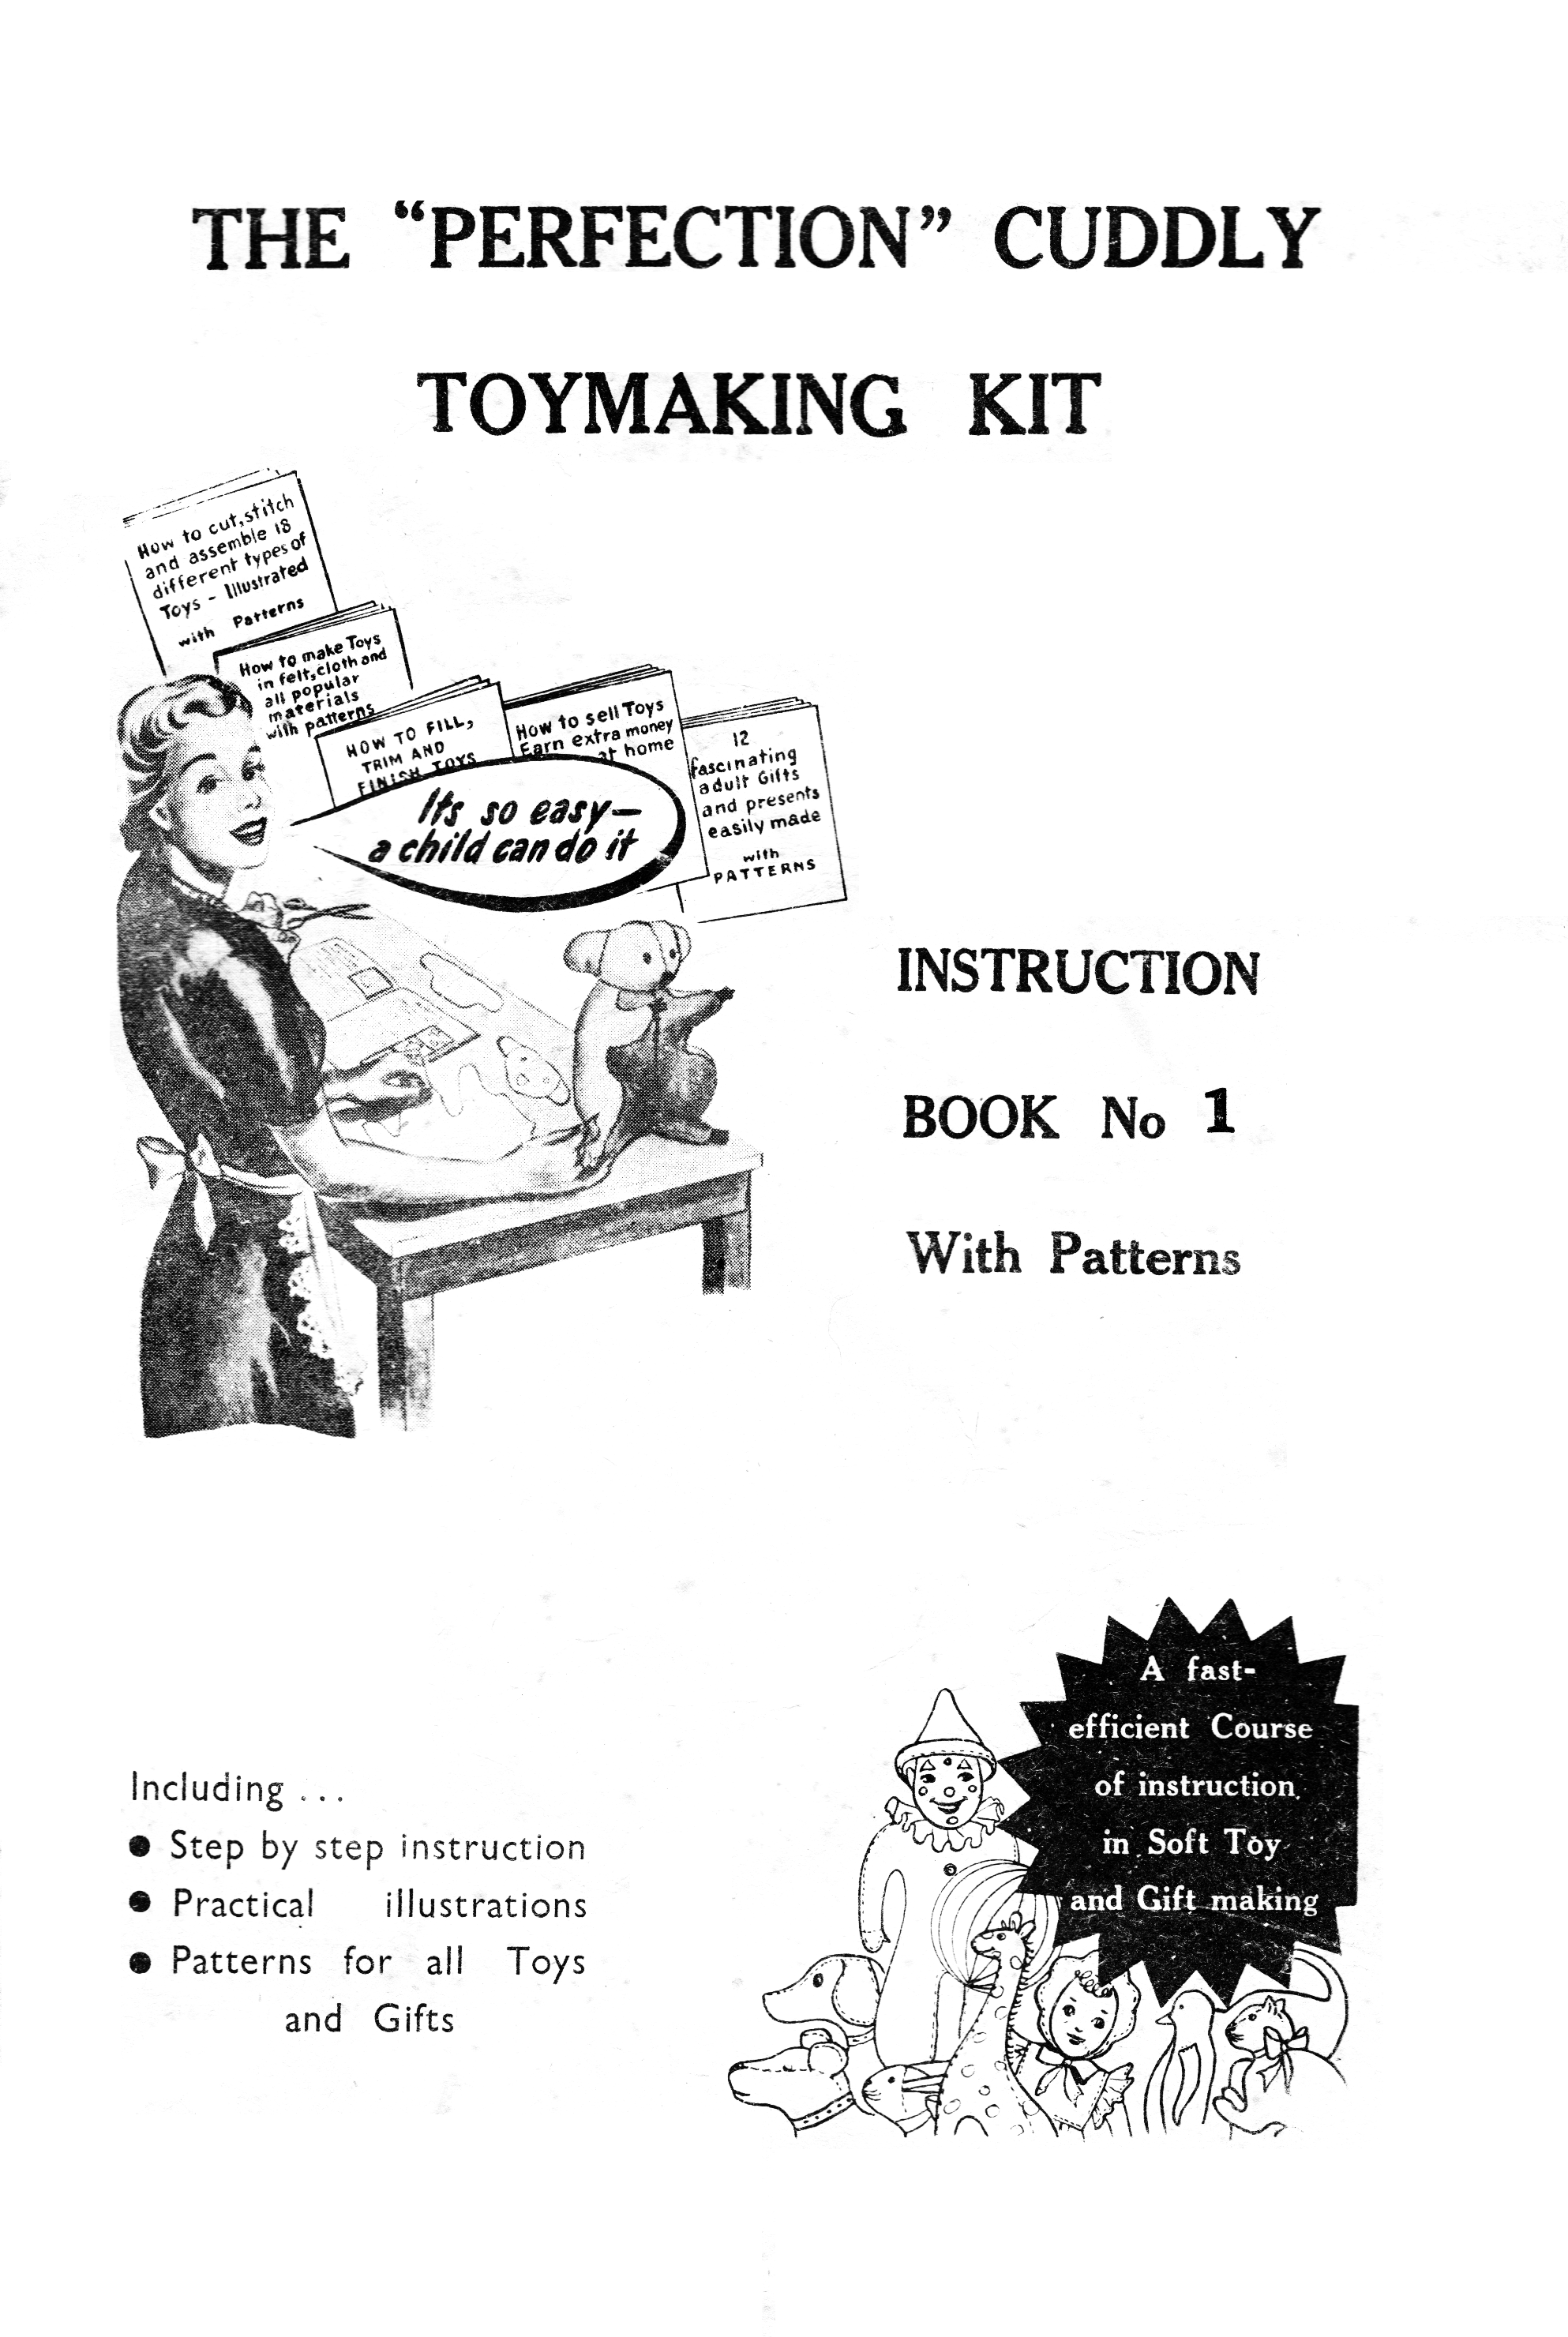
The Perfection Cuddly Toymaking Kit, Book No. 1
The Perfection Cuddly Toymaking Kit was published in Australia in the early 1950’s as a home education course for women wanting to earn pin money by making toys and gifts and selling them in bulk to local shops.
There are ten booklets in the kit, covering a large range of toys, novelties and bags. If you love retro style toys then you’ll love making the toys straight from the full size patterns, or you can make changes and use them to design updated versions with a more modern look. With all sorts of toys from little felt rabbits to fur fabric penguins, leatherette (or felt) sausage dogs and the obligatory Scotty, to (my favourite) felt flowers and a great knitting/overnight bag to sew, I think you’ll have many of your Christmas presents covered!
Now I just have to stop coughing long enough and I’ll be uploading one booklet per day for ten days. Watch this space for booklet number 1 very soon!
I love knitting for babies and one of my favourite things about it is the huge range of cute, and sometimes bizarre, novelty buttons that you can find to sew on them.
As a mother, however, the one thing I hate most about knitwear for babies is trying to do up the buttons on a cardigan wrapped around a 4 kilo mass of wriggling baby, especially when the buttons aren’t chosen to be functional.
If you’ve ever knit something for a baby and it has never been worn, it might not be because the parents are ungrateful un-knitworthy hand-made hating ingrates. They might be, but they might have just had a difficult time doing up the buttons. So from my years of experience doing up cardigans on wriggling babies, here is my guide to choosing buttons for baby garments.
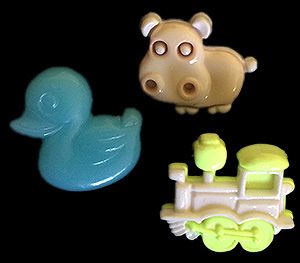
The irresistible but poky novelty button.
These are the type of buttons that have little poky bits sticking out everywhere but they’e cute so we must put them on all the things. Star shaped buttons are the WORST. Unfortunately they are also adorable.
These buttons should be used strictly as a decorative element, as trying to put them through a buttonhole that is in constant motion just causes yarn snags, sudden knitwear hatred and wild emotional swings (especially if the person trying to do them up is sleep deprived).
I am not a functional button!
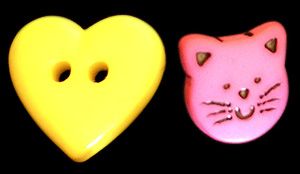
The irresistible but mostly round novelty button.
This type of button works well on knitwear most of the time. If it has any part that sticks out, like the cat’s ears, they are smooth and won’t snag.
The only time I would avoid using buttons of this type is if my yarn is particularly splitty as it still might snag, but who wants to knit with that kind of yarn anyway?
I am cute and functional! Most of the time.
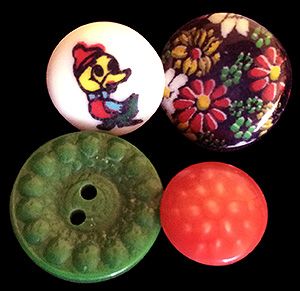
Round decorative buttons
These are my favourite type of buttons to put on baby wear. Printed with cute characters or flowers, special 3D look patterns or interesting moulded but completely smooth shapes. The buttons below are all vintage but you can still get printed buttons with classic children’s characters in most shops that sell buttons.
They’ll never snag the yarn, no matter what you’ve knit with, how wriggly the baby is or how tired the person trying to do them up.
Putting my buttons where my mouth is
Figuratively speaking.
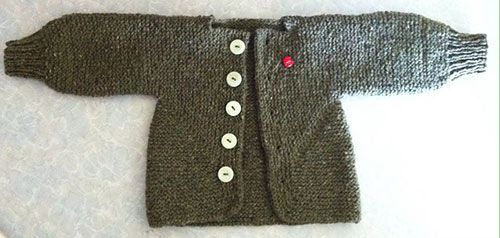
This is a baby surprise jacket that I knit for my nephew. I used vintage pale green buttons for fastening the front and a poky novelty ladybird button purely for decoration.
Two types of buttons used in the right spots.
I’d love to hear your thoughts on choosing buttons for baby and toddler knitwear so please feel free to leave a comment below!


 and
and