I don’t buy things at the op shops very often any more but I couldn’t resist these today.
I went out with Sortahubby to buy a light for making craft and music tutorial videos this morning, and on the way home we popped in an op shop to see if I could find some fabric to make a backdrop. We film on the dining room table which has a bookshelf behind it, so it has to be hidden when making videos 😛
We found all this:
5m of navy blue crepe, which should work well suspended from the ceiling in front of the bookcase, and “Old Bear Stories” video that we don’t have, and lots of everyday needlework notions. Needles (hand and machine), bodkins (which I desperately need after bending so many safety pins when inserting elastic), transfer pencil, laundry marker, bias binding (for singercraft guide edgings), self cover buttons, puffy angel wings, and flower stamens.
All these cost about $20 and I wish I had a bigger budget because I could have bought lots more needles, bindings and bits!
When I started writing this blog post nine days ago, I didn’t realise that I had so much to say about kanzashi. It’s taken me this long to gather all the information that I wanted to share and try out my kanzashi flower makers!
Kanzashi refers to the Japanese style of making fabric flowers. There are two styles of Kanzashi making, traditional and contemporary.
Traditional tsumami kanzashi are decorative hair ornaments, usually made with tiny squares of silk and a thick rice glue.
Large pieces of silk are hand dyed and starched, then cut into tiny squares, folded with tweezers and glued together to make decorative hair pieces. It’s quite amazing to watch experienced kanzashi makers at work, the speed and efficiency with which they work is dazzling.
There are artisans still making tsumami kanzashi in the traditional way but creating contemporary style pieces.
Kuniko Kanawa of Atelier Kanawa is one such artist. Make sure to check out her Youtube videos for inspiration. Especially interesting are her custom order records and a three part video in which she describes how traditional petals are made. Unfortunately the closeups won’t show you how they are made but the documentary I’ve included at the beginning of this post will show you much more clearly.
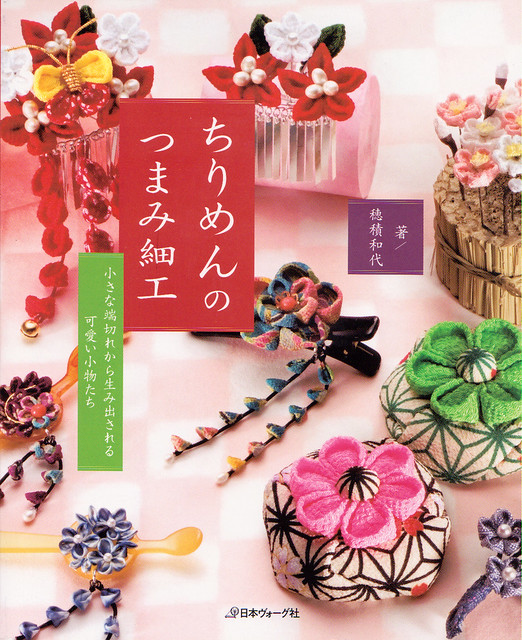
A few years ago I bought these two books on making Kanzashi in the traditional way. They’re in Japanese but the photographs are quite interesting and easy to follow.
isbn4-529-04258-8
isbn978-4-529-04041-9
The other style of kanzashi that are popular today are the sewn style.
In order to make the art form more accessible to today’s crafters, a technique using larger squares of silk or cotton has been developed. Whilst some people argue that this development detracts from the importance of traditional tsumami kanzashi, I disagree. I see it much as the way teneriffe lace developed into flower looming. A traditional, time consuming technique being developed for modern crafts people and materials.
I couldn’t say who pioneered this technique as it’s been passed around on the internet for at least ten years or so, with each crafter adding their own twists and additional techniques along the way.
Sewn kanzashi tend to be much simpler than most traditional pieces, however a larger number of folds have been developed. Whilst there are only two folds used in traditional kanzashi, I have found at least five styles of petal making in sewn kanzashi.
These videos show how to make four different styles of petals without the Clover tool.
At the time of writing this article, there are six different Clover kanzashi flower makers. They make three different styles of petals in two sizes.
I have never made kanzashi by hand before so I can’t compare these with making them without a flower maker, however using these has inspired me to try all of the tutorials I have shown you above and I’ll be purchasing the Kanzashi in Bloom book as soon as I can.
I used medium weight cotton to make my flowers. I didn’t starch them because most of the fabrics were already quite crisp.
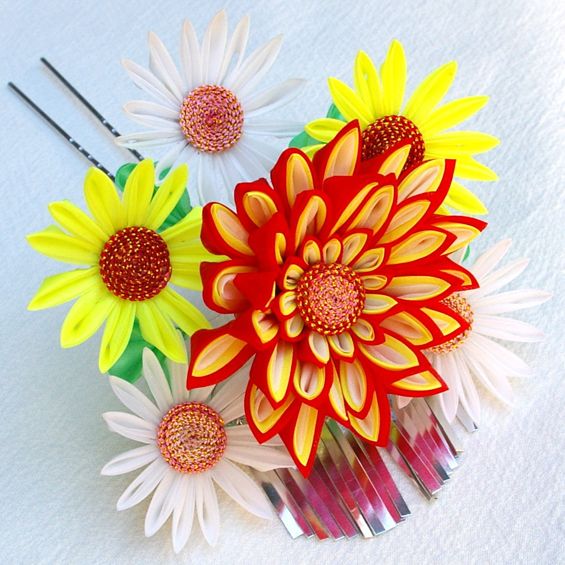
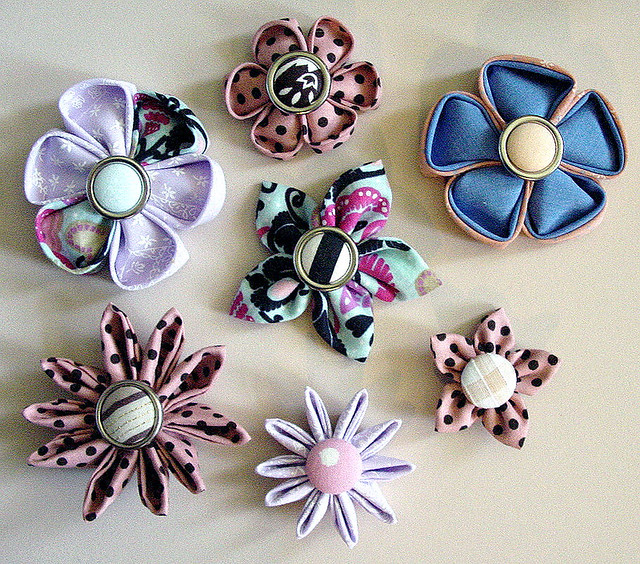
Here are the very first flowers that I made.
I used self cover buttons to make the centres, and sewed them in. Self cover buttons are about to become another obsession of mine but I’ll tell you more about that later 😉
I found the kanzashi flower makers very easy to understand and use. The whole process was quite enjoyable. The bonuses of using the flower makers were twofold. I didn’t have to measure and cut the fabric beforehand, which can be quite difficult when you have a two year old son running around! It also made it easy to use any odd shaped scraps of fabric I had lying around.
The other benefit is that you don’t have to make any folds, other than to fold your fabric scrap in half to begin with. If you have trouble with fine motor skills, or are just plain clumsy, you can still use these flower makers to make many petals that are exactly the same.
The two benefits are balanced out with two caveats though. If you use only these tools you are limited to making only two sizes of petals. You can still make quite dramatic flowers with many layers, but I feel the limit of only using two sizes of petals could become a problem for anyone wanting to make advanced designs. Clover are very interested in feedback from the people that use their tools though, so if enough people mentioned that they would like different sized flower makers, they may produce with them in the future. I recently asked them if they would consider making a square quick yo-yo maker, and after I pointed out to them how popular flower looms had become, they started selling their hana-ami loom again (I wonder how many other people begged them to re-release them as well!) 🙂
The other problem, which may not end up being a problem at all, is the thin piece of plastic that holds the two halves of the template together. It seems quite strong but I would be concerned about how long it will last. Since I did really enjoy using them, I might have an update on that for you in the future.
My flowers are very simple, using just one template each. For the round petal flower on the top right, I folded two pieces of fabric and placed them on top of each other before closing the flower maker to create petals with contrast coloured centres. You can also make rings with different numbers of petals and stack them up, use four to make a butterfly, two for a heart or bow and so forth.
You can also combine the different templates to make more styles of flowers.
Here’s a Japanese video that shows how to use them
The other large purchase that I made with the money from selling my knitting machine is a Strauch jumbo ball winder.
I had been really frustrated with my tiny 50gm ball winder ever since I started spinning on a Majacraft Suzie Pro. Even the regular bobbins can hold up to 200gms of fingering weight singles and since I bought a plying flyer and jumbo bobbins I’ve been forced to knit from enormous 400gm hand-wound balls of yarn. My hands would become very sore while winding them and then they’d roll around the floor the whole time I was knitting and get chased by the cat.
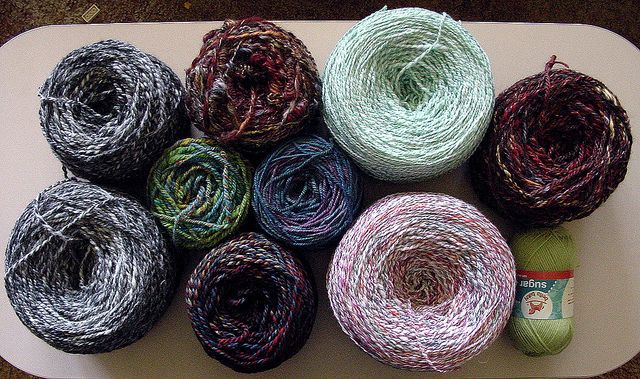
These are the jumbo centre pull balls that I wound on it yesterday. Even the smallest ones don’t fit on a regular ball winder. The little commercial ball of wool on the right is a 50gm ball, which is the most that will fit on a normal size one.
The two largest ones are over 400 grams :). I have a lot more to wind yet!
I did have a few questions after I bought the winder and both Mandie and Otto were very helpful and quick to reply.
Otto Strauch also made this video to show how to use it to wind slippery yarns.
Tomorrow I’ll tell you about my new kanzashi templates from Clover that my Sortahubby gave me for my birthday. Hopefully I’ll be able to play with them tonight and give you a full review.
When I turned 33 (8 years ago, cough), I decided that everything I own that wasn’t being used or enjoyed should go and find itself a purpose in someone else’s life. And what a great idea that has turned out to be!
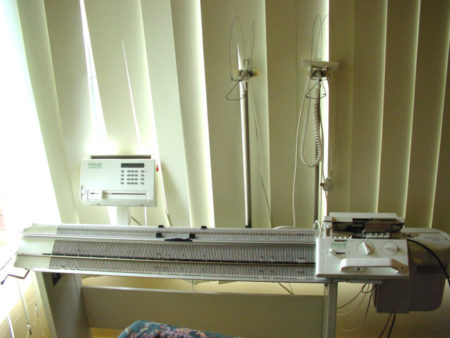
Last year I started making decisions about the “big stuff”. The things that cost me a lot of money or a lot of time to procure. The biggest of these things was my enormous computerised knitting machine.
I had originally bartered $1,800 worth of website work for this machine and a lot of extras but despite my love for it and the things I made on it, I just did not have the room to use it any more. So I took a deep breath and sold it on Ebay for $1,500.
And I bought things with the money. $900 was on things I planned and the rest went on our new “surprise” mortgage on what we lovingly refer to as our little crap shack. Our last home purchase was for walls and most of a roof so a crap shack is a step up. But I digress.
I bought stuff. Cool stuff. Informational stuff. Some of it is even “learn things you never thought you’d get to” stuff.
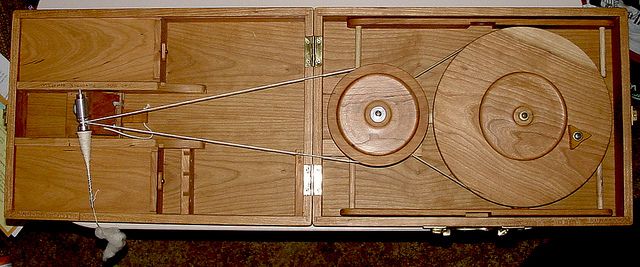
My biggest purchase was a Journey attache case charkha made by Jonathan Bosworth. Most people call them Bosworth charkhas because without Jonathan they just wouldn’t be the same. Here are some pictures of my new love 🙂
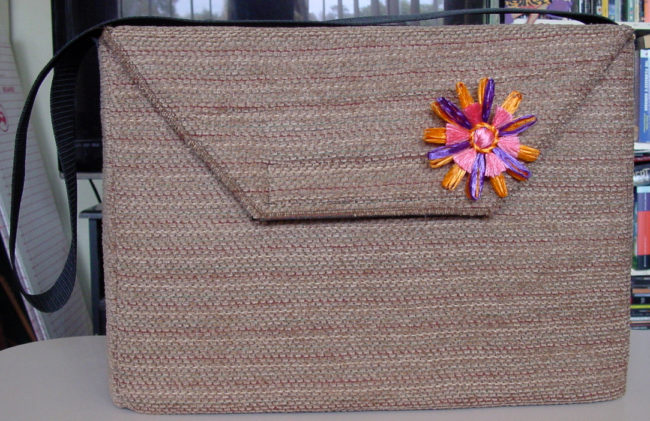
In the bag.
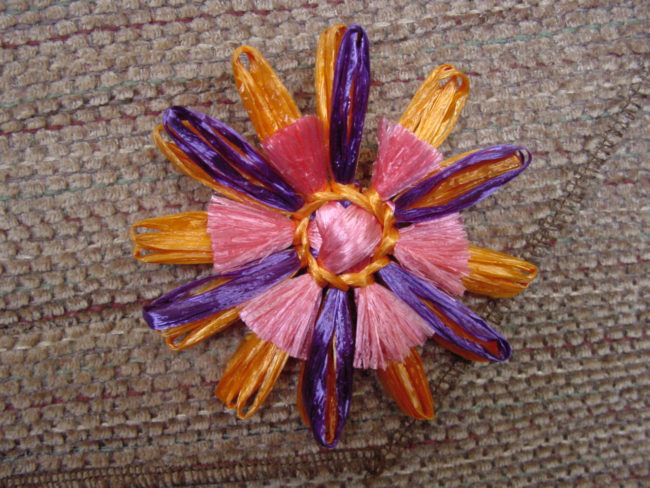
The bags on the website are all made of patterned fabrics so I asked if they had any plain ones that weren’t listed. They had just one left and it was exactly the colour I was after. Of course I wanted a plain bag so I could decorate it with a loomed flower brooch.
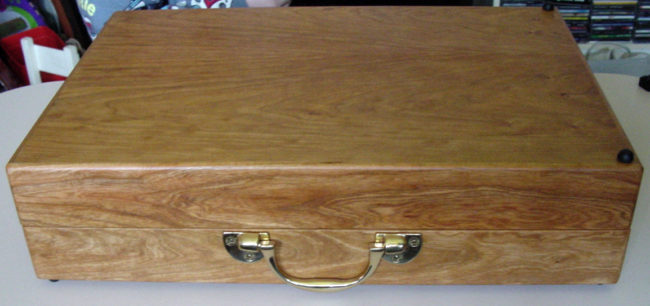
Closed they look like a beautiful wooden attache case. Kind of obvious considering the name, ahem.
ToddlerGuy went down for a nap very easily today so I thought I’d have another go at learning to spin on it. I got it! I spun actual real cotton yarn! I have wanted to learn to spin cotton for about ten years and now I can. Not well, but it didn’t fall apart. Much 🙂
Bosworth attache case charkha
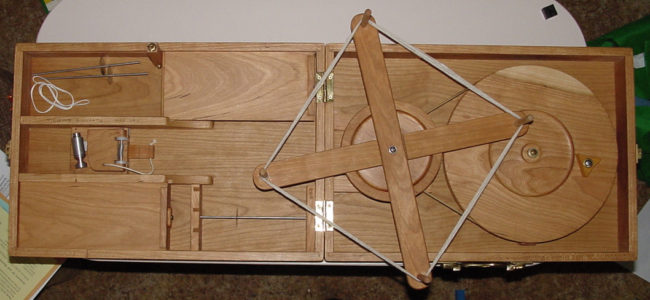
My very first little skein of cotton on the built-in skein winder. When I bought my charkha I also bought the “Spinning Cotton on the Charkha” DVD by Eileen Hallman. I found Eileen’s instruction very easy to follow and the proof that she teaches well is sitting in front of me in a little skein 🙂
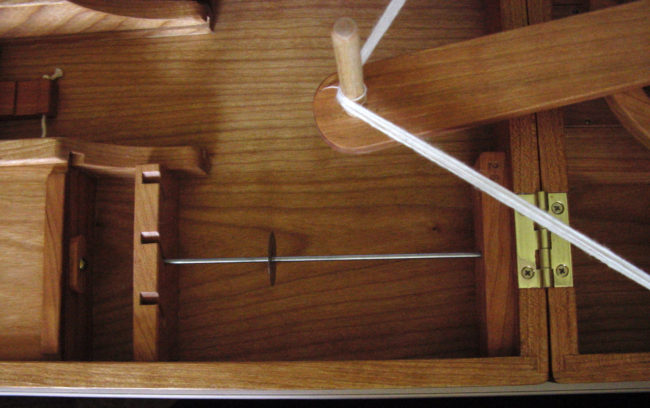
This picture shows the lazy kate. The two boxes on the left are for holding the spindles. The top one also has a fixed arm inside for when you’re using the skein winder so the yarn goes from the spindle on the lazy kate, up around the hook on the arm in the top box, then to the skein winder. The skein winder also measures your yarn as one turn equals a yard.
Not only is the workmanship really high quality, there are many small features that go into making these charkhas really lovely to use. When you’re not using the skein winder you can spin on the charkha while the arms of the skein winder are stored in the box so you don’t have to find somewhere to put them. The bearings are sealed and don’t need oiling. The skein winder can also be assembled without unscrewing anything. I also can’t say enough good things about the Bosworths as people. They’re lovely to deal with, very helpful -with overseas purchases and special requests, and kept us up to date every step along the way while those of us who had placed orders waited for our wheels to be made.
I don’t have enough skill using the wheel to make it worth videoing me using it, but I found this video on youtube. This spinner is using a Bosworth book charkha, which is the smaller version of mine.
And I have to show you this video too. This lady isn’t using a Bosworth charkha but check out the smile at 46 seconds. That’s how it feels when you figure out that you really can spin your own cotton after wanting to for so long 🙂