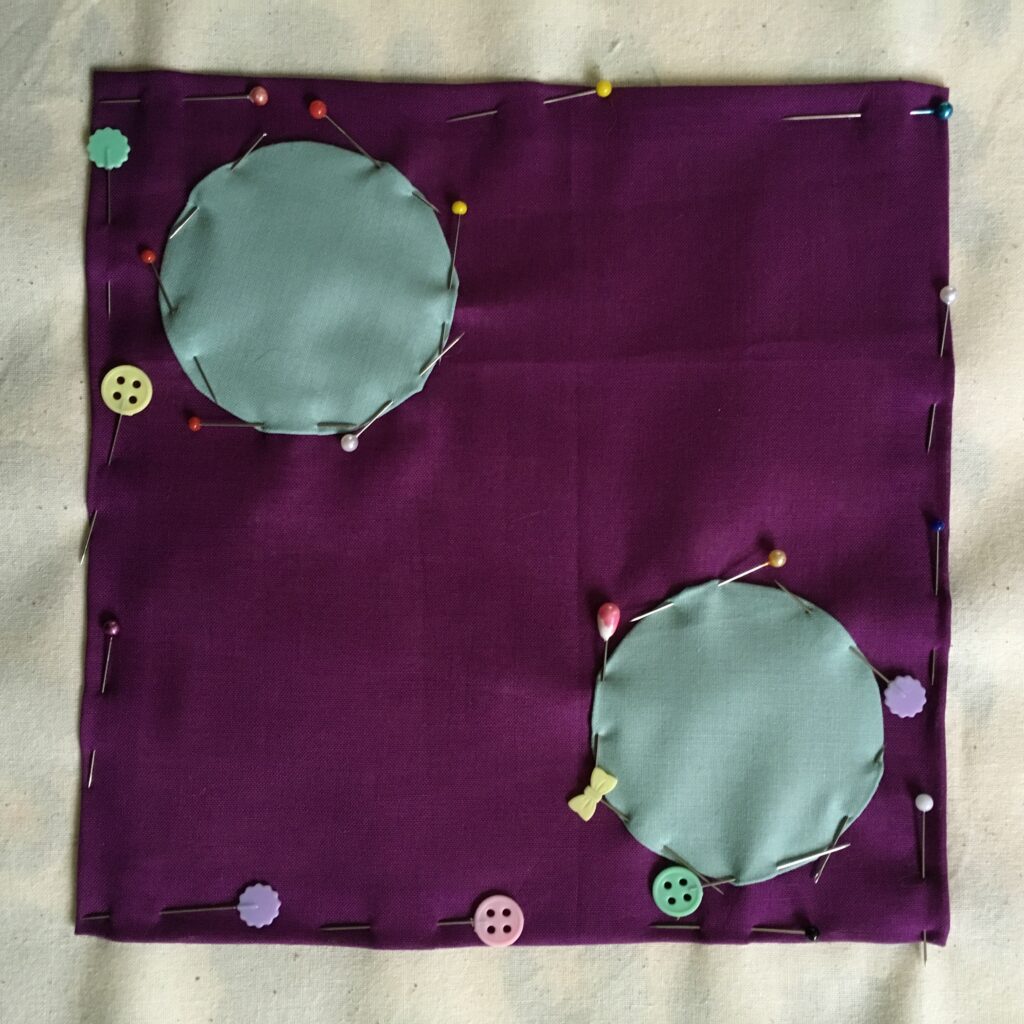
In my last post I mentioned I would be using a painted background in my crossed buttonhole sampler but thanks to a trip to the op shop, I changed my mind.
I try to learn something new in all of my samplers. Sometimes I’m learning a new stitch or a design technique. This time I decided I had painted enough backgrounds already, so why not learn to appliqué circles?
A bit of googling later I found this video by Sarah Fielke.
It works! It’s lucky that I keep a flat cereal box in the stash at all times for emergencies like this! And I now have some circular templates I can reuse.
I can definitely see a lot more appliquéd circles in my future!
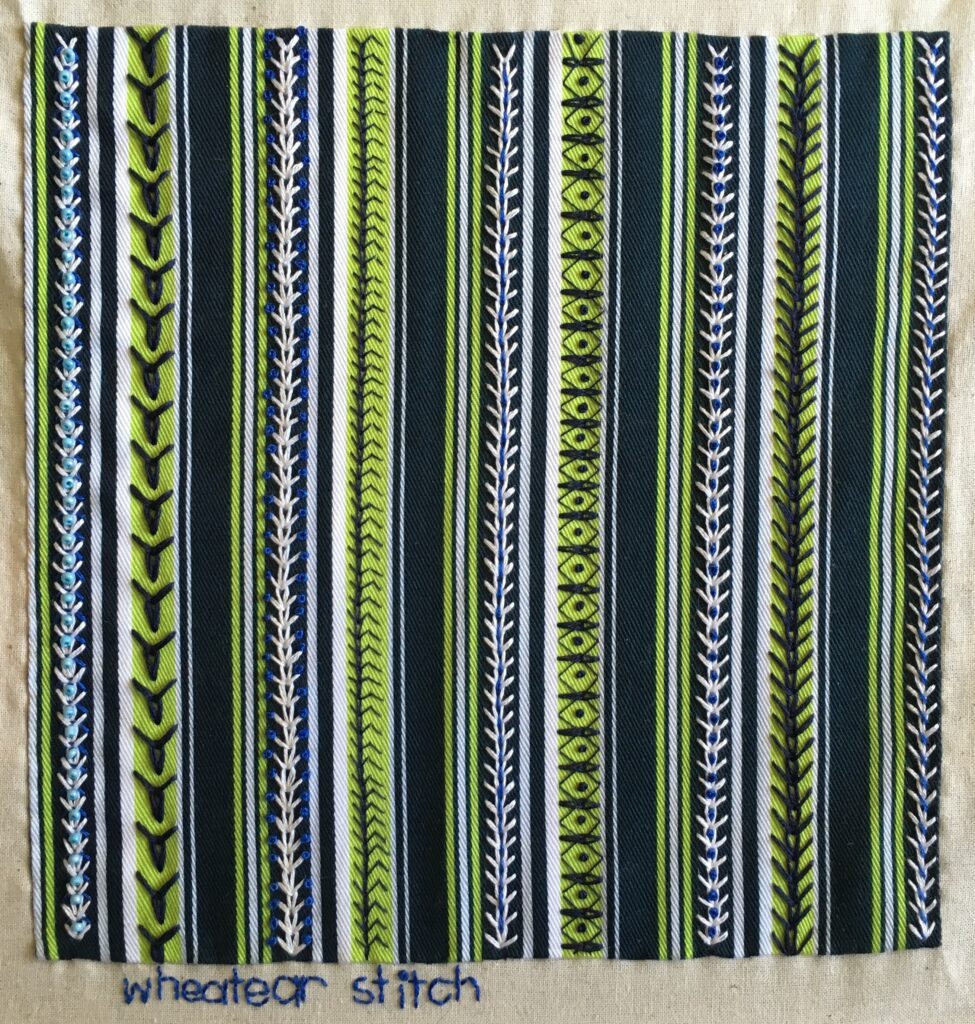
For my wheatear stitch sampler I wanted to work on striped fabric again.
I’ve been reading a lot about embroidery design lately and wanted to have another go at working on striped fabric after my very first TAST sampler didn’t really go the way I wanted. I really like the stitching but I didn’t know how to make the most of the stripes. (I’ll do some book reviews soon, there are some amazing books out there on designing embroideries).
I also wanted to minimise the types and colours of thread I used. I ended up using 1 -6 strands of cotton floss, in three different colours. Navy blue, medium blue and white.
I’m a week behind so the next sampler I’m up to is crossed buttonhole. I think I might paint some calico with a couple of circles and just play with this one.
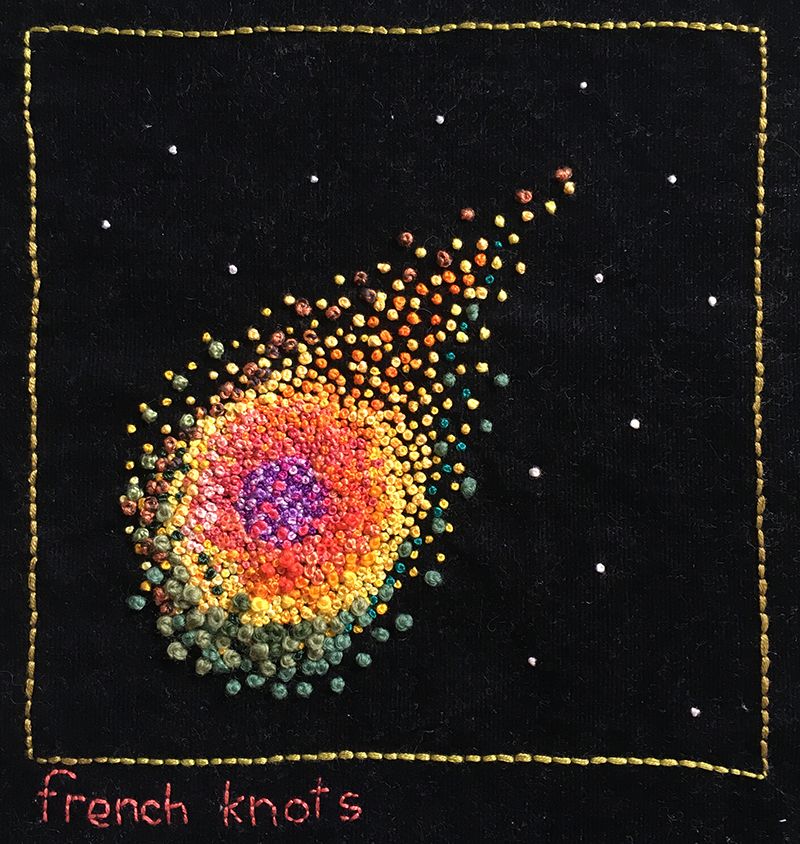
Who knew, when I started my embroidered French knot sampler for week 15 of the Take a Stitch Tuesday challenge, that it would result in a fiery meteor of thread oddments hurtling towards Earth?
I certainly didn’t.
I had intended for this week’s sampler to be a negative space cookie cutter image in the centre, surrounded by French knots but it didn’t turn out that way. I ran out of time to mark my fabric on a day when I knew I’d be in a waiting room for at least three hours so I just grabbed everything and headed out the door.
I then began stitching what I thought was going to be a target shape of my basic sampler colours (purple, yellow, orange, green and brown) but when I checked my bag of oddments, most of the interesting greens were rather thick and they made the circle look like it was gathering mass from somewhere, or breaking up through the atmosphere. And so it evolved into a meteor. My love of dodgy science fiction movies may have been a slight influence there.
My background fabric this week was cut from a remnant of black featherwale corduroy. No matter what I tried, I just couldn’t remove the fine white fibres that were stuck on it so now they’re space dust.
🙂
My threads include everything from 3 to 8 strands of embroidery floss, rayon, tapestry wool, Appleton wool, size 5, 8 and 10 perle cotton gobelin wool and whatever else was in the scrap bag.
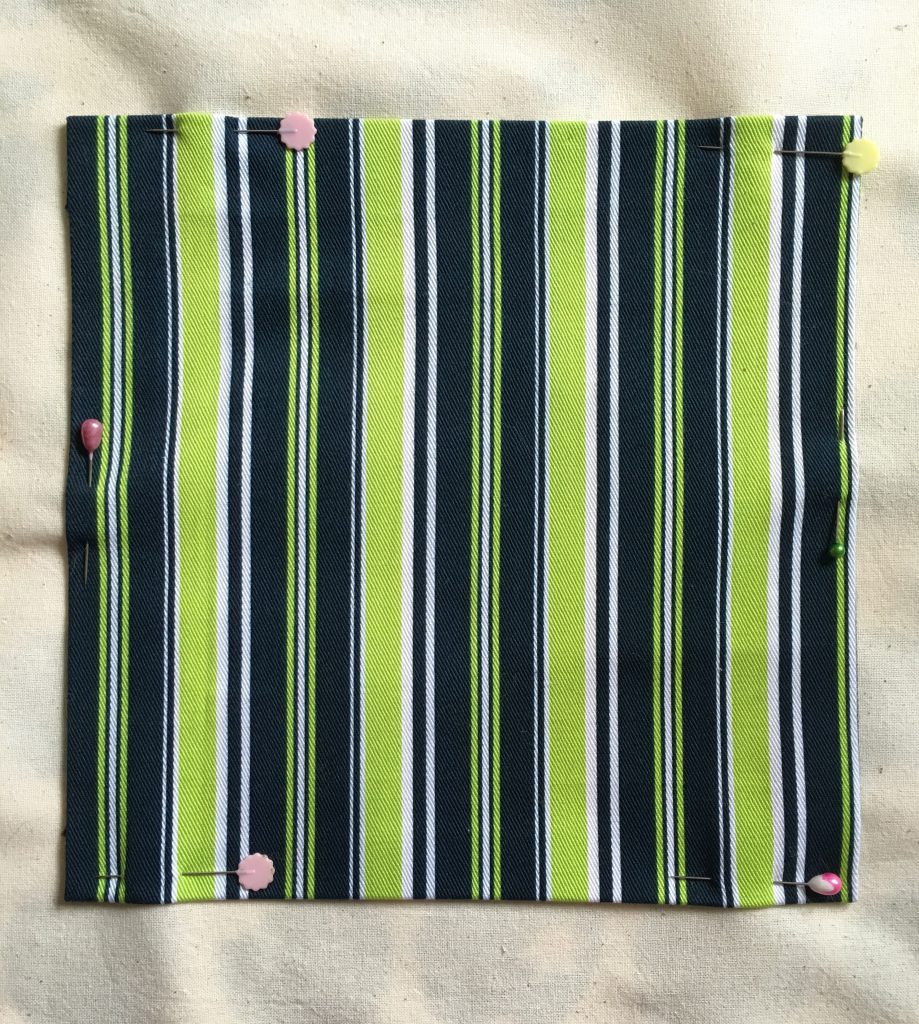
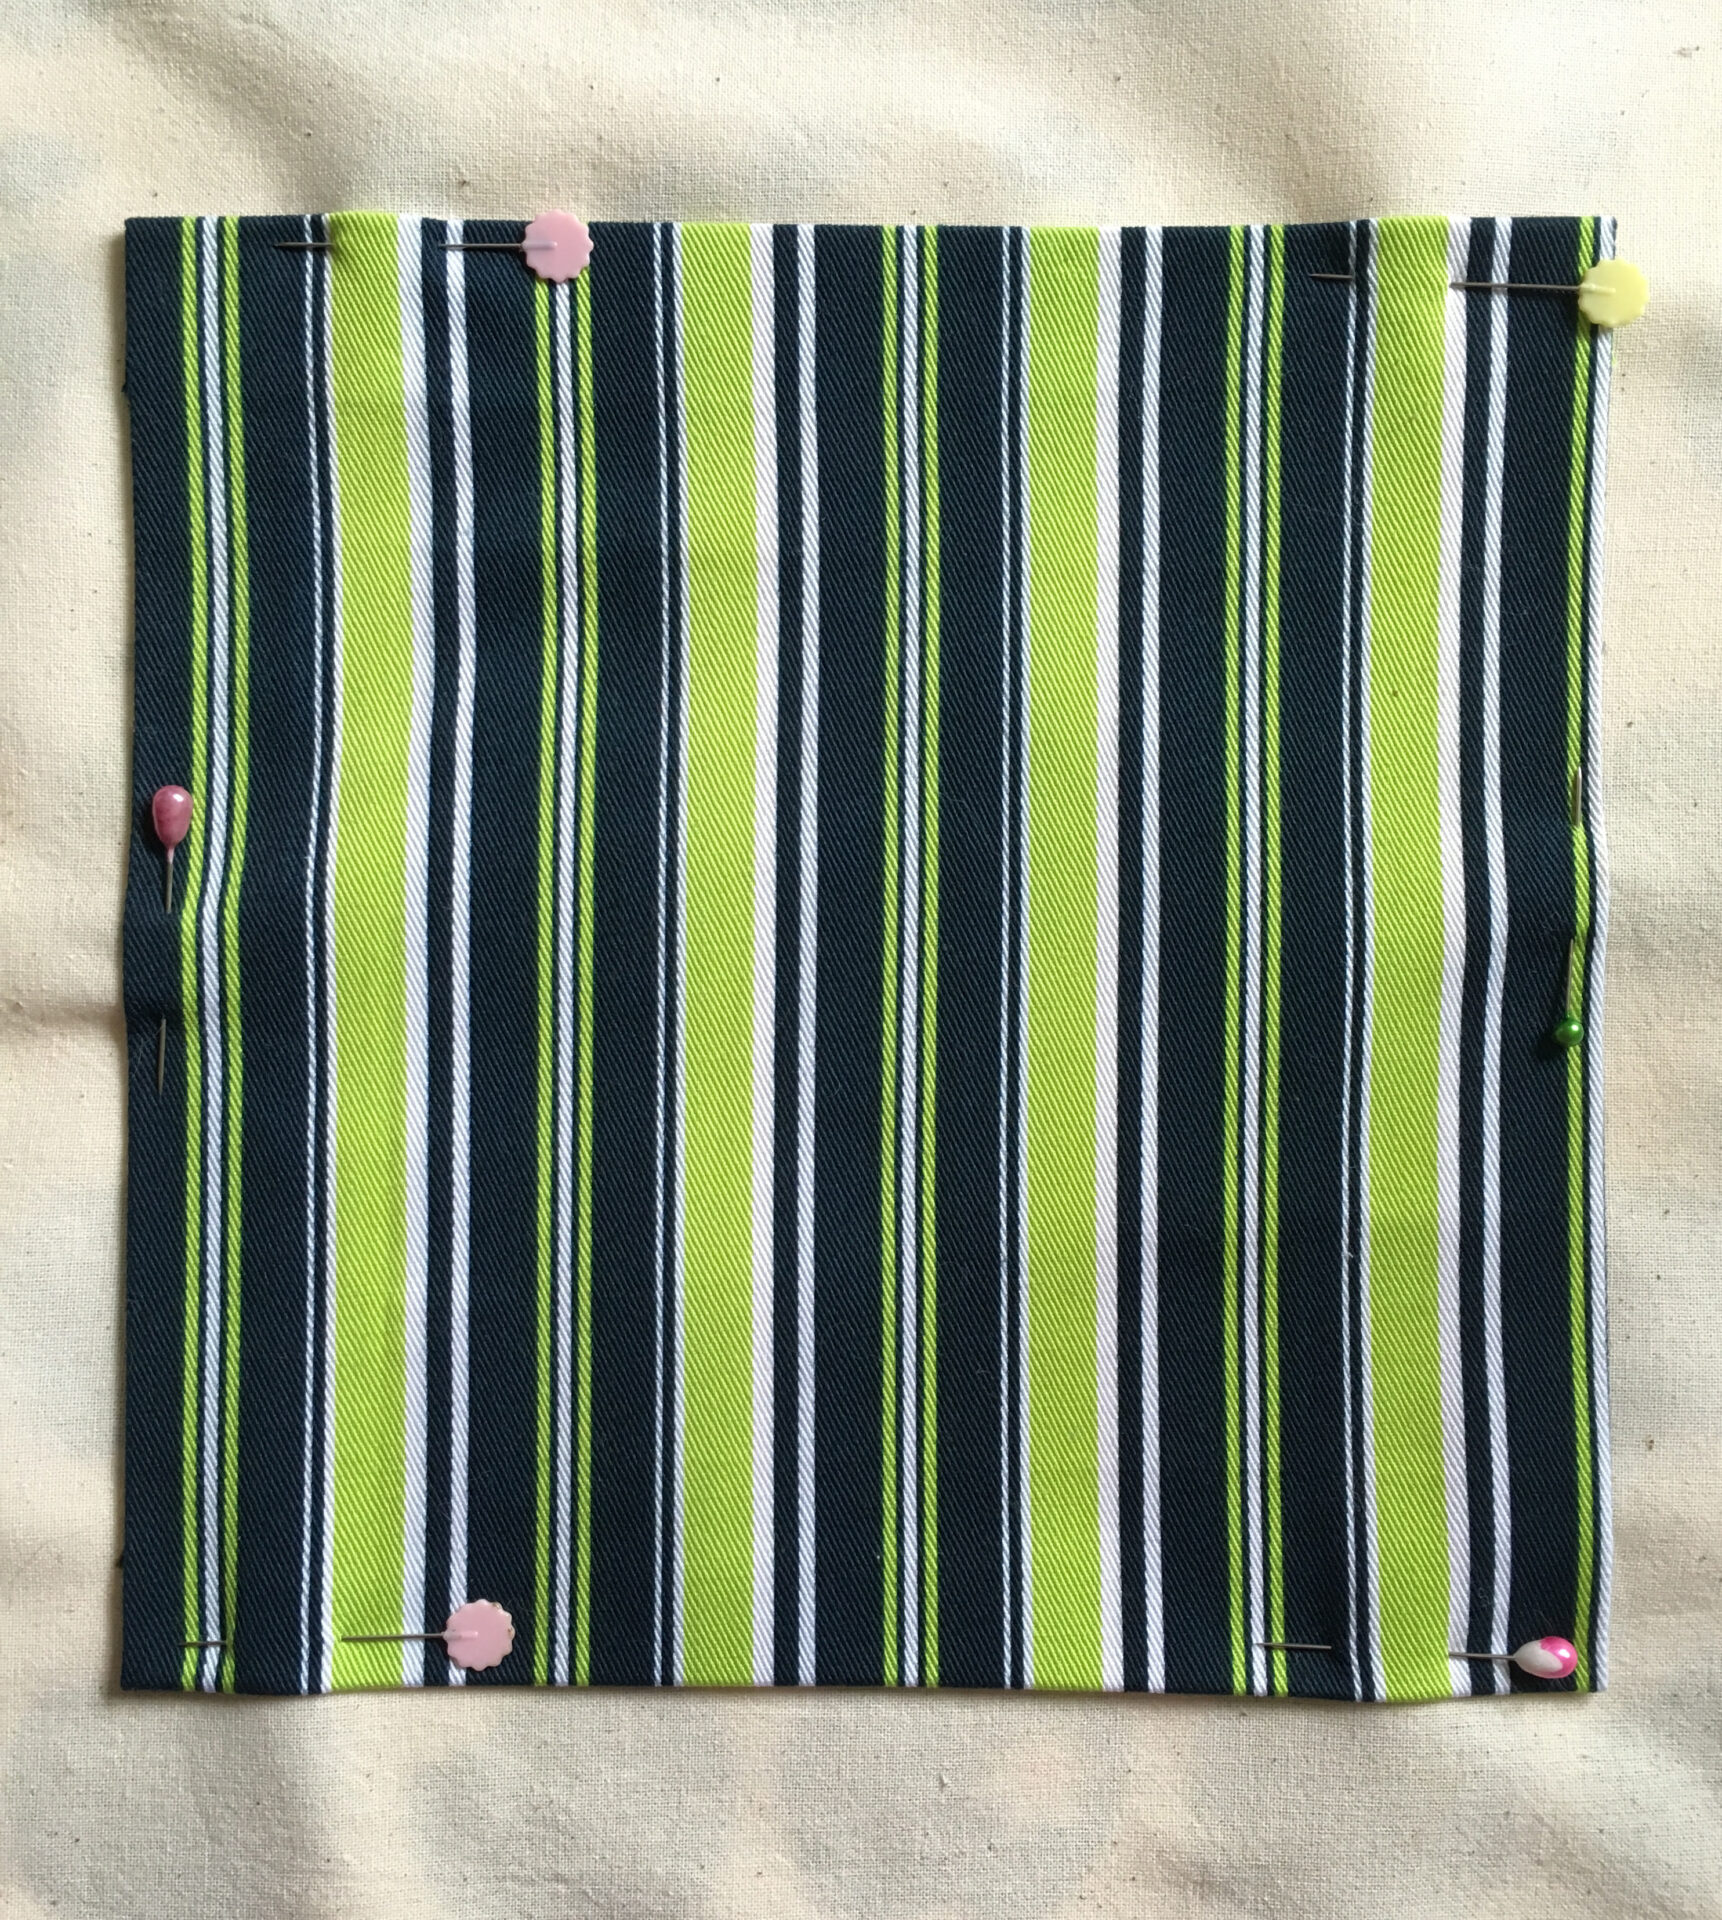
I’m all ready to start stitching week 16’s wheatear sampler on another op shopped remnant, this time it’s twill cotton stripes in white, navy blue and a disturbingly intense lime green. I plan on sticking to just two threads, one navy blue and the other white but to be honest, anything could happen once I start stitching.
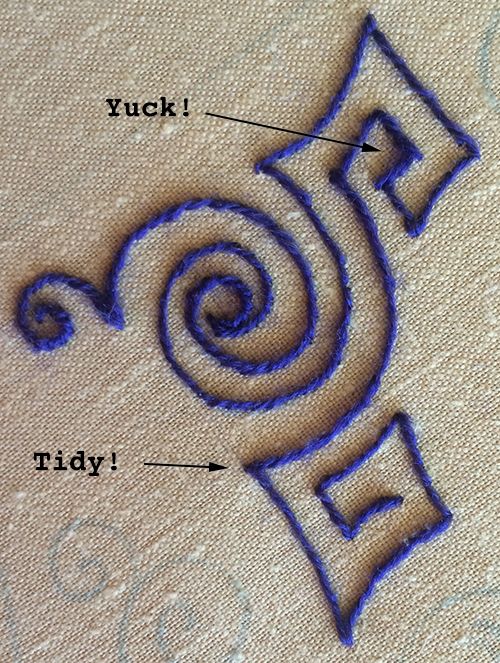
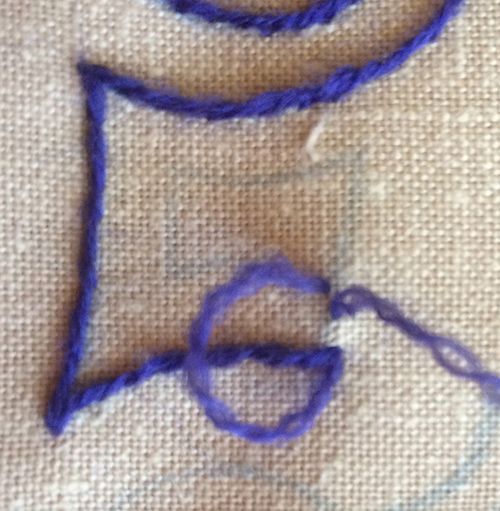
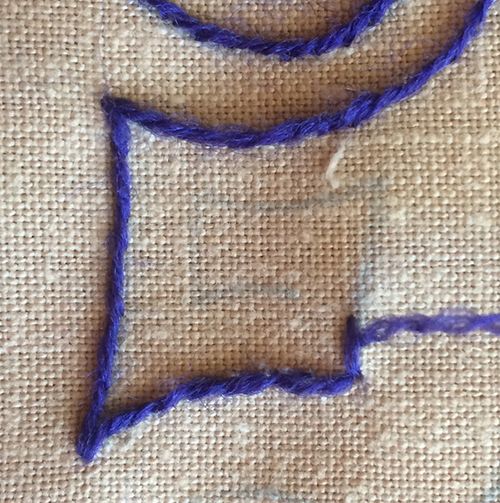
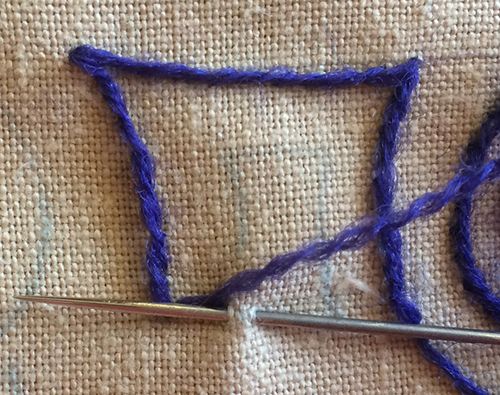
For my stem stitch sampler this week I wanted to achieve something very simple, to work neatly. Specifically to learn to work tight curves and to document the way I turn sharp corners because I can never remember how I did it last time.
(Click the photo for a larger view).
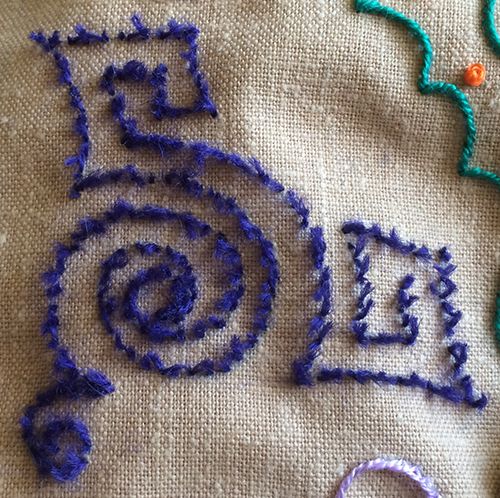
I used some of my antique embroidery transfers (I trace them with an iron on pencil) because the butterflies are really great practice for both, with their spiky edges and big curvy wings. (You can download the butterflies and the curlicue on the left from the 20’s for free). The top butterfly is worked in mercerised cotton sizes 8 and 10. The bottom large and small butterflies are worked in 3 threads of stranded embroidery cotton. The tiny bug has perle cotton for the body, vintage rayon for the wings and size 30 Japanese sewing silk for the antennae. The spirals are worked in different thicknesses of perle cotton and differing numbers of strands of stranded embroidery cotton.
I read somewhere (sorry, I’ve forgotten where), that the way to work stem stitch around tight corners is to use very small stitches so you don’t get a spiky edge. That worked beautifully. At times, I put my needle under just one or two threads for each stitch, especially on the arch shapes on the butterfly wings.
I couldn’t find any information on turning sharp corners and it took a bit of work to remember how I usually do it.
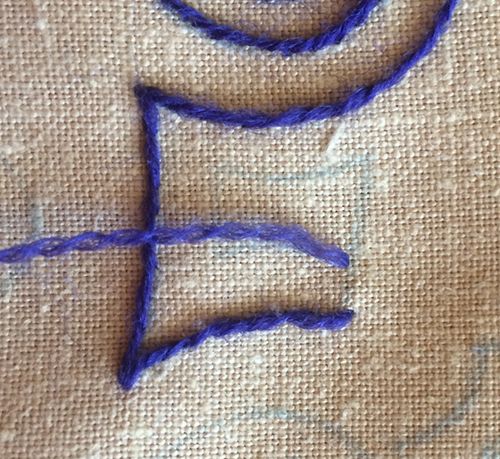
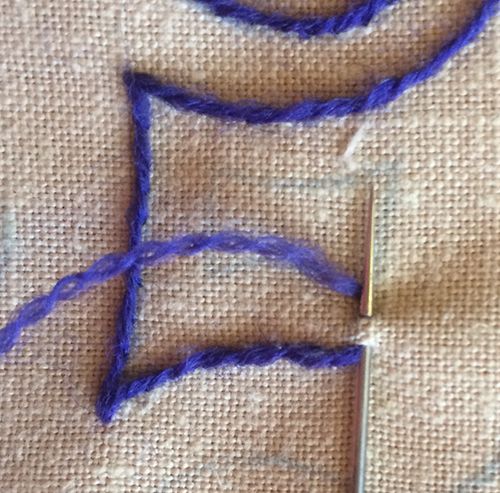
Here is my technique in pictures.
Now turn and continue in stem stitch as usual.
As I finished off I realised the weave of my fabric was far too tight for working with Appleton wool and it was getting badly shredded so I pulled it all out and reworked it in cotton 🙂
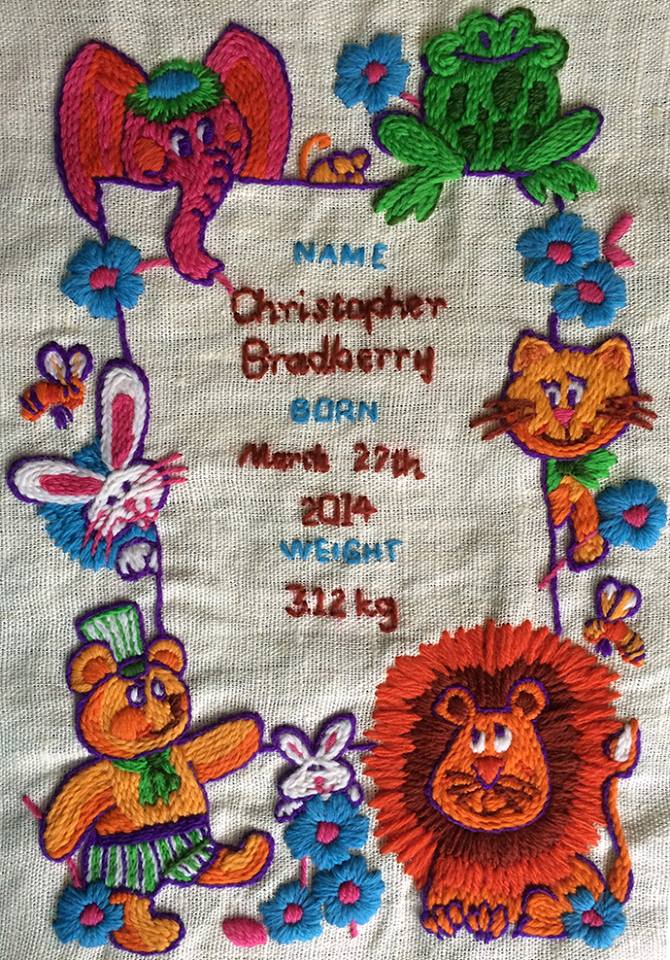
Here’s a birth sampler I made earlier in the year for my nephew. Most of the filling and outlines are stem stitch, worked in full or half thicknesses of Semco Gobelin wool, which is about the same thickness as dk weight knitting yarn. I really love how the characters worked in the thick yarn seem to sit on top of the fabric.
Now I had better get going on my French knot sampler. I’ve done about 1/3 so far!
I used many thread oddments from my “leftover bits” collection and everything from Japanese silk sewing thread to worsted weight tapestry wool. I’m still fighting the temptation to add woven picots to everything 🙂
I prefer technique books to project books and the thing that makes this book stand out from many these days is that each project introduces an idea or way of working that can be expanded on and used with other projects.
Here are a couple of my favourites.
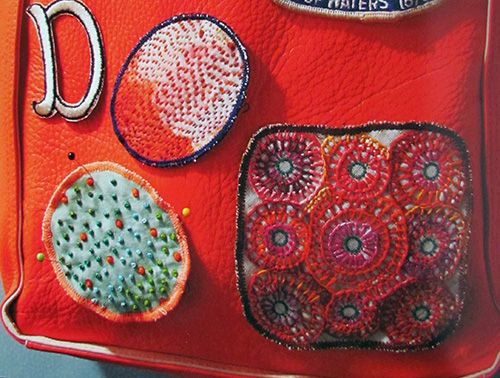
Stitch badges. I’ve already made one. The Japanese book mentioned in that post inspired the use of the flower motif while this book inspired the hand embroidered edge