Menu Close

Category: Embroidery

Embroidered Samplers on Found Embroidery

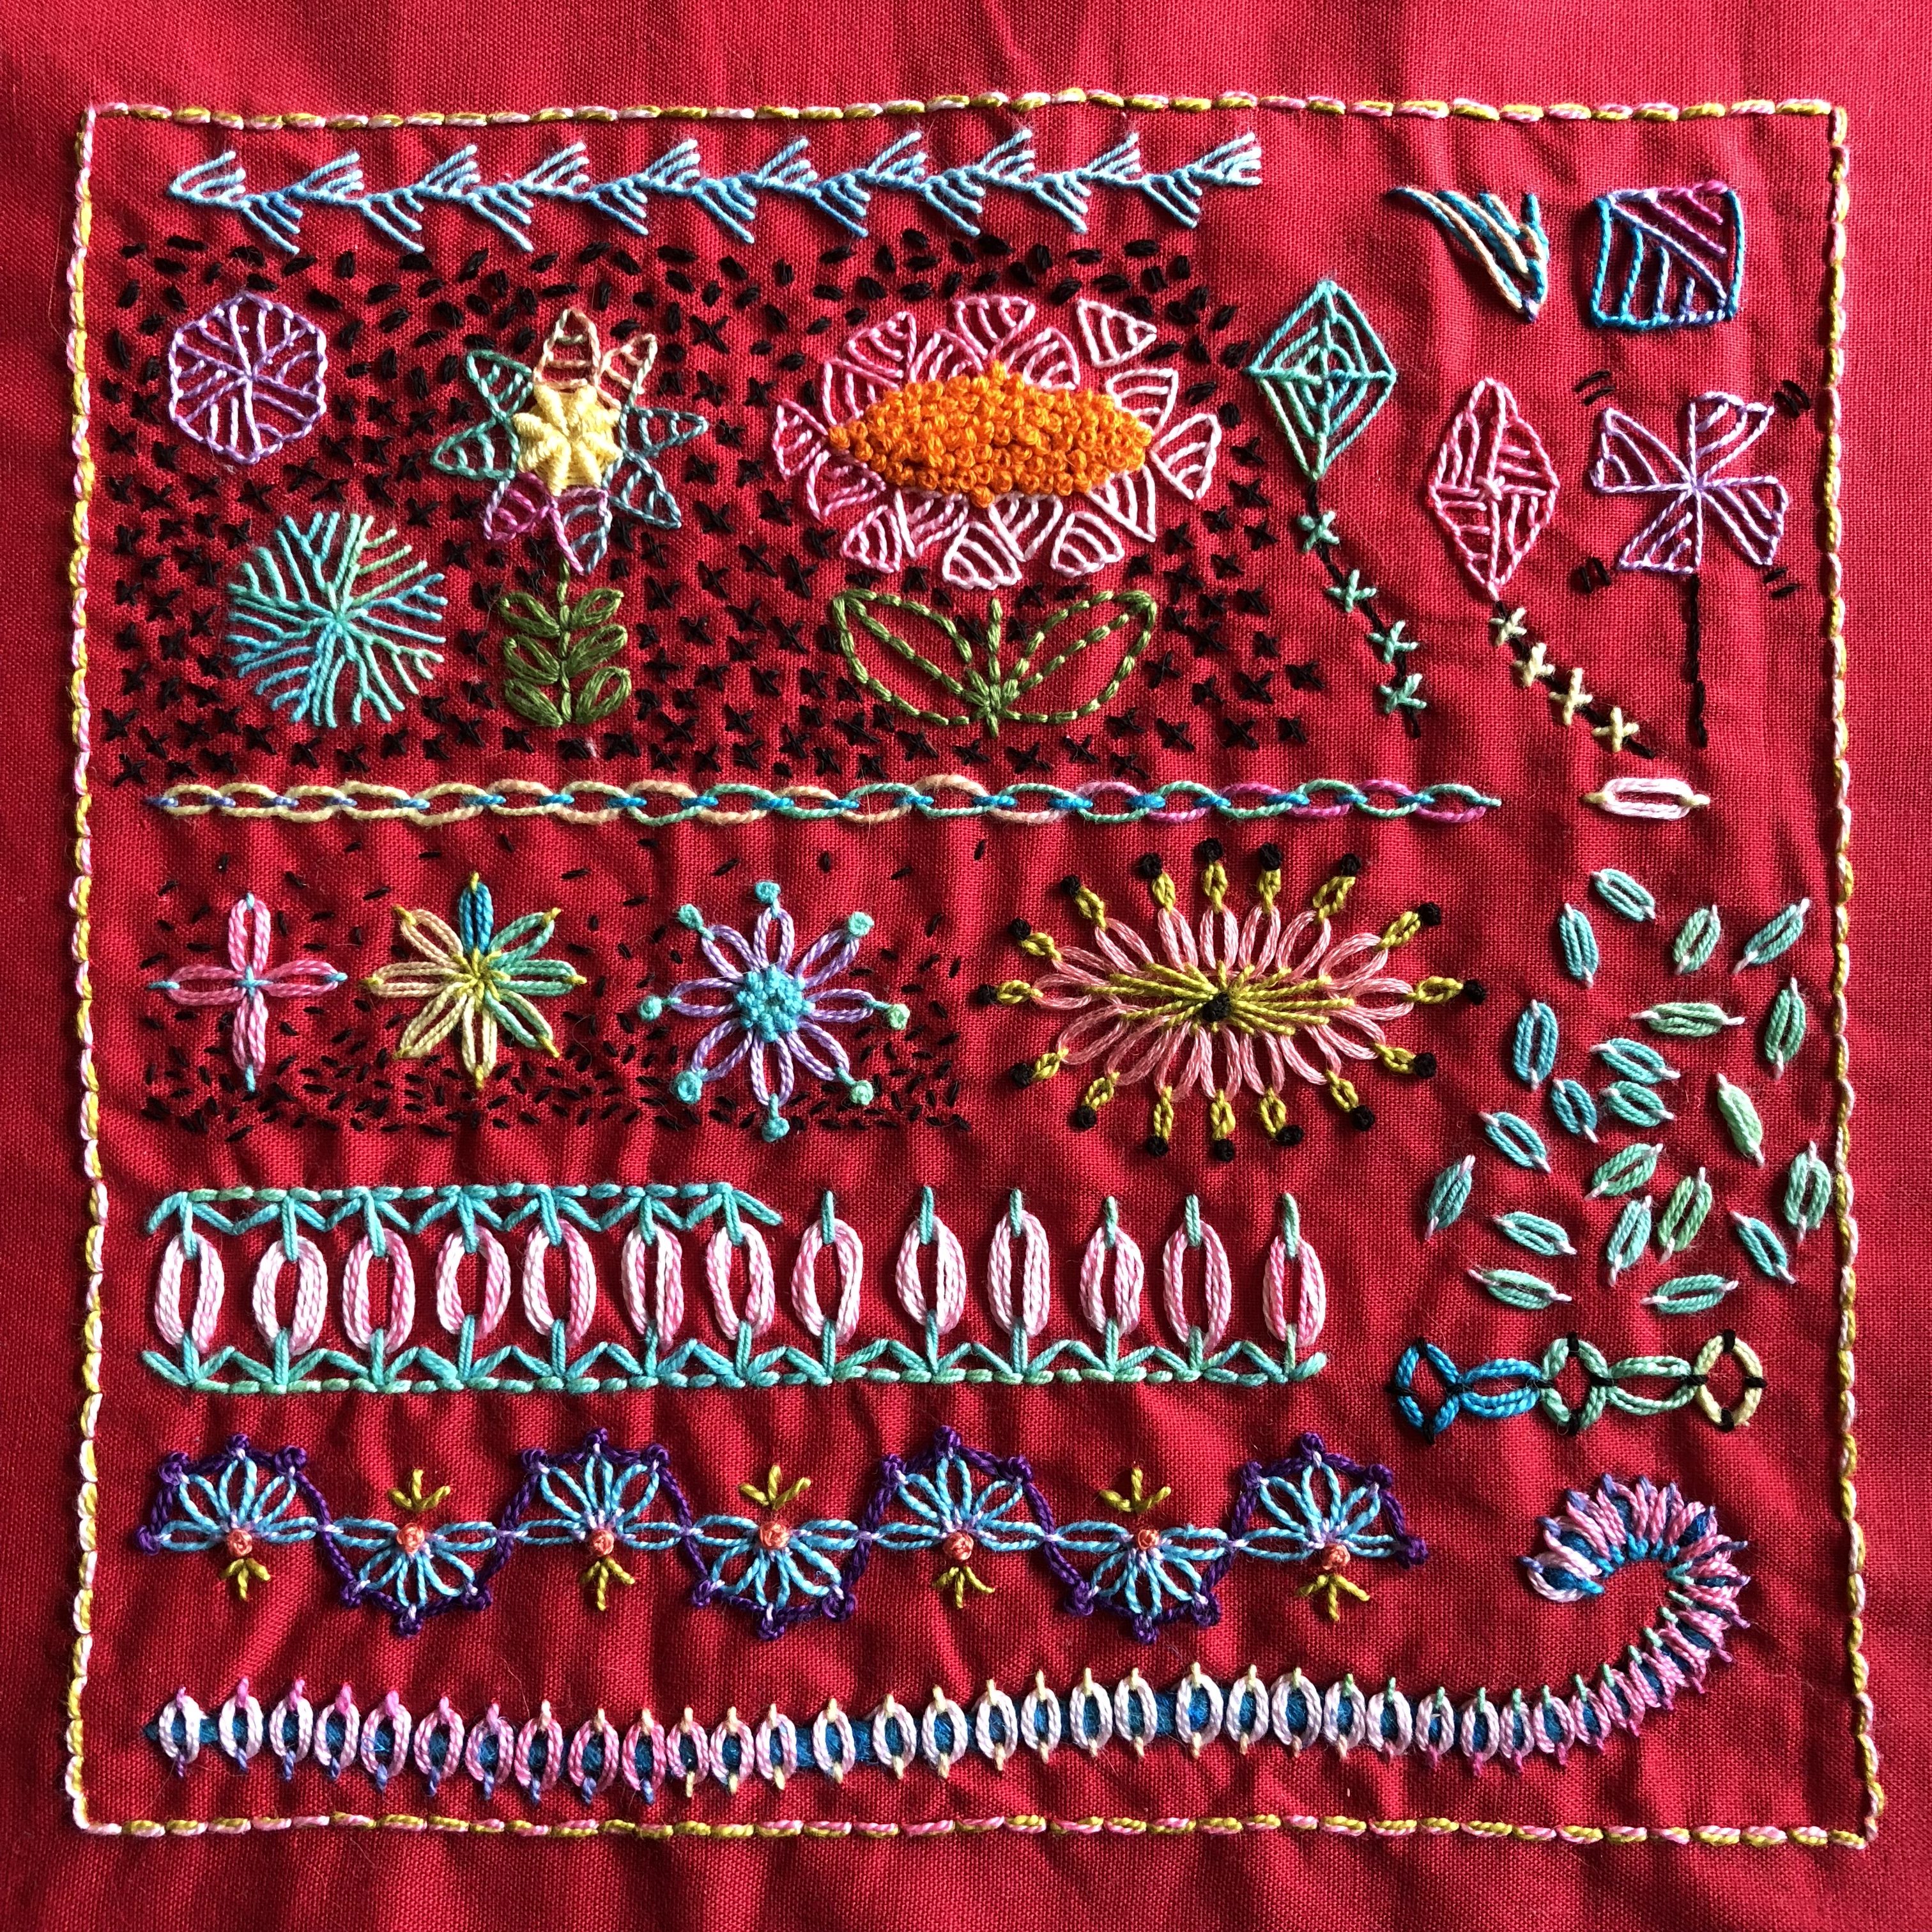
I am an avid collector of vintage embroideries, especially ones with interesting floral designs. Finished ones, unworked ones, worn out and stained ones, if the price is right they come home with me, usually from our local op shop/charity thrift store for fifty cents to a few dollars.

Spectacular pieces go into my collection of pieces to use as they are, but I use the others as pieces of fabric to stitch on. Here are my two most recent pieces.

I loved the rose on this placemat but the stitching was quite worn, and it had a couple of cream coloured paint splotches that I didn’t notice until after I washed out the stains!

Running stitch on found embroidery.

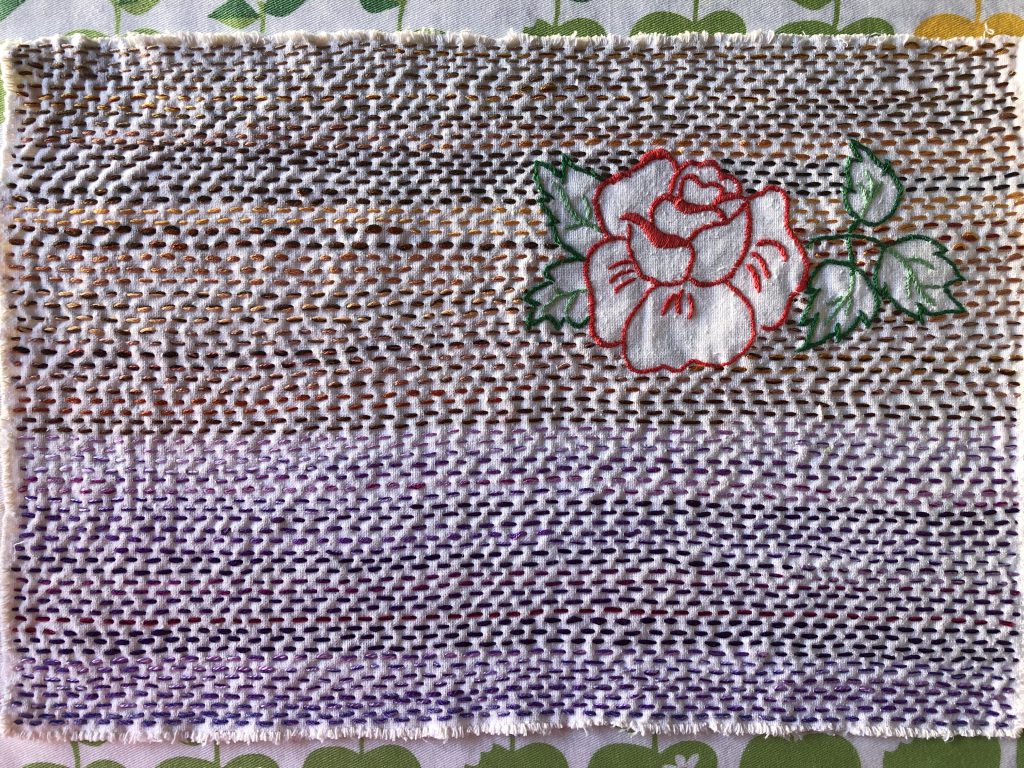
I took some scrap threads and doubled them up to about the thickness of six strand floss and worked running stitch across the background to make the rose “pop” out from the background. I’m a big fan of running stitch! I tried to offset each row of stitching but didn’t worry if stitches were a little wonky. I also removed the crocheted lace edging so I can dye it and use it for something else.

This piece will end up becoming part of another project. At the moment I think I’ll use it as part of a cover for one of my stitch sampler books, but who knows?

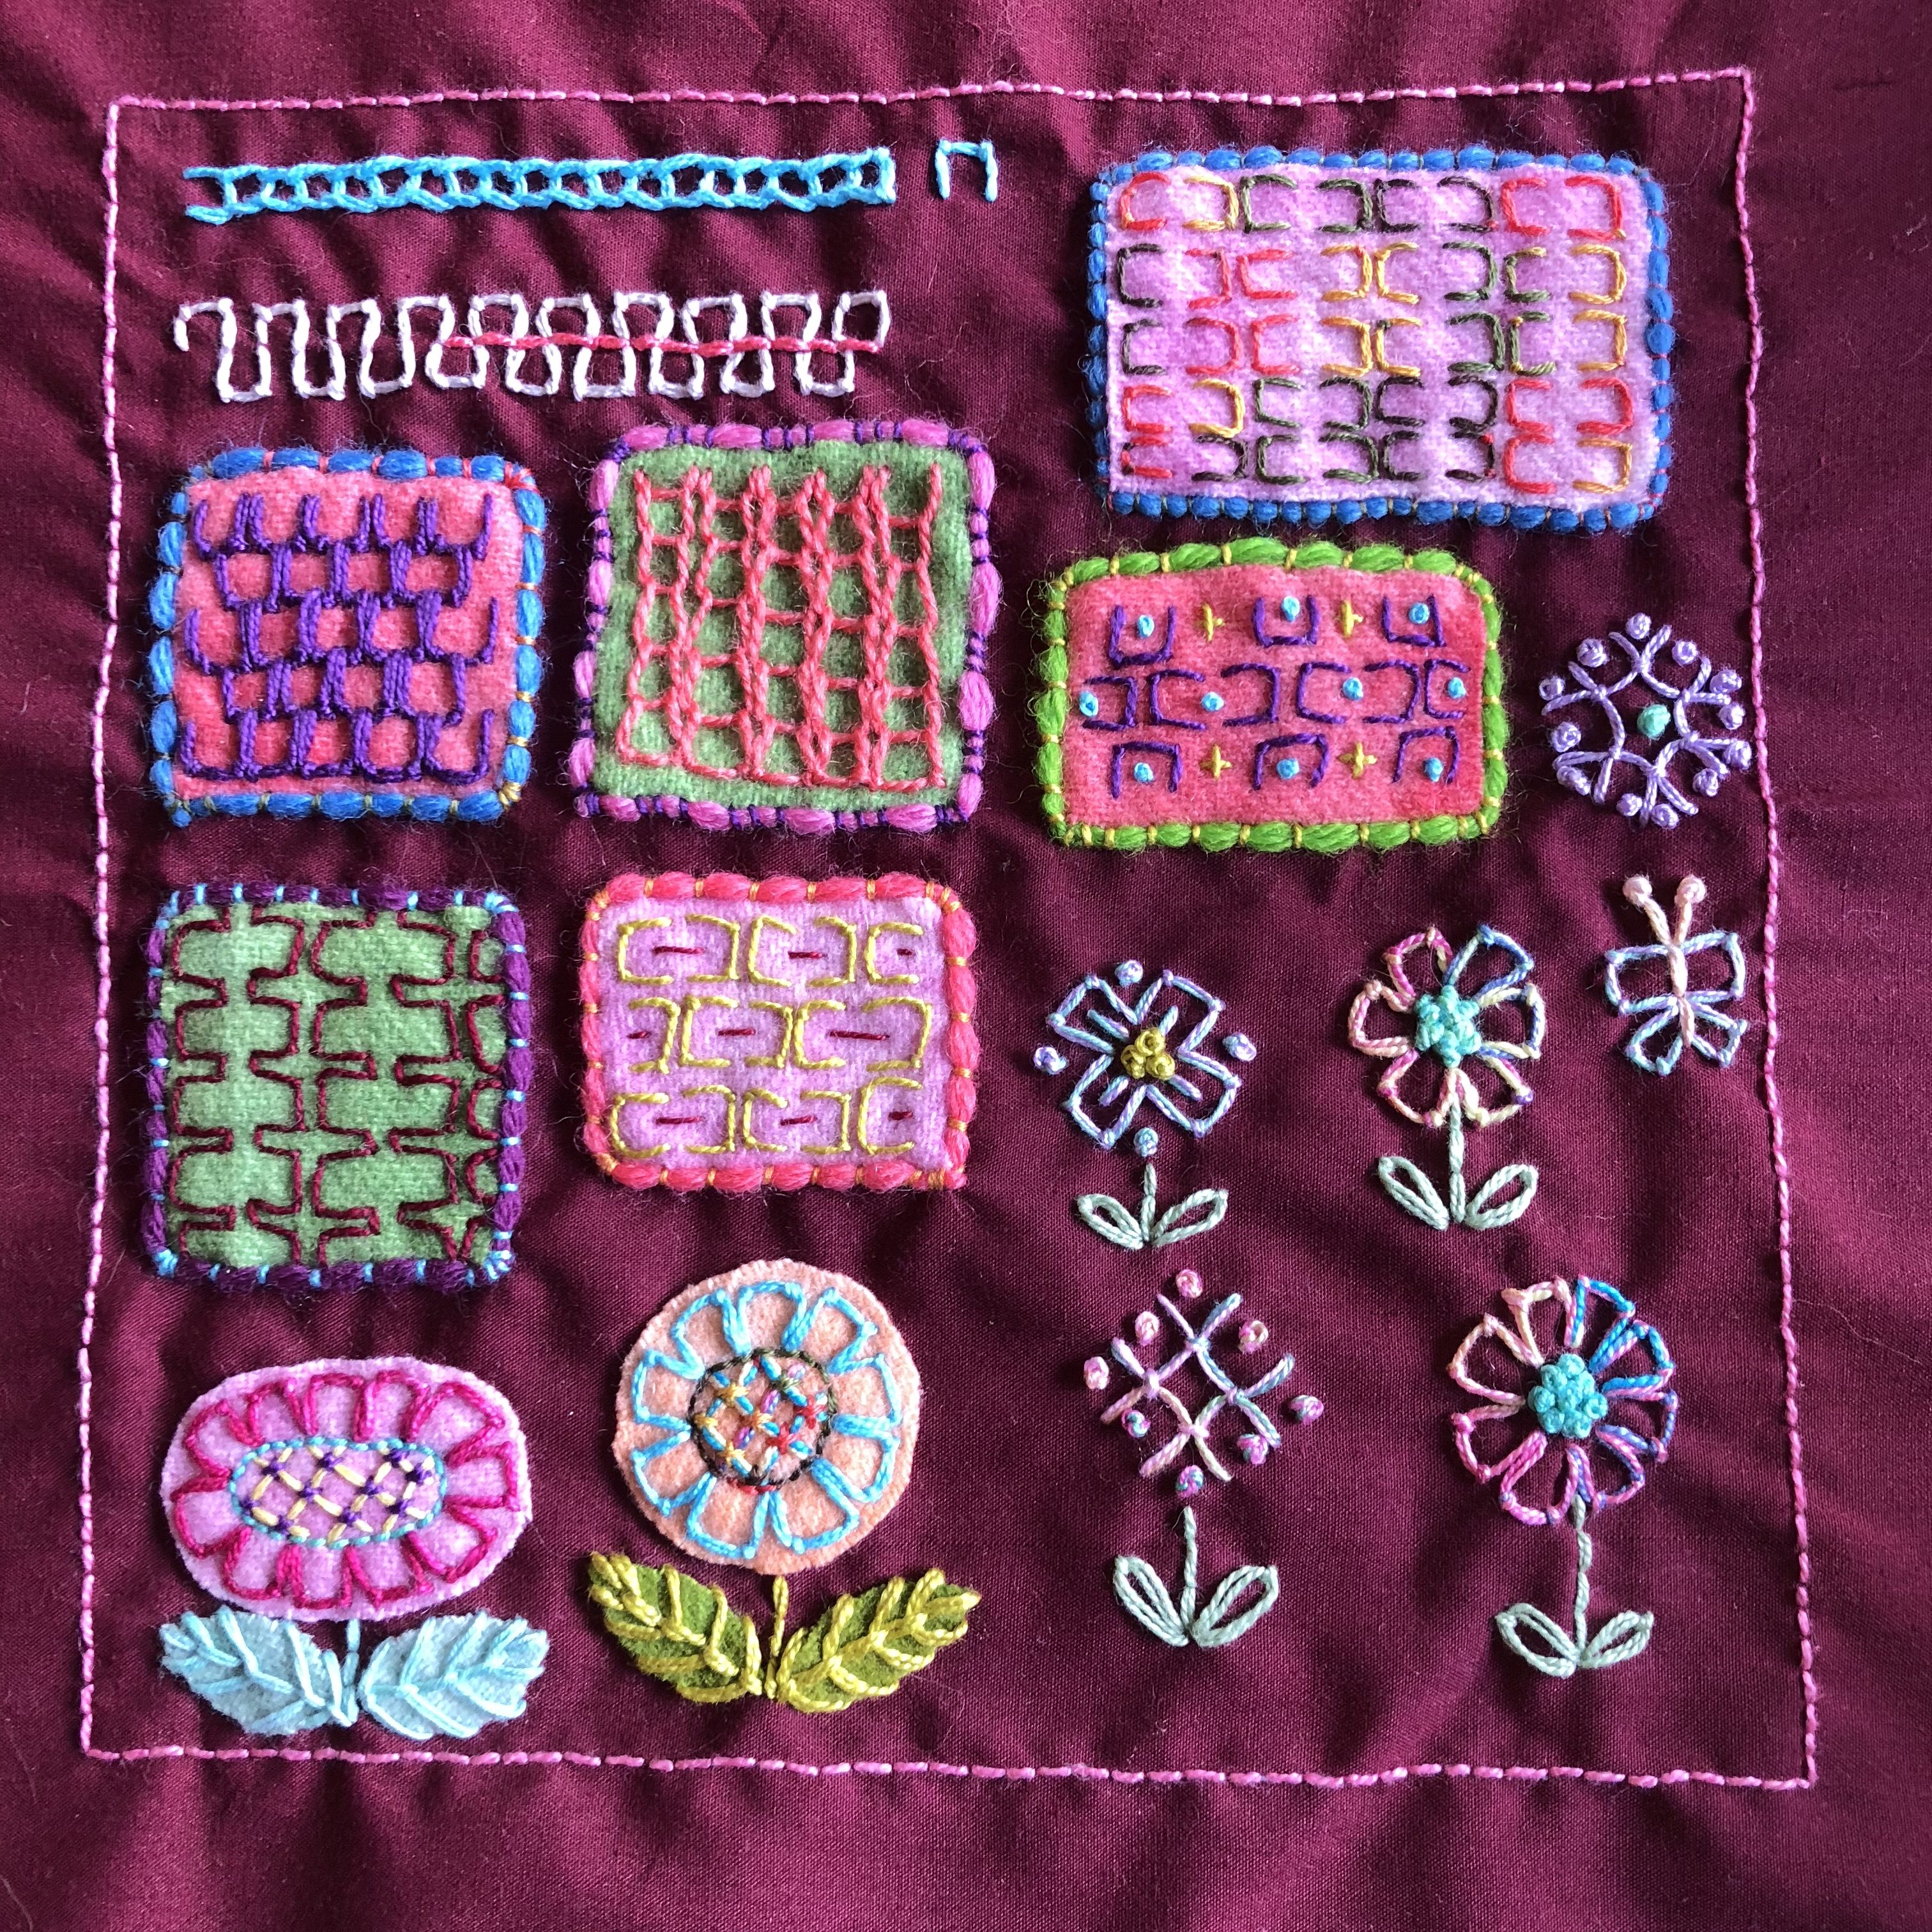
Another damaged doily became this very simple modern eyelet sampler. Orange and green are my favourite colours but no amount of soaking would remove all of the rust and ink stains from this little mat. I decided I could either cover them or cut them out. Why not both?

I used scraps of various orange and green threads and worked round eyelets in the centre, a flower at each end, and leaves on the top and bottom. (Click the photo to see a larger version).

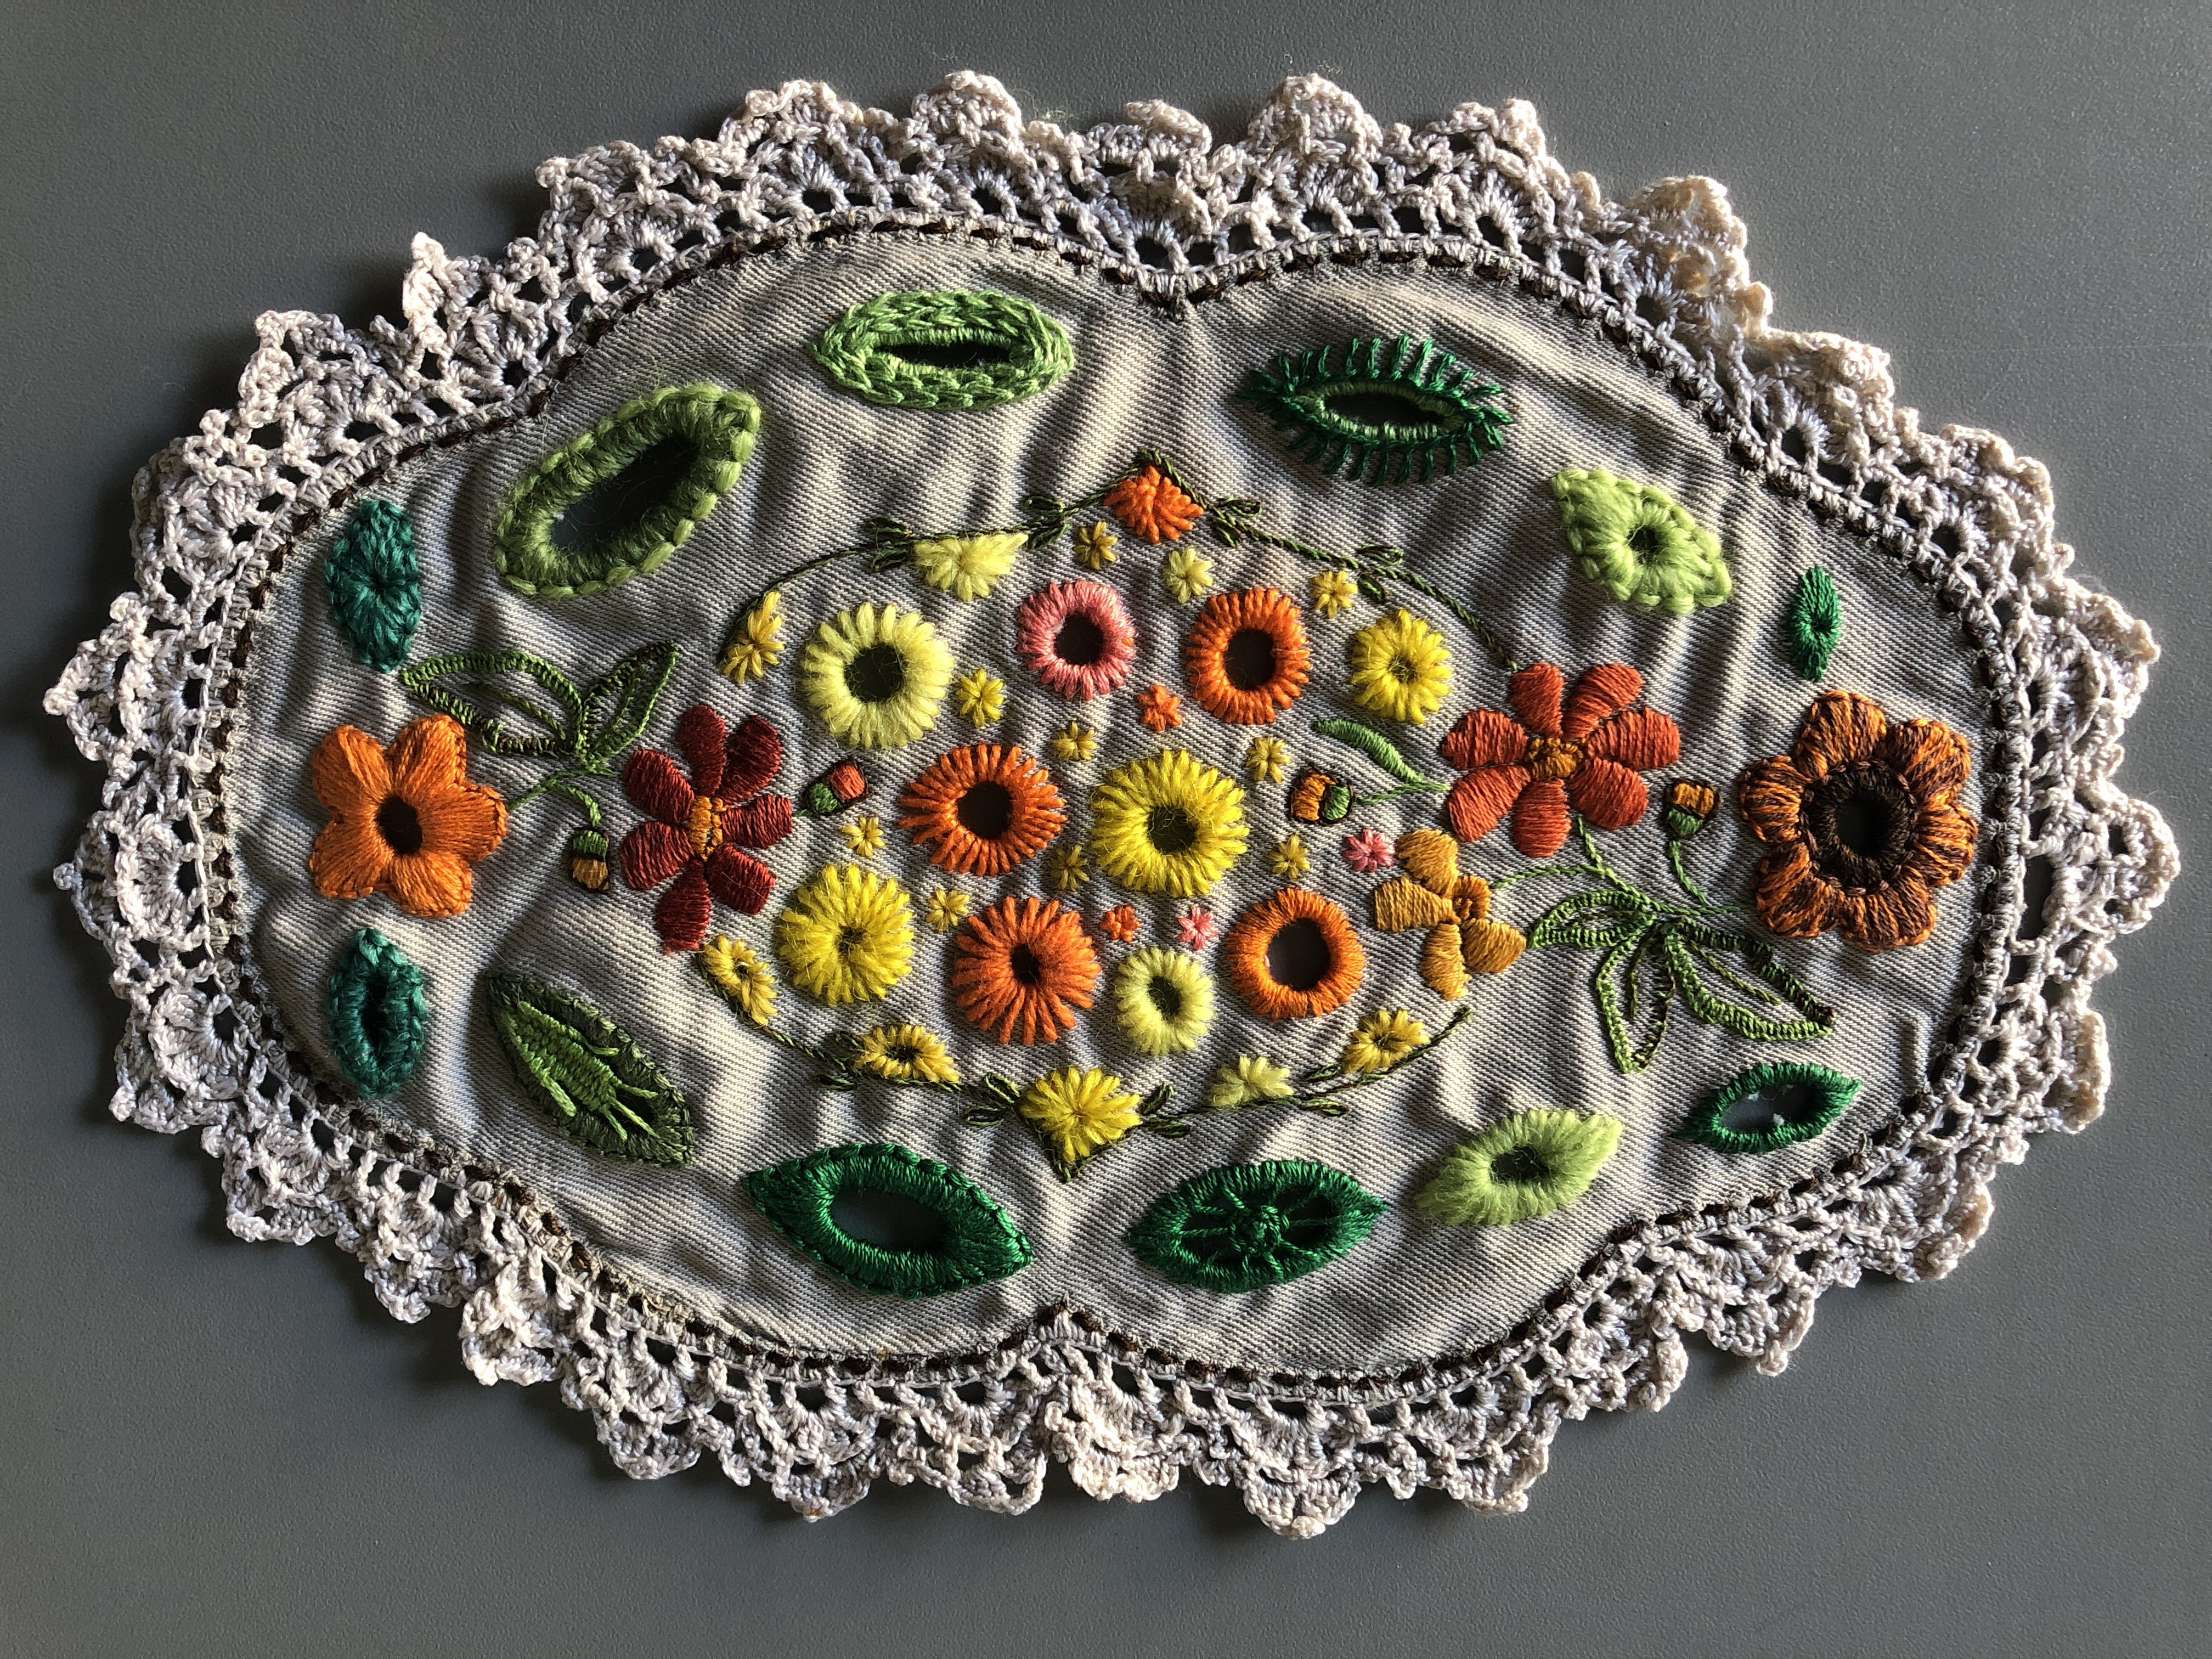
Since the stitching holding the crocheted edging was quite worn, I worked running stitch with dark brown through the holes, which frames the finished piece nicely, I think. I’d never worked eyelets before so this little fifty cent doily was both educational and fun to make. It’s small enough to fit in with my other samplers so it will probably get bound into one of my fabric books for future reference. I’m definitely going to stitch a lot more of the flowers like the orange and brown one on the right!

Instructions for working eyelets can be found here on the French Knots vintage embroidery website. I experimented with a few different stitches around the leaf shapes after working the satin stitch over the edge. Most are finished off with back stitch to tidy them up, but a couple have tiny satin stitch and rounds of chain and blanket stitch as decorative finished around the outside.

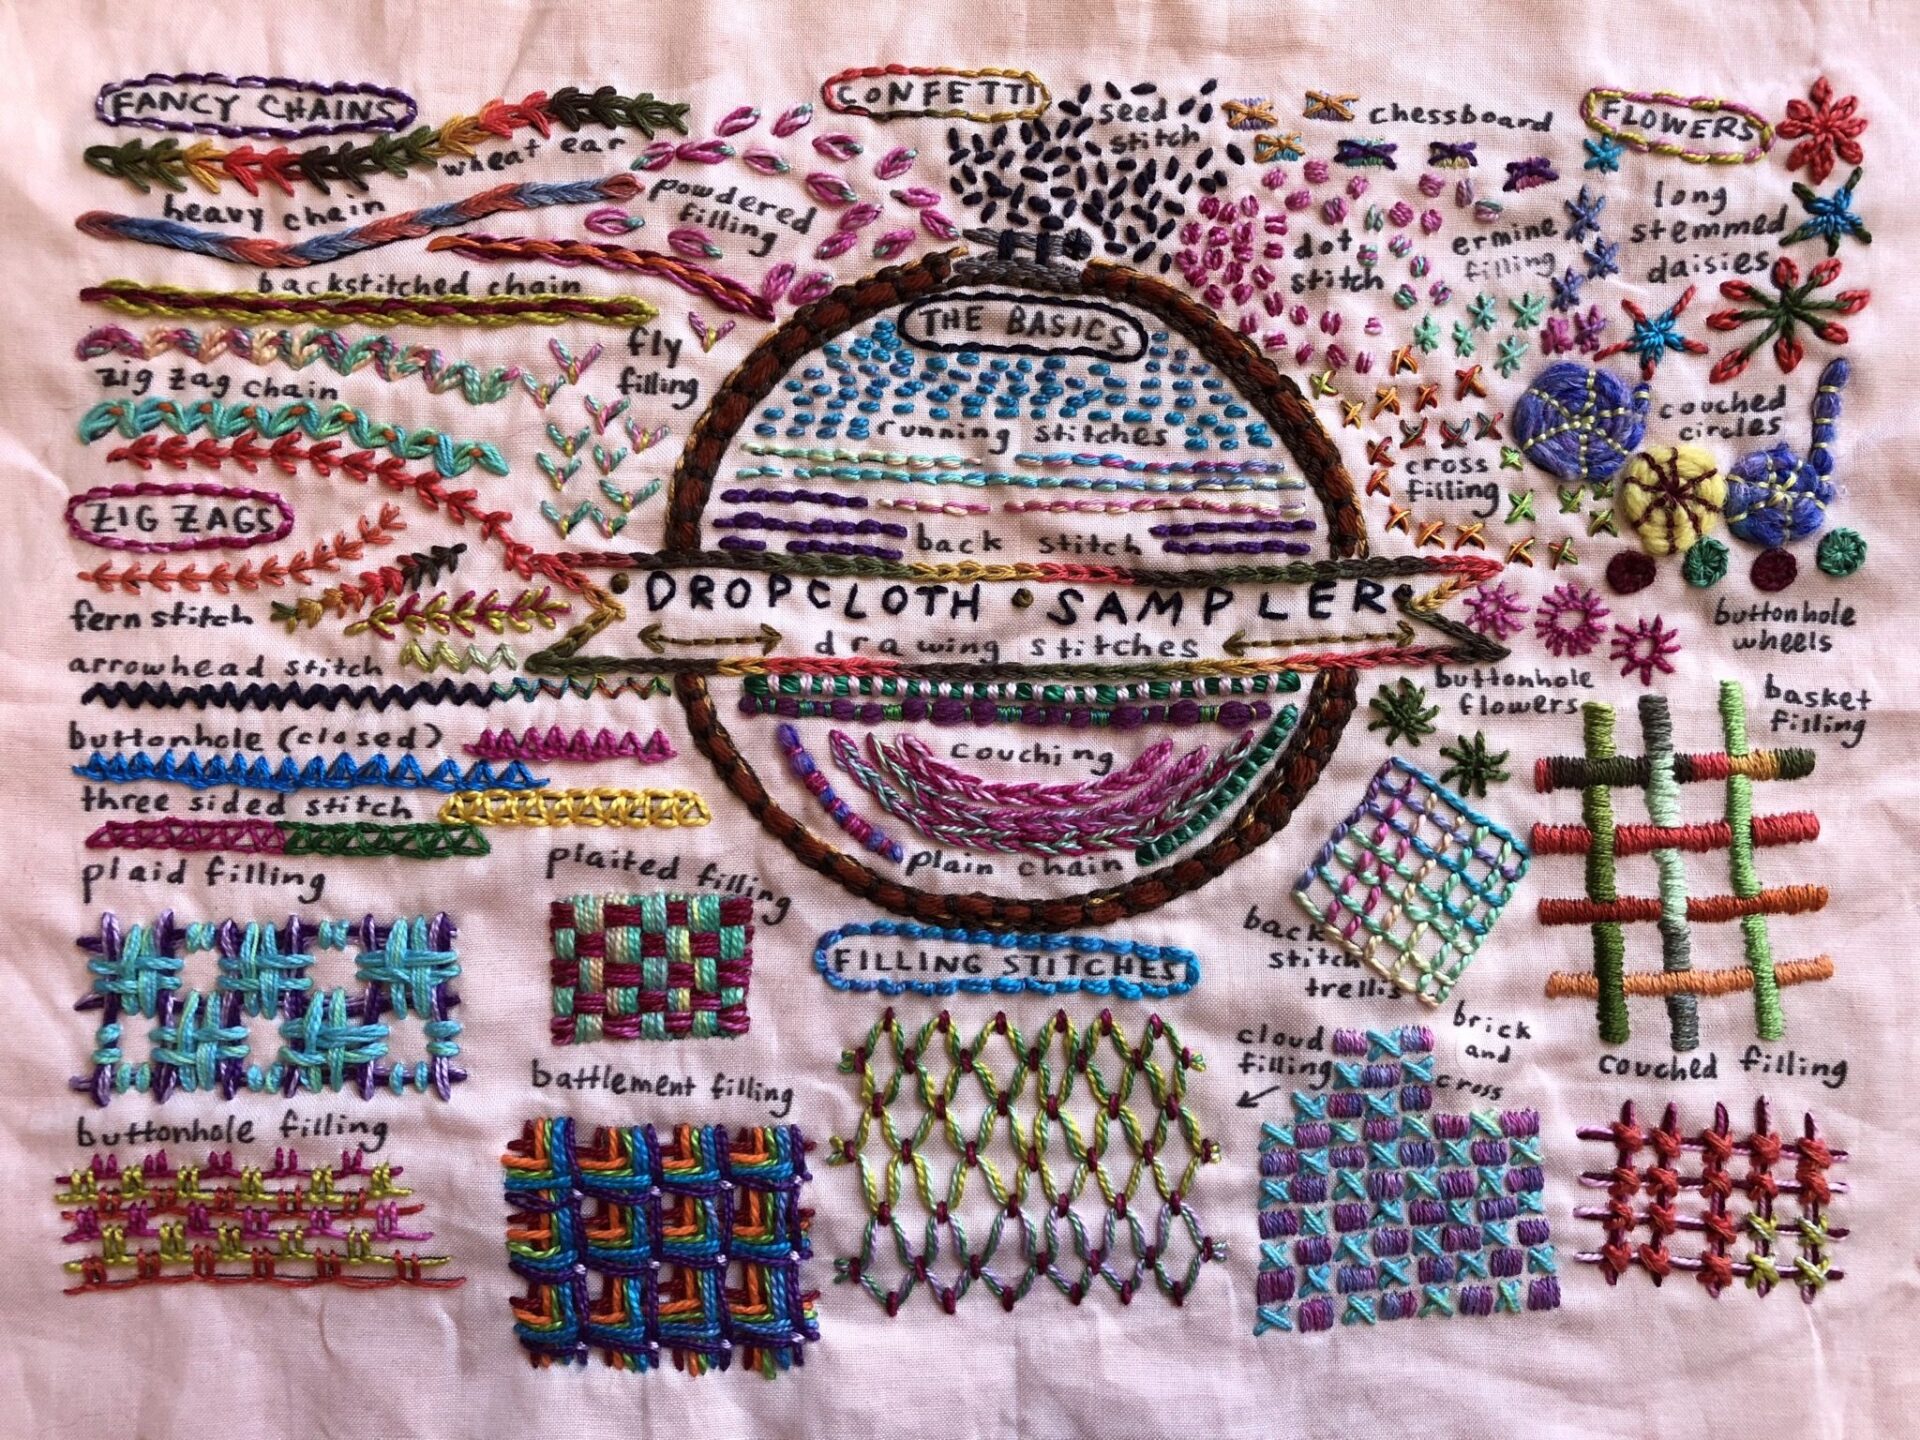
I have another sampler worked on found embroidery to show you tomorrow, so please come back then. I’m quite excited by the way it turned out!

signature

The Drawing Stitches Sampler

Anyone who has been following my embroidery adventures for the past couple of years will know I’m completely addicted to Dropcloth embroidery samplers by textile artist Rebecca Ringquist.

In March this year, Creativebug hosted a daily stitching challenge to coincide with the release of Rebecca’s latest sampler, “drawing stitches” and I joined in.

Embroidered sampler designed by Rebecca Ringquist of Dropcloth Samplers and embroidered by Sarah Bradberry of knitting-and.com

My finished sampler. (Click the photo to see a larger version)

At the time, this sampler had several stitches I hadn’t tried before even though I’ve worked over 120 stitches on various samplers over the last three years:

  • Rebecca’s version of zig-zag chain (which also led me to looking in my books for more variations on the original version and finding out I’d been working that the wrong way all along!)
  • Chessboard stitch
  • Dot stitch
  • Ermine filling
  • Basket filling
  • Brick and cross
  • Battlement filling
  • Plaited filling
  • Plaid filling and
  • Back stitch trellis

(I’ve been blogging my stitching out of order so you may have seen projects with these stitches here recently).

I really enjoyed this stitch along because not only did I learn new stitches, but Rebecca also has a way of creating a way of making stitches that give you the most opportunity for adding more colour and texture. For example, it had never occurred to me to work the tails of long tail chain first, so they could be worked in two colours.

The class is online permanently over on Creativebug, which you can find here: Daily Embroidery Challenge with Rebecca Ringquist and you can purchase the sampler from the Dropcloth Samplers Etsy Store. You don’t need the sampler to stitch along though, all you need is thread, a hoop and some fabric!

signature

  • This post contains affiliate links to Creativebug. All opinions in this post regarding the Creativebug platform are the honest opinions of the author. I will only ever promote products and services I have tested and enjoy.

More Couched Fillings for the Beyond TAST Embroidery Challenge

After working my last couched fillings sampler for the Beyond TAST embroidery challenge, I couldn’t resist the urge to push the idea a little further. Whilst traditional couched fillings are lovely, they aren’t a style of stitch I would use on most projects.

Presenting my “slightly more ‘me'” couched fillings sampler.

Couched filling embroidery sampler, stitched by Sarah Bradberry of knitting-and.com

These stitches are worked on quite a large scale using needlepoint and knitting wools as the couched threads. As you can see, I tend to like large graphic elements rather than small, tidy fillings, although I would probably work these in a range of different scales on an actual project.

I tried techniques including (clockwise from top left):

  • couching a double strand of yarn and separating in to make diamonds and circles, some of which I filled with a satin stitch shape.
  • Bayeux stitch.
  • Brown wool couched down with fly stitch.
  • Pink wool couched with random straight stitches.
  • A version of plaited filling.
  • Couched concentric circles, inspired by a comment made by Rebecca Ringquist in her most recent CreativeBug Daily Embroidery Challenge, The Drawing Stitches Sampler.*
  • Couched spirals in square and circle shapes, and finally
  • A leaf with green needlepoint wool couched down with straight stitches in an offset brick pattern.

Of course now that I have said these fillings are more my style, I’ll probably go and stitch something huge using both!

I have a lot of embroidery posts to catch up on this week, so stay tuned for more!

signature

* This is an affiliate link to Rebecca’s CreativeBug class. I may receive a small payment if you sign up to CreativeBug after clicking this link.

Laid Work and Couched Fillings – Beyond TAST Embroidery Challenge

For the third Beyond TAST challenge, we explored laid work fillings and creating patterns using couching.

To be honest, my heart wasn’t in playing with these stitches, so I learnt some classic ones instead. (I really like them, I just didn’t want to invent my own.)

Squares and leaf shapes filled with various styles of laid work and couched embroidered fillings.

To find instructions for all of the techniques I used, check out my Laidwork Pinterest Board and “Embroidery Stitches” by Barbara Snook. You’ll probably find instructions in any embroidery book that has more than the basics.

signature

Isolated Stitches – Beyond TAST Embroidery Challenge

For the second Beyond TAST embroidery challenge we had to take an isolated stitch, or part of a repeated stitch and rearrange it into different patterns. Having already investigated many of the isolated stitches dueing the 2015-2017 TAST challenge, I decided to take a single repeat of some stitches and see what I could do.

Firstly, open chain. At the top you can see a line of open chain, with a single repeat of the stitch next to it. I then took the single repeat and arranged it into fillings, square, hexagonal, circular and oval motifs (which I turned into flowers because I usually end up turning everything into flowers at some stage).

Various ways of stitching an embroidered sampler using single units of open chain stitch

Next, I did the same with maidenhair stitch and threaded, or interlaced running stitch.

You can see on this sampler that I also tried a single unit of interlaced running stitch as a random filling stitch and a couching stitch, to hold down some yarn. I ended up threading each running stitch twice to make the stitch bolder.

Embroidery sampler investigating different ways to use single units of maidenhair and threaded running stitches.

While I was working on these samplers, I came up with an “investigation language” to use on other stitches.

Firstly, some basic ways to try repeating stitches to make motifs and repeats. Then some ideas for ways to repeat stitches in borders. You can see that I used the “half circle on top of a line, followed by a half circle underneath the line” repeat with the interlaced running stitch to make a very decorative border.

Sometimes, as with the open chain border sketched below, it was immediately obvious there was a better way to make this stitch, so I didn’t end up stitching it out. In this case, back stitch is probably a better idea. I think that would make a great border with the addition of some beads or satin stitched blocks.

Sketches of ways to arrange embroidery stitches to form borders, fillings and motifs

Then I thought of different ways to change each stitch, using chain stitch as an example. Whilst I didn’t use most of these ideas in my current samples, they’ll be very interesting to play with in future.

Different ways to change detached chain stitch in embroidery

These ideas can be used with almost any stitch.

  1. Add more parts to the stitch by repeating sections. For example, adding a second chain stitch to the other end of the little “tie down” stitch on a detached chain stitch. Tying down a chain stitch with three tacking stitches instead of one.
  2. Replace part of the stitch with something else. E.G. tying down a detached chain with a french knot instead of a little tack stitch. Using a bullion stitch to make the looped part of the chain stitch.
  3. Add beads to different parts of the stitch.
  4. Take any variation and make part of it longer.
  5. Use any of the variations to couch down another thread, ric-rac, or fabric.
  6. If you change the order of the steps to make the stitch, can you then use more colours? For example, make the tack stitch of a detached chain or fly stitch first, then make the loop in another colour.
  7. Can you weave part of the stitch?

There are probably more ways to change a stitch. If you can think of any, please leave a comment with your idea. I may end up giving them a try!

signature