
Below are just some of the many different things you can do with cold pad dyeing. Experiment to create your own techniques!
You’ll need a copy of the cold pad dyeing instructions, then let your imagination run wild!
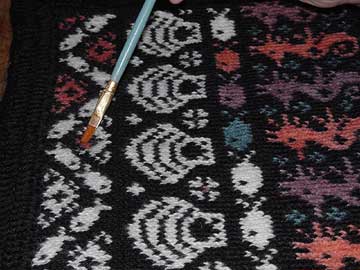
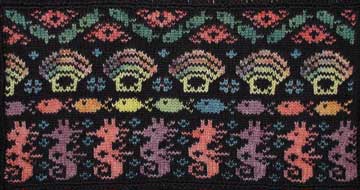
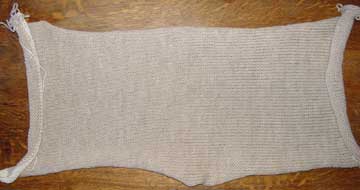
Painted Knitting |
|
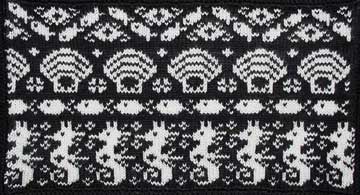 |
Cold pad dyeing is a great way to colour black and white fairisle knitting or individual areas of lace work. The padding mix makes the dye thick enough so that it won’t bleed into areas of another colour. |
 |
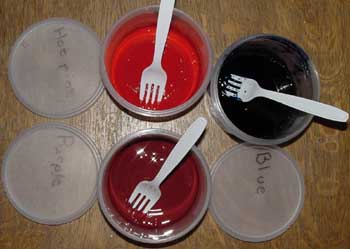
Soak your knitting for half an hour in warm water and a few drops of dish washing liquid.
Remove the excess water as you would if you were dyeing yarn and lay it flat on some plastic wrap. Make up your padding mix and dyes. If you only want to use a small amount of a colour, mix 1tsp of padding mix (5ml) with half to one ml of dye (or more for really intense colours). Using a suitably sized paintbrush, paint your knitting. |
 |
Put another layer of plastic over the top and roll up.
Cook in the microwave for 2 minutes, rest for 2 minutes and repeat another 3 times. Leave to cool down and wash out the padding mix and excess dye with a little detergent. You can create some unusual effects that would be impossible or difficult to knit. For example, I’ve shaded the top of the shells in my sample by painting the tops with several different colours. Note: If you’re dyeing something like a hat or a jumper, put a layer of plastic inside so the dye won’t bleed through to the back. |
Colour-Change Yarns |
|
 |
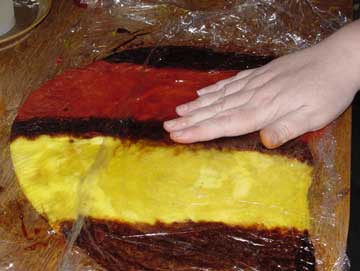
If you have a knitting machine (or a fair bit of patience), you can make yarns that slowly change from one colour to another.
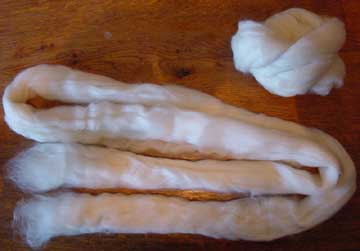
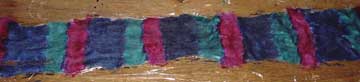
The first step is to knit a big swatch with your yarn, this is where a knitting machine comes in handy! My sample is 150gms of 8 ply (dk weight) wool which I have knit into a swatch 66 sts wide. |
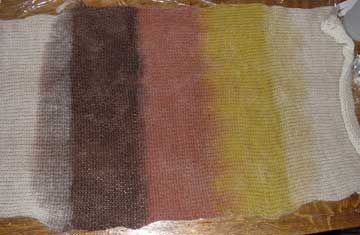
I wanted my colours to blend gradually so I used water instead of padding mix. You can see how the dye bleeds at either end. I’ve used Ashford’s Cold Pad Dye Kit in the Autumn Collection colourway of brown, yellow, and rust. |
Soak your giant swatch as you would if you were dyeing yarn and remove the excess water.
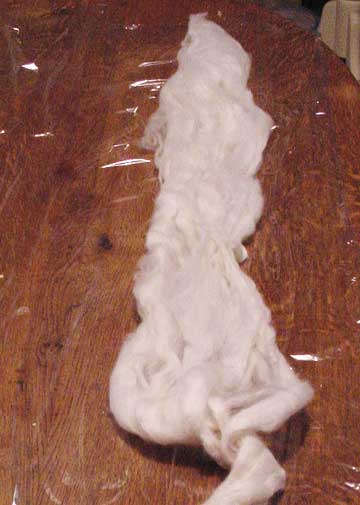
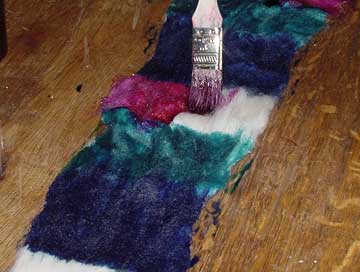
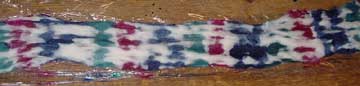
Lay it out on a piece of sandwich wrap and paint bold stripes of colour. If you want your colours to change very gradually use water instead of padding mix and add a few teaspoons full of vinegar. If you want your yarn to change colours more dramatically, use the padding mix in your dye. Whichever dye mix you use, make sure you don’t make your knitting too wet. You want to use just enough dye to colour the wool. |
 |
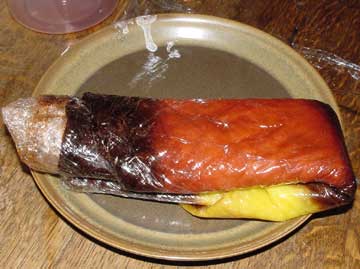
Put another layer of plastic over the top and roll up.
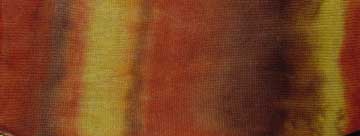
Cook in the microwave for 2 minutes, rest for 2 minutes and repeat another 3 times. Leave to cool down and wash out the padding mix and excess dye with a little dish washing detergent. On the left you can see my sample after cooking and rinsing. |
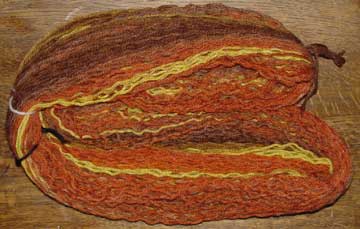 |
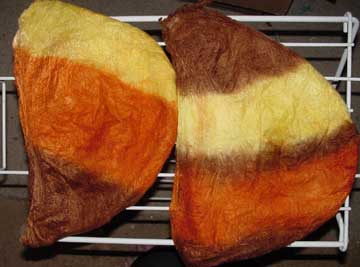
When your swatch is dry, unravel it and make it into a skein. Rewash to remove the kinks and hang to dry. |
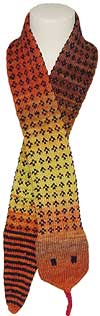 |
Knit something cool!
At the points where the colours start to blend into each other they will look a little like coloured pencil drawings, where colours are drawn over the top of each other to create new shades. I used the yarn I dyed in this tutorial to knit the Slithering Scarf If you don’t spin, this is an excellent way to make a colour change yarn for the Lucy’s Diamonds scarf. It won’t look the same as the yarn in the original but you’ll have a unique scarf that changes colour throughout. |
Painted Slivers |
|
 |
Soak your sliver for half an hour in room temperature water with a few drops of dish washing liquid.
Remove the excess water as you would if you were dyeing yarn. |
 |
Lay your sliver out on some plastic wrap, spreading out out widthways as you do.
I like to use a piece of sliver about 6ft long as this is the maximum length that will fit on my dyeing table. |
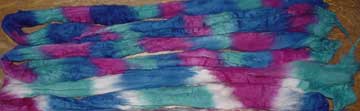
I used Ashford’s Cold Pad Dye Kit in the Winter Collection colourway of blue, purple, and teal. |
Prepare your dye and padding mix following the basic instructions.
Paint the dye on with a slow dabbing motion. Don’t dab up and down really quickly because this may cause your wool to felt. |
 |
Keep adding colours in your choice of design until you have painted the whole top of your sliver. |
 |
Turn your sliver over and press on the white spots with your paintbrush to help the dye you have already painted onto your sliver soak through. Paint any remaining white spots with more dye. |
|
Click on the image for a larger view |
Fold the plastic over your sliver and press out any air. |
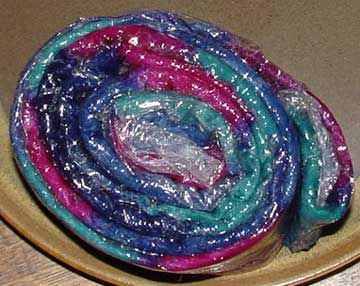 |
Roll up and leave to cure or cook following the basic instructions. |
 |
Leave to cool down, then wash out the padding mix and excess dye with a little detergent. Rinse in water that is the same temperature as your wash water. Spin out the excess water and hang to dry. |
| For tips on spinning hand painted and multi-colour slivers (and to see all these sliver spun into yarn), see my article on “Spinning Handpainted Slivers” | |
Painted Silk Caps |
|
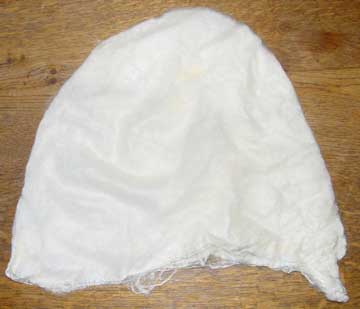 |
Soak your silk caps in warm water and a few drops of dish washing liquid. Leave them to soak for a couple of hours.
Remove the excess water and lay out on a piece of sandwich wrap. |
 |
Mix your dyes with the padding mix following the basic instructions.
Paint your silk cap in a design of your choice. Unlike the previous examples, you’ll need to paint on quite a bit of dye so that it will start to soak through to the other side. Turn your cap over and paint the other side. Now cover it with a second layer of plastic and press firmly all over. This will push the dye through all the layers of silk. If the dye isn’t soaking through to the centre of your cap, keep painting on more until it does. |
 |
Roll up the silk cap in the sandwich wrap and cook in the microwave for 2 minutes, rest for 2 minutes and repeat twice more. Leave to cool down and wash out the padding mix and any excess dye with a little detergent. |
|
I’ve used Ashford’s Cold Pad Dye Kit in the Autumn Collection colourway of brown, yellow, and rust. |
Spin out the excess water in your washing machine (or blot very carefully with a towel) and lay out to dry.
I originally thought the silk would catch on the paint brush and create a mess, but the slipperiness of the padding mix holds any wisps of silk in place and stops the fibres catching. Click here for information on preparing your silk caps for spinning. |
|
A few more ideas for cold pad dyeing: Paint silk scarves, etc |
|
 Photos and text copyright Sarah Bradberry. All rights reserved. Photos and text copyright Sarah Bradberry. All rights reserved.
To find your local Ashford stockist, visit the Ashford website at http://www.ashford.co.nz |