Menu Close

Tag: knitting tips

Make Your Own Knitting Needle Keepers from Nuts

I really want to make these. My stitches are always falling off the ends of my needles when I’m knitting socks. Probably because they sit in my work bag for several years at a time 😉

From Queensland Times, Ipswich Herald and General Advertiser, December 30th 1899.

Knitting.

Most people who knit have experienced at one time or another the annoyance of stitches dropping off the needles when the work is put down for a few minutes. Knitting-needle holders prevent this, and are extremely easy to make. Bore a hole, quarter of an inch in circumference, in the bottom of two hazel nuts. Remove the kernels, and with a red-hot knitting needle bore two small holes at each side of each empty shell. Run together (at both edges) two pieces of narrow ribbon, not quite half an-inch wide and three-quarters of a yard long. Then draw through the casing a narrow black elastic, two inches shorter than your knitting needles, and stitch each end of elastic to the small holes in nut, drawing the ribbon over the ends of elastic to hide the stitching. Tie a small bow at each end to cover fasten- ing, and the needle-holder is complete.

signature

Economical Knitting for Children

From the Goulburn Evening Penny Post, July 8th 1936

Knitting

When knitting pullovers for several children, use wool of one colour. When the jumpers are partly worn and shabby, unravel, and wind the wool from the strong parts, and use again. Children’s jumpers can be unravelled and knitted into a fresh-looking pullover for a boy of twelve, a pullover for a boy of five, and perhaps two smart berets for school for miss nine and miss eleven. There is usually enough wool left for darning these articles later on.

Knitting Tips from 1933

Most of these knitting tips are as true now as they were in 1933! I’m not sure about the seaming tip though. I prefer a whole stitch in from the edge unless an edge to edge finish is needed (for example, if there’s a seam in the sole of a sock that was knit flat).

From the Muswellbrook Chronicle, May 19th 1933.

KNITTING.

When you are knitting remember – Never stretch your wool by winding it into a hard ball. Wind it loosely over three fingers; changing their position frequently, and a soft, loose ball, delightfully easy to work will be the result. Knitting is often spoilt because it is carelessly made up and finished off. In joining edges, be careful not to draw them too tightly. Use the same yarn as the knitting and a coarse, blunt-pointed needle, and take up the end loops only of each edge.

When changing from one colour wool to another twist the two wools together to avoid a gap in the knitting. Avoid joining the wool in the middle of a row, but if the design demands this, try to do so as neatly as possible.

signature

8 Ways to Weave in Your Ends – Knitting Tutorials

I’ve been a knitter of sorts for almost 40 years and can confidently say that if I can imagine it, I can knit it. However there’s one thing that I’ve never been 100% sure about: darning in my ends. My darns are always secure and neat but after hearing a judge at a knitting competition say that that best knitters darn in their ends so you can’t even find them, my confidence in my technique flew right out the window (along with any desire to enter any more knitting competitions).

The Purl Bee has set me straight with her tutorial on eight different ways to darn in your ends when knitting. I was doing it properly all along!

Weaving in Your Ends – Knitting Tutorials: Finishing Techniques – Knitting Crochet Sewing Embroidery Crafts Patterns and Ideas!.

The Purl Bee is a great blog, not just for this article. So even if you know how to darn in your ends when you knit, check it out anyway. You’ll be glad you did!

signature

How to Sew Name Labels Into Knitting & Crochet That Stretches and Charlie’s New Hat

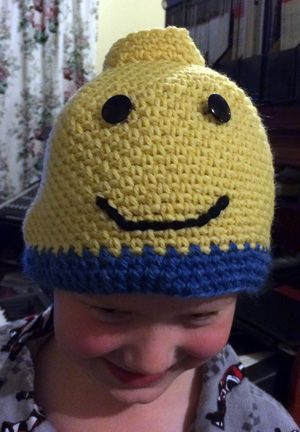
Charlie's Block Head hat

As promised, here is Charlie’s new hat! Not only is it proof that I can crochet, it’s also proof that sometimes I buy patterns that were written more recently than 1969 🙂

Here are the details, because this hat is so ridiculous that everyone should make one!

Pattern: Blockhead Man Hat by Darleen Hopkins – $4.50 US
Yarn: Cascade 220 (not superwash, just the regular kind)
Hook size: 5mm/US size H
Size: medium/large (Charlie likes his hats loose and long so he can pull them down over his ears but the smaller size really was going to be a bit tight)
Skill Level: Super easy but make sure to keep track of the end of your rounds!

Charlie insists he’s never going to take this hat off, so I had to sew a name label in it because of his school’s clothing policy (I.E. put a name label in all your kids clothes or we’ll look at you with the same expression we use on the 5 year olds when they’ve done something silly).

Of course, I could find neither the name label tape, nor the laundry marker that I bought for this purpose (It’s probably in my sewing box which is the only place I didn’t look), so I made a label with vintage seam tape and a Sharpie.

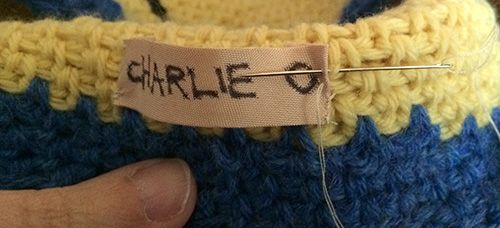
Fold the ends of the tape over and fasten the thread with a few stitches over the top of each other. Then over-sew to the hat, catching just the back of the stitches so it doesn’t show from the outside.

How to sew in a name label part 1

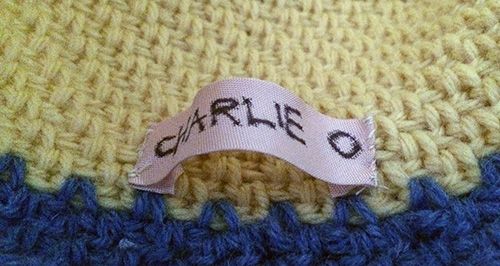
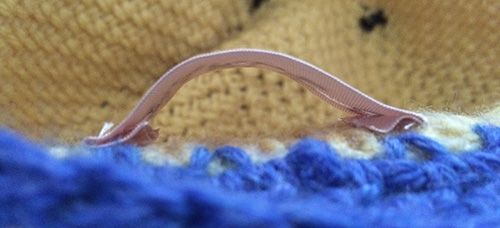
Make sure to leave a slight “bubble” in the label so that there is enough room for the crochet to stretch.

How to sew in a name label part 2

Here it is seen from the side.

How to sew in a name label part 3

I have my fingers crossed that Charlie doesn’t still manage to lose it. Whenever his Dad or I pick him up from school, he’s always managed to spread his belongings all over the classroom verandah so you never know!

Now I’m off to play with my our new Rainbow loom, which arrived during breakfast this morning!

signature