Menu Close

Mostly Knitting Blog

Want to find the new stuff on Knitting-and.com, or read about my latest projects and discoveries? This is the place.

Catching Up with The Square Deal Weave-Along

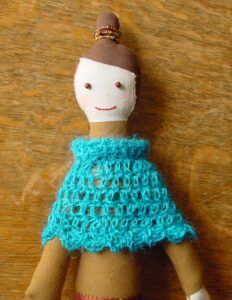
After falling ill in the last couple of months of last year I fell drastically behind in the Square Deal Weave-Along so I have spent the past few days catching up. Here are lots and lots (and LOTS!) of pictures and details from my adventures 🙂 Since there are so many images I’m making them a bit smaller than usual. You can click on the images to view the larger pictures in my flickr account. Firstly, Wide Wale Corduroy. (Am I the only person who always wants to spell that “Wide Whale”?)

Weavette square in wide wale design

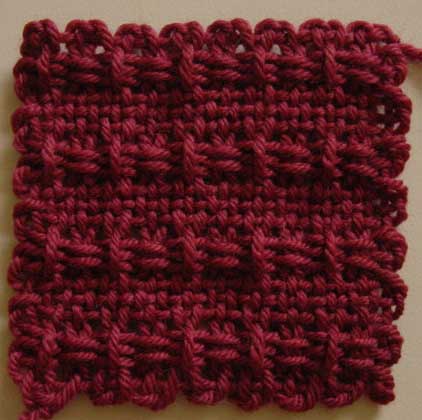
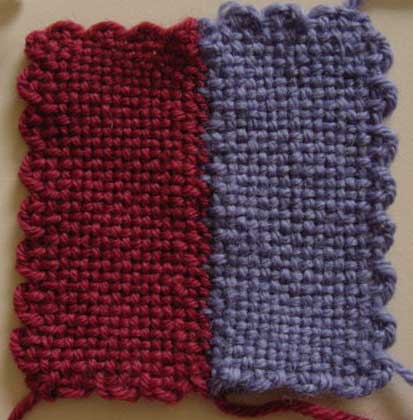
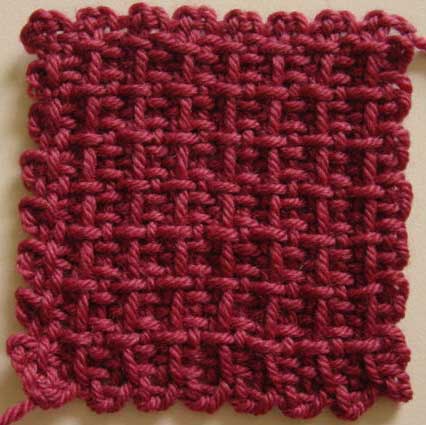
I love this weave. It has a lovely texture, it’s soft and squishy and generally encompasses everything I like about hand weaves (textured weaves are my favourite). I used up a whole skein of Cleckheaton Country 12 ply and made quite a few squares. When I began to run out of that skein of yarn I wove this square. Rounds 1-3 are the Cleckheaton Country 12 ply and I wove with two strands of hand painted 8 ply wool. (That’s DK weight to those who don’t know Aussie yarn weights).

Weavette square in wide wale corduroy

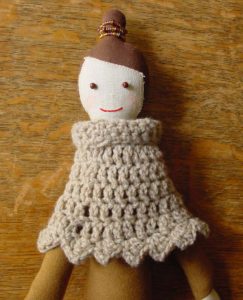
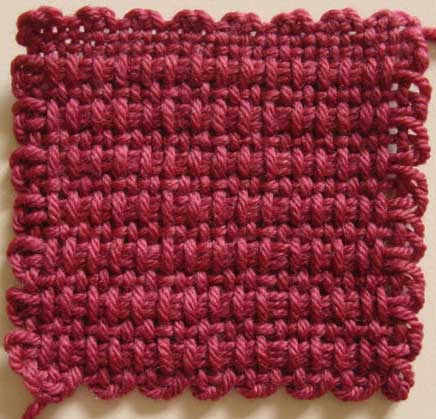
This is the front and

Back of a weavette square worked in wide wale corduroy

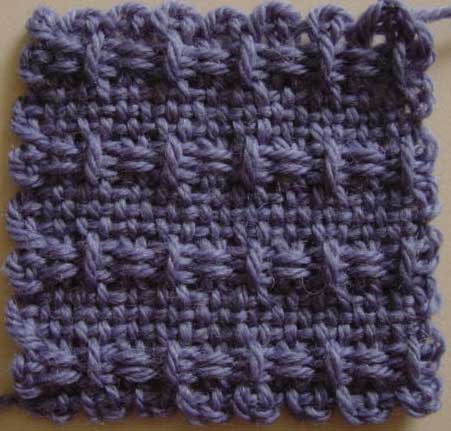
this is the back. I like both 🙂

Wide wale corduroy square 3

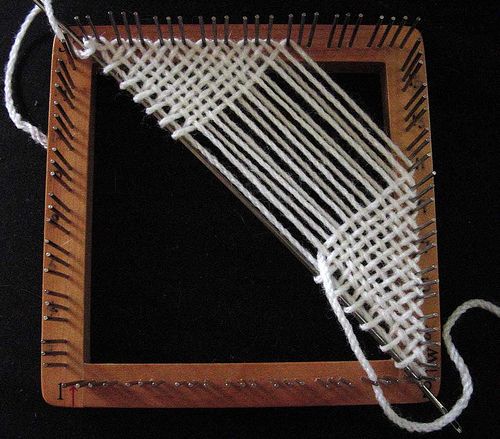
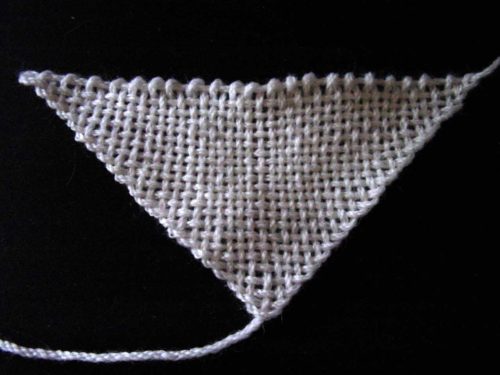
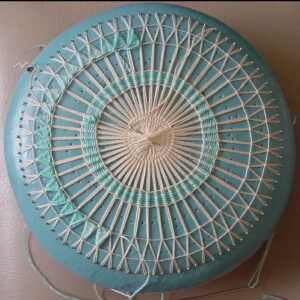
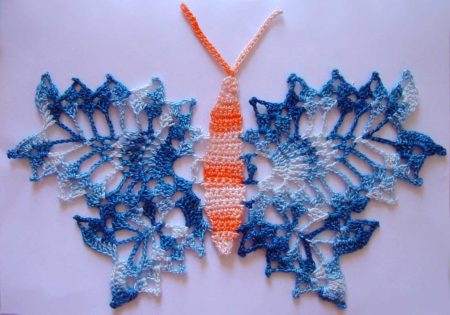
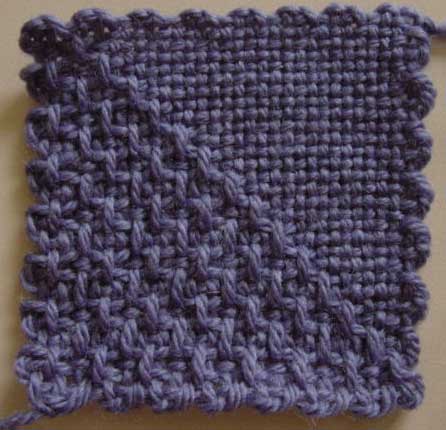
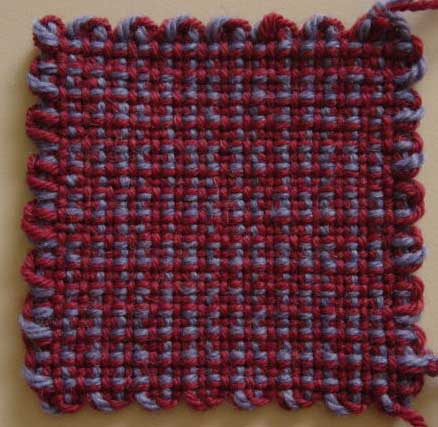
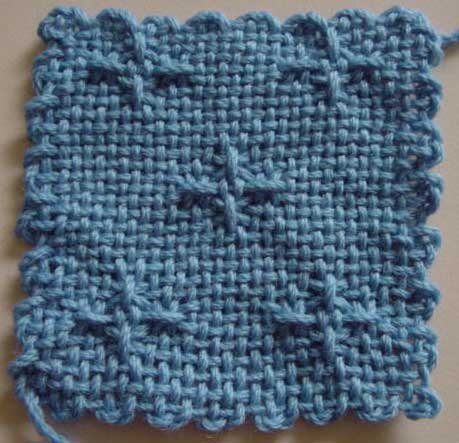
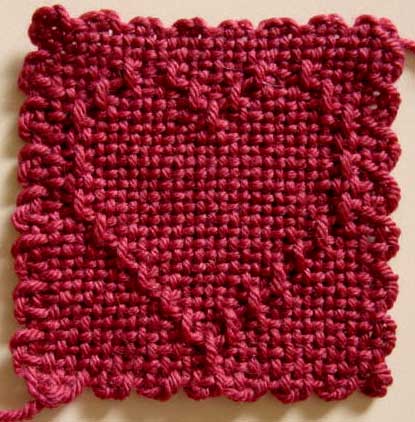
I also tried rounds 1-3 in blue and wove with red. All 8 ply thickness, 100% wool I want to try this weave on my table loom, worked in a single colour. A while ago I posted about weaving triangles on a 4 inch square weavette loom. I made more triangles and stitched them together in a pinwheel design.

Weavette triangles

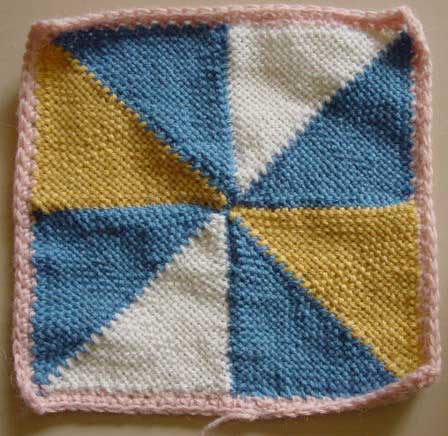
The triangles are really fiddly to weave but they do look nice :). The triangles were woven using various 8 ply wools. ”

Weavette squares with inlay design

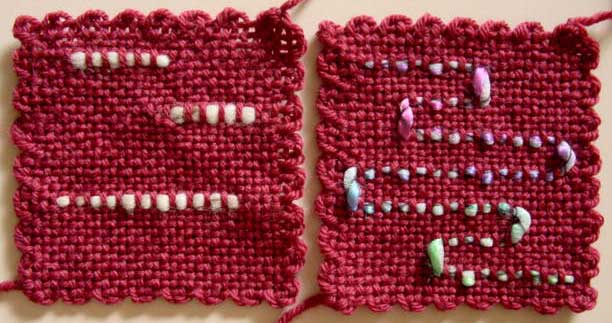
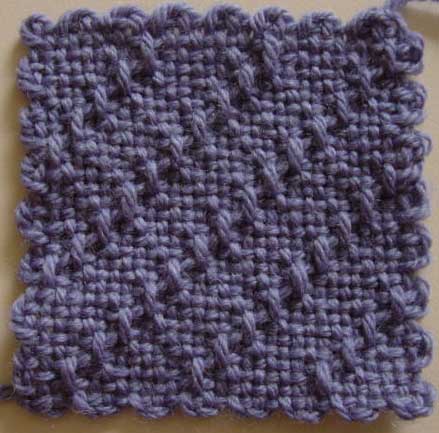
I experimented briefly with the inlay technique. This is another technique and look that I really enjoy. I will be playing with this, and related techniques, on my table loom as well. Next (working backwards through the weave-along), is seven diagonal stripes.

Weavette square with diagonal stripes

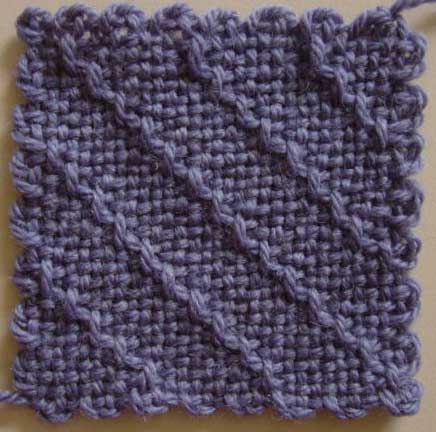
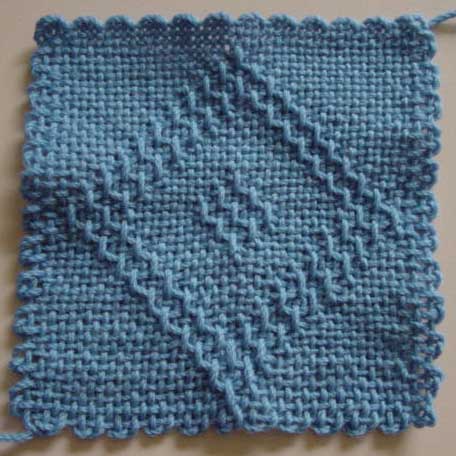
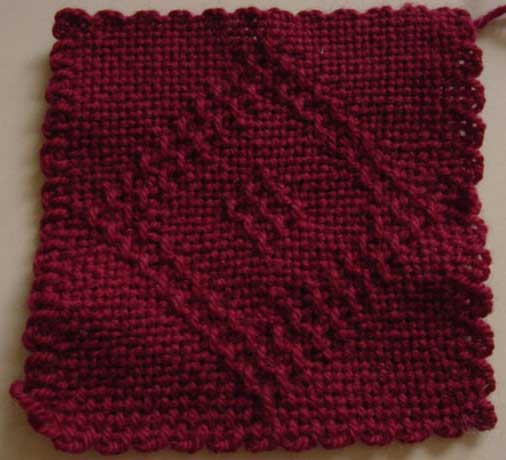
I worked the first style in one colour, again using 8 ply weight wool.

Weavette square with diagonal stripes worked in two colours

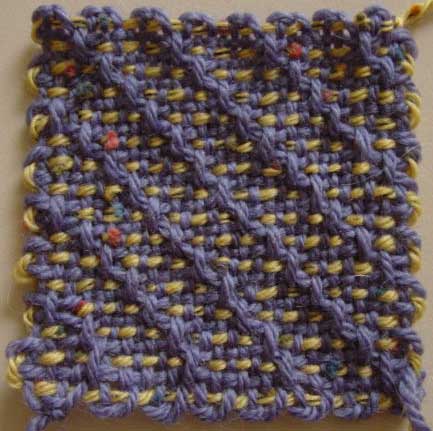
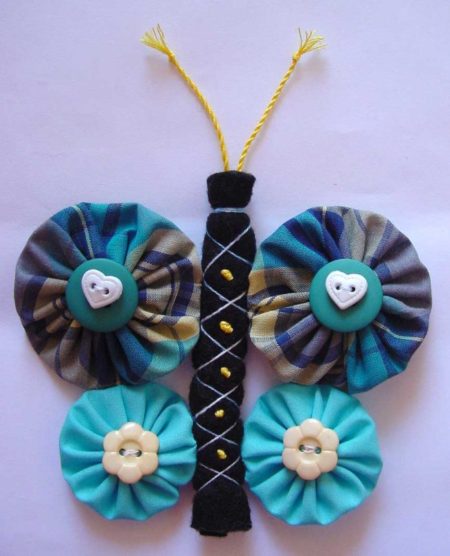
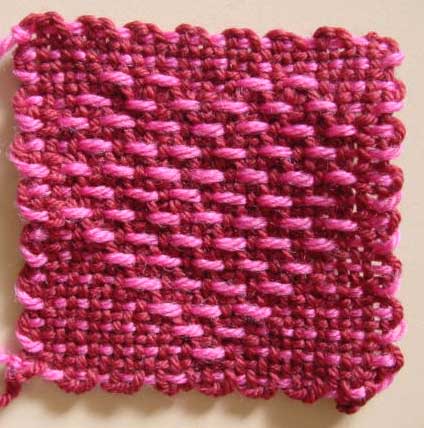
Then I worked the mirrored seven diagonal stripes variation using the same blue for the first three rounds and a speckled yellow 8 ply wool for the weaving. A five stripe diagonal weave was mentioned in the same post so I tried that too.

Weavette square with smaller diagonal stripes

Weavette square with diagonal stripes

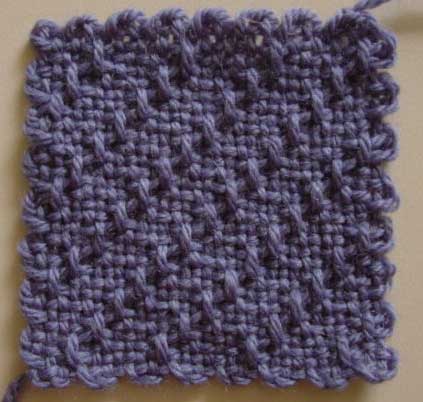
Furrows was the next design. I worked quite a few squares in single colours of 8 ply wools.

Weavette square in furrows design

Weavette square in furrows design

Weavette square in furrows design

Weavette square in furrows design

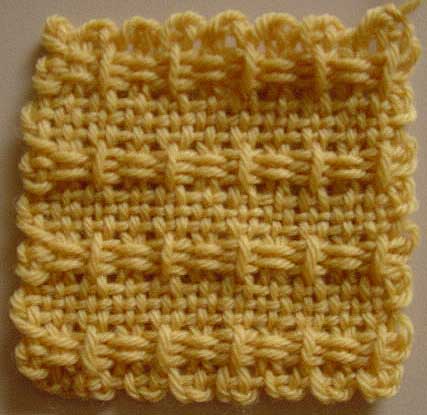
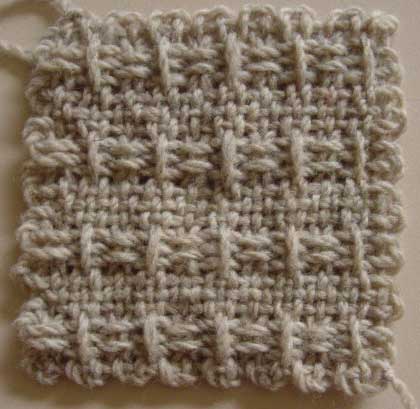
Furrows quickly became another favourite texture weave that I want to play with on my table loom 🙂 Next is the diagonal half square.

Weavette square with diagonal triangle weave

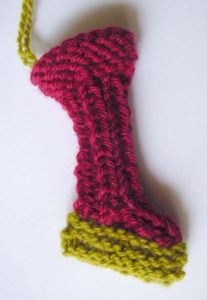
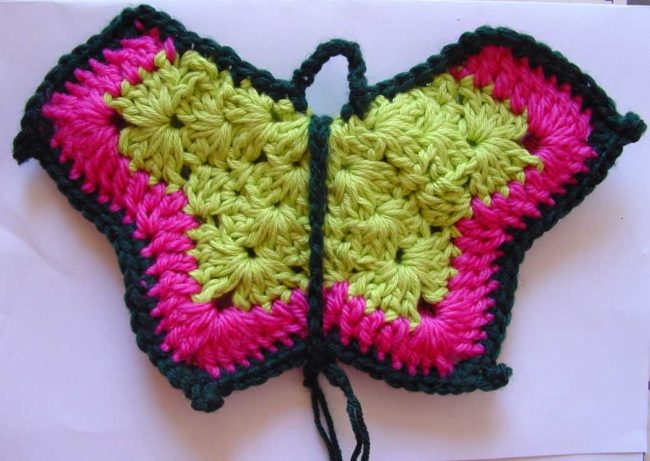
I wound the first variation with three rounds of blue 8 ply weight wool, and wove with pink.

Weavette square in diagonal half square design

Then I wove the mirrored variation in a single colour. I like the two-colour version best as I think it shows up the design more. Next we have rigby weave. I played around with this one quite a bit.

Rigby weave

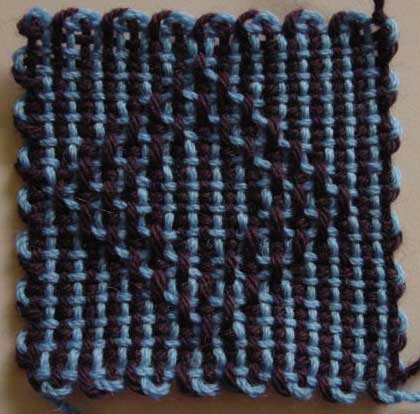
Firstly I wound rounds one and two with a strand of 8 ply weight blue and a strand of 8 ply weight purply-red held together. Rounds 3 and the weaving were done with the blue yarn only. This is entirely too stiff and was a bit difficult to weave.

Rigby weave

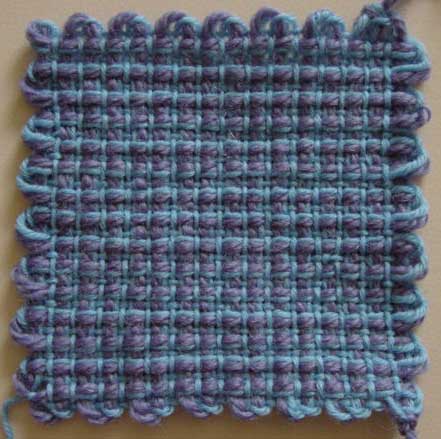
Then I tried rounds one and two with the blue wool and a strand of 4 ply wool (fingering weight) held together and worked round 3 and the weaving with the 4 ply wool. This was much better. I really like the subtle effect with the similar colours.

Rigby weave in boucle

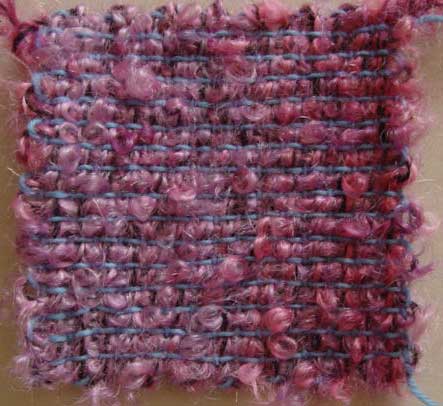
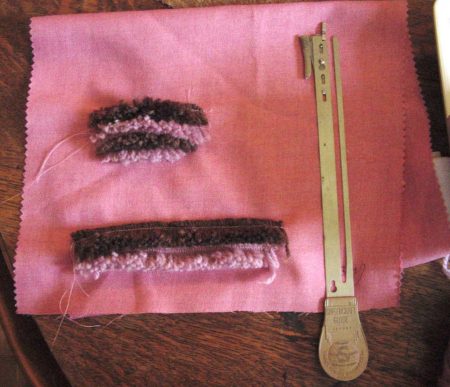
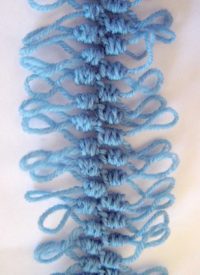
I also tried the first two rounds with two strands of pink bouclé, then wound round three and wove with the same fingering weight blue wool from the previous square. The weaving was surprisingly a lot easier than I thought it would be, given the loopiness and bulk of the bouclé. This one worked out a little stiff though.

Rigby weave weavette square

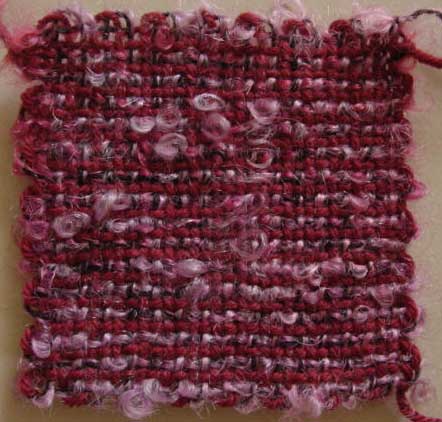
I tried again with a single strand of the bouclé and the third round and weaving worked with the purply-red 8 ply weight wool. This square has a nicer hand but lost the fun of the loopy bouclé texture.

Plain weave boucle square

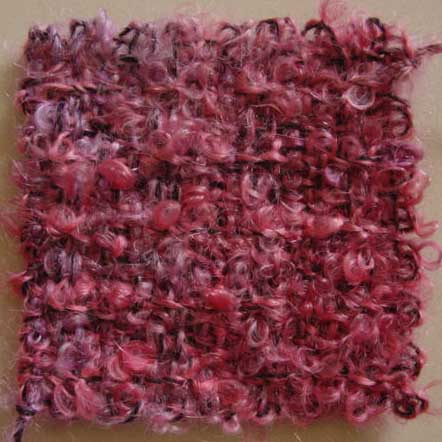
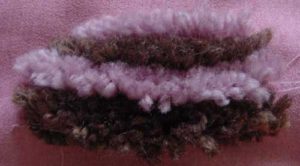
I liked the bouclé so I went ahead and wove a plain-weave square with it. I may use up the rest of the skein in plain weave squares. Once again, I love the texture of it 🙂 Even though I have a set of rectangular looms, I had a go at weaving odd sized rectangles on my square loom. It’s nice to know these techniques in case they’re ever needed.

Rectangles woven on a square weavette loom

I made two, two by four inch rectangles and stitched them together to make a square I could use in my blanket. These are 8 ply weight wools again. I found them to be quite easy to weave once I figured out the technique. Lines and Bars, and Bars and Squares were next.

Weavette square with bar and lines design

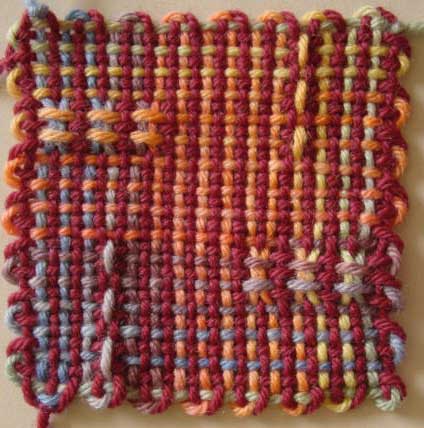
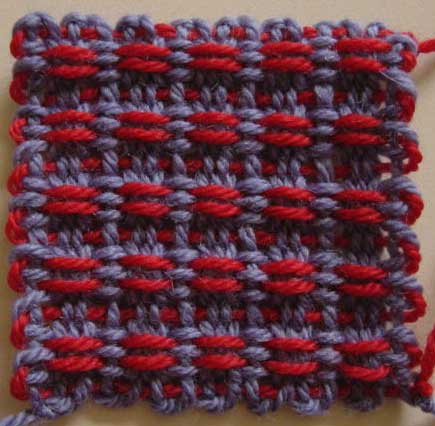
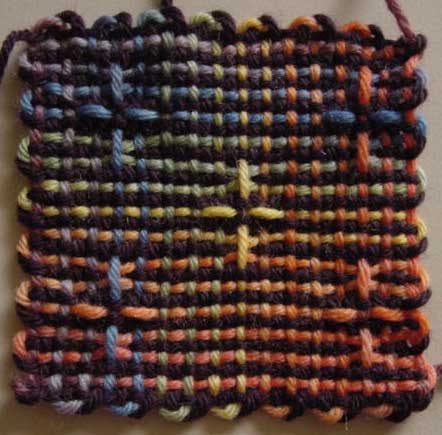
First I wove bars and lines with two rounds of purply-red and two rounds of rainbow. It almost completely obscured the design.

Weavette square with bar and lines design

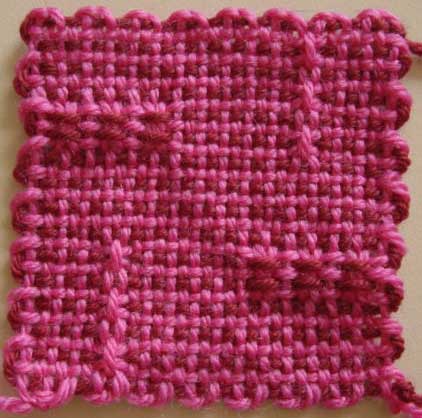
I tried again with three rounds of dark pink and weaving with purply-red. Whilst this is not one of my favourite weaves at least you can see it better this way…

Weavette square with square and lines design

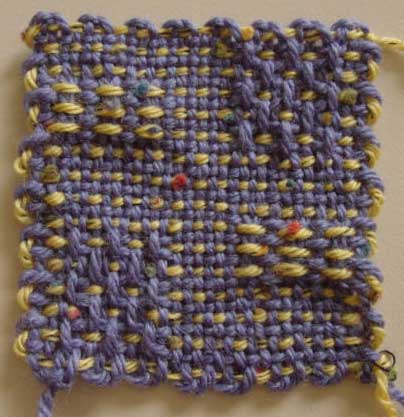
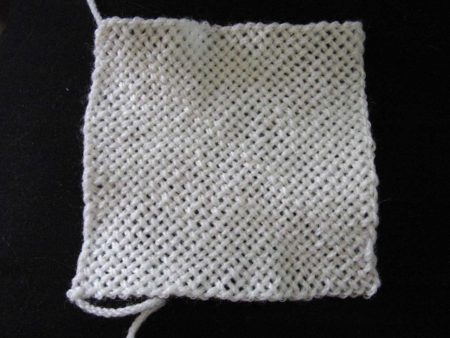
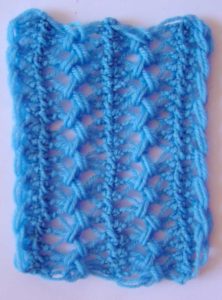
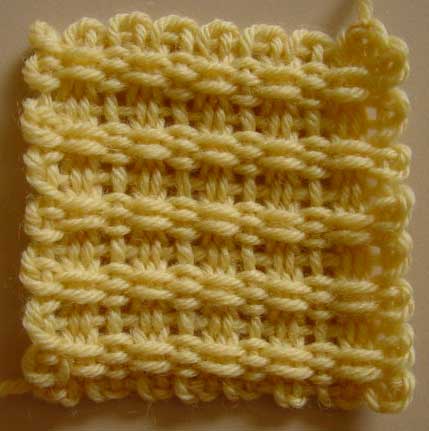
Finally I tried bars and squares the same way, with blue and yellow (all 8 ply weight wools). I only wove one square in eight single rib. I really like it so I shall have to do more. It’s another lovely squishy textured weave.

Single rib design weavette square

I’m not entirely sure if that’s the back or the front… I wasn’t sure if I had done any ribbing weave so I wove this new square in purply-red 8 ply weight wool.

Weavette square in ribbing design

As it turned out, I had done a lot of ribbing squares before I fell ill so this is another one to add to the blanket 🙂 Finally in my square deal weave-along catch-up are the double outline diamond squares that I wove before I fell ill but never blogged.

Four weavette squares in the diamonds weave

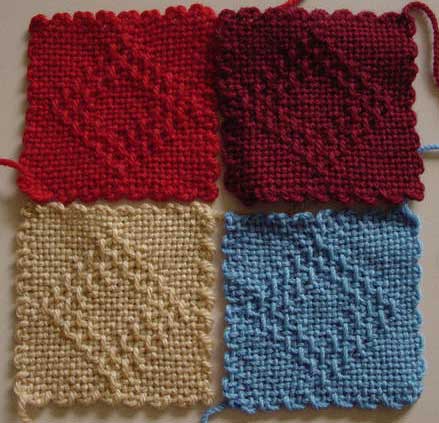
Four 4 inch squares woven with 8 ply weight wools.

Multicoloured weavette square in diamonds design

Two rounds of light blue and two rounds of dark purple. I prefer the plain colours.

Large weavette square with diamond design

A six inch square in light blue 8 ply weight wool

^ inch weavette square in diamond design

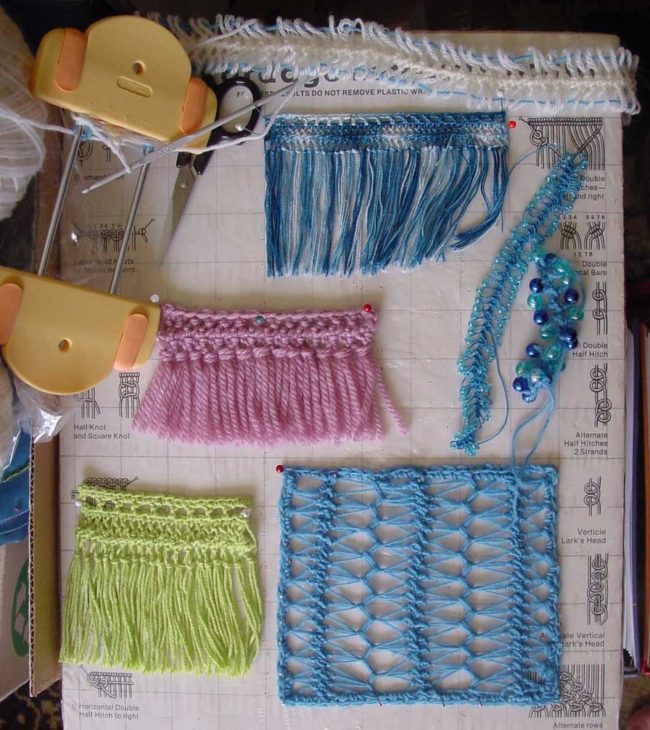
and the same in purply-red. I wove a total of four large squares with this design. That’s all for the square deal weave-along. I didn’t work the fringed squares because I have no need for them in my project but I definitely want to make alion at some stage. That isn’t all the weavette weaving I did though. I played with this weave from the book I bought from the makers of the weavette looms.

Weavette square with plus sign motifs

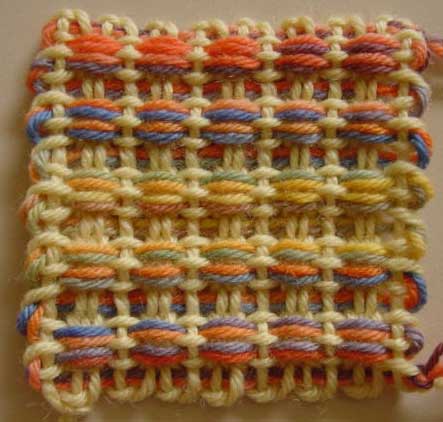
As with one of the previous weaves I did two rounds purple and two rainbow. The busy colours are just too much for the design.

Weavette square with plus signs

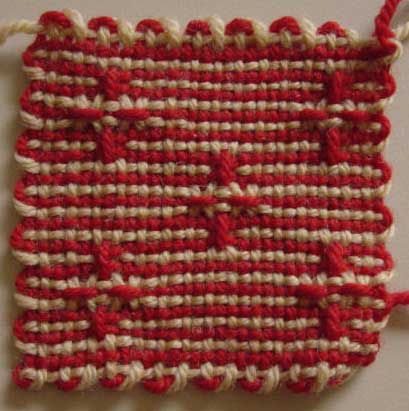
I tried again with tan and red. I think this effect is interesting and would probably work well in two colours that are less “jarring” together.

Single colour weavette square with plus signs

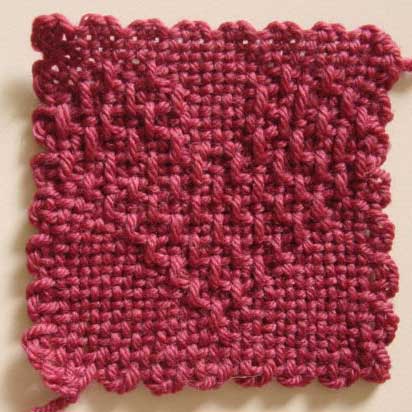
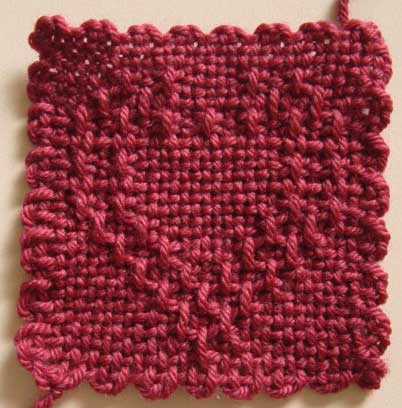
I finished up with the blue again (all of these are 8 ply weight wools). I’m not overly keen on this on the weavette looms but it would make a nice weave on a larger project. Lastly I wove the heart designs that were posted in the looms to go group at ravelry. All of these are worked in 8 ply weight wools.

Weavette square with heart design

I wove this one with pink. This is the back of the weaving. I liked the back the best.

Weavette square with heart design

Weavette square with heart design

Weavette square with heart design

After playing with all of these weaves and designs it dawned on me that I may be able to make squares with the letters of the alphabet. I’m up to “B” so I’ll keep you posted on how it goes!

Click Clack, Stitch Stitch, Sew Sew, Splat Crunch

Ok, technically there is neither a splat nor a crunch, bet hey! Artistic license and all that 🙂
Three or so weeks ago I promised I would upload photos of other projects I had made the next day. Then there was Christmas and New Year’s and swimming and shopping and destashing and…

Let’s just face facts, shall we? This is as fast as I get 🙂

I still don’t have a photo of one of them, but here are the rest.

I finished these wristicuffs for Miss Brittany last night.

Orange wristers

They’re made from some of my very, very early handspun. It’s lumpy and bumpy and dyed with Kool-Aid. It’s also incredibly soft and Brittany asked me to make her something out of it while we were sorting out the garage stash. I wanted to destash it but there you go…

Techy specs – Yarn: lumpy handspun 2 ply merino, approximately aran weight. Spun by me about 10 or 11 (maybe 12) years ago.

Pattern: K1, p1 rib on 4mm needles. 1 inch smaller than wrist circumference (unstretched).
3 inches long

The next projects are quite picture heavy so bear with me. Two Una-na dolls made from the Japanese book by Mimiwn. I love making these dolls. I can see myself becoming quite addicted to making them little clothes and accessories. I had to stop myself buying a little toy kitchen dresser at the op shop the other day because it was the right size for them. (If I had my own, much larger, house I would have bought it).

The black haired one is called Pansy Dollington (Brittany’s) and the brown haired one is mine. Her name is Florence Dollington. Unfortunately Florence has developed a tendency to swear like a sailor when least expected (but definitely *not* when my Dad is around, haha). I suspect she’s got a little bit of a dolly “drinky drinky” problem to tell the truth…

Una-na doll - Pansy Dollington

Una-na doll - Pansy Dollington

I still need to finish sewing Florence’s shirt and skirt. I had to take my sewing machine apart halfway through to clean it, and then everything got put away for Christmas and I haven’t been back to it yet.

This first picture shows her wearing the first unsuccessful wrist warmer as a shoulder warmer type thing. I’m going to put a little felt & button flower on it.

Una-na doll - Florence Dollington

Here she is wearing an early Spring… let’s call it a “ponchette”. (I love that word. It’s so pretentious).

Una-na Doll with Poncho

And finally here she is wearing a ponchette from the same pattern, but in thicker yarn.

Una-na doll with ponchette

Technical details:
The book is unfortunately out of print (Una-na dolls by mimiwn)

The red and beige yarns are discontinued dk weight commercial yarns, and the bright blue is some of my hand dyed handspun yarn with (I think) mohair, angelina fibre and possibly something else thrown in. The blue is 2 ply and a bit finer than fingering weight.
Next is a quickie that I knit at the doctor’s the other day.

Tiny knit Christmas stocking

The mysterious pattern was posted on Cosymakes a few days ago. Since I had just finished all my simple knitting and I had to leave quite soon, I scribbled out the pattern, grabbed needles and yarn and had a go. I just can’t resist small vintage patterns that don’t have pictures 🙂

I love this little stocking boot so much that I’m thinking of making a bunch of them during the year in whatever scraps I still have lying around after my major destash (I’ll get to that BTW).

Techy details: I used thinner yarn and smaller needles than the pattern calls for, but only slightly. The pattern calls for 5mm needles and (I guess) a worsted weight yarn. I used 4mm needles and dk weight. The green is some of my handspun, the purpley red is Jo Sharp DK wool.

Well I think that’s enough for today! I have more projects to share with you but I think I’ll leave them and the story of the destash until tomorrow. I’ve already taken the photos, so you won’t have to wait another three weeks, I swear!

Bias Weaving on a Regular Weavette Loom

Jana from Eloomanation.com recently mentioned on Ravelry that she found some vintage instructions for weaving a bias triangle on a regular weavette and my curiosity had to be assuaged so I sat down with my little 4 inch loom to see if I could figure out how to do it.
First I made a bias woven square so that I could see the effect that the missing pins on a regular weavette have on the finished look of the piece.

Bias Square Woven on a Regular Weavette Loom

Answer: None at all. No wonder Weave-It bias looms didn’t sell well, if you had a regular weavette you didn’t need one 😛

The weaving technique for the triangle was the easiest part to figure out as you can find several excellent sets of instructions by googling instructions for weaving on a triangle loom.

On a triangle loom, the hypotenuse of the triangle (the long edge) is supported by a row of nails so it can’t be pulled too tight. However, on a weavette the edge is completely unsupported.

The trick to keeping the unsupported edge neat is to place a spare weaving needle across the loom and weave around it.

The selvage can’t pull in and you’re left with a lovely neat edge.

Continuous woven triangle made on a weavette loom

Now that my curiosity is satisfied I can get on with my Christmas knitting!

All Over the Place

I’m a bit allover the place with my needlework projects at the moment so I thought I’d give a quick pictorial update as to what I’ve been up to. My keyboard is also dying, which is beginning to make typing difficult (half the top row of keys won’t work and the shift and control keys seem to have a life of their own!)

I received this in the mail this week (I love the ring-only edging on the cover):

Tatting Book number 1

and have decided to use this motif out of it for the doily I wanted to make, instead of the one from Modern Priscilla which I had decided on before. I prefer this one because it’s a bit more complex than the one I was originally going to use, which will make it a bit more challenging.

Tatted medallion

I’ve been working hairpin lace samples for a couple of articles, plus about half of the first strip for my shawl (the white thing at the top)

Hairpin lace crochet samples

I’ve been learning to use the Singercraft tool to make pile fabrics

Learning the Singercraft tool

Singercraft sample

and finally, I started a piece of teneriffe lace on my Koppo cushion

Teneriffe lace in progress on a koppo cushion

The cream thread is size 40 and the “random kingfisher” is size 20. If anyone knows where I can find more random kingfisher in any size thread please let me know! I bought one ball at an op shop so it’s probably vintage but it’s my favourite colour and I’d like to stock up on some more.

Potterflies and Crochet Trees

I finally had time to fix the thread crochet butterfly that I stuffed up a couple of weeks ago!

Thread crochet butterfly

and followed by getting totally carried away making more butterflies 🙂

The first one was meant to be a potholder but I wanted to make it as a decoration so I used slightly finer yarn than the pattern called for. Behold the potterfly!

Butterfly pot holder

and finally, since you just can’t escape the suffolk puff explosion around here, a suffolk pufferlfy of my own deranged devising.

Suffolk puff butterfly

I made the top of the wings with the extra large Clover quick yoyo maker and the bottom with the large yoyo maker. The body is a rolled up strip of felt bound with size 10 cotton and decorated with some french knots.

I’m still playing with hairpin lace techniques. I just found some more patterns in an antique magazine I was looking through last night. Did you know that hairpin lace is also known as hairpin crochet, fork work, krotchee crochet, fourche work, Portuguese lace, Maltese lace and Maltese work? If you’re looking through vintage or antique publications and see references to any of these techniques they may refer to hairpin crochet. Maltese lace and Portuguese lace also refer to bobbin lace and other crochet styles so it depends on the individual pattern. Some patterns just marked as crochet also contain hairpin lacework so it pays to keep your eyes peeled. I had no idea I had so many hairpin lace patterns and techniques in my little collection of antique books and magazines until I read through them all.

Anyway, here’s what I’ve been doing. Since I won’t be adding the hairpin lace section to knitting-and.com until after my brother’s wedding (next Sunday), I’ll put some rudimentary instructions here in the blog for the time being.

First of all, I have come up with a pleasing and extremely simple design for a stole that I want to make for Sunday. (I hope the yarn arrives today!)

Hairpin lace swatch for a stole

Made with fingering weight yarn on a two and a quarter inch staple.

The strips of crochet are made with the double stitch, meaning you work 2 double crochet (US single crochet) into the front of each loop before turning the fork instead of just one. The hairpin braid is then joined together using the cable join as shown here on the Stitch Diva website, but joining two loops through two instead of single loops as shown in the tutorial.

I’m going to make my stole 6ft long (I’m 6ft tall in flat shoes), with white fingering weight yarn, and as wide as I can make it before I run out of time. I want it to be at least 12 inches wide, I hope to make it 24 inches wide though so I’ll need 12 – 25 strips. Wish me luck 🙂

I also had a go at tree stitch, which is great fun to work and makes a really interesting centre to the braid.

Hairpin lace tree stitch in crochet

To work tree stitch, work a slip stitch into the front of the large loop on the fork, pass the crochet hook under the front thread of the large loop, yarn round hook and draw through (2 loops on hook), *yarn round hook, pass the hook under the front thread of the large loop, yarn round hook, draw loop through** (4 loops on hook), repeat from * to ** once more (6 loops on hook), yarn round hook and draw through all 6 loops on the hook. Turn the fork and repeat for the next stitch. It’s really important not to forget the slip stitch to start with.
One thing I did find with the Clover hairpin lace tool is that it feels incredibly awkward with any yarn finer than Aussie 8 ply (DK weight). I ended up switching to a Pony brand hairpin staple in size 4 to work with the fingering weight yarn in these samples and immediately found it a lot easier. Next time I get to the newsagent I’ll pick up a pack of large paperclips to see what I can do with those.

I suppose I should sew my skirt while I wait for my yarn to arrive, but first a cup of tea…