
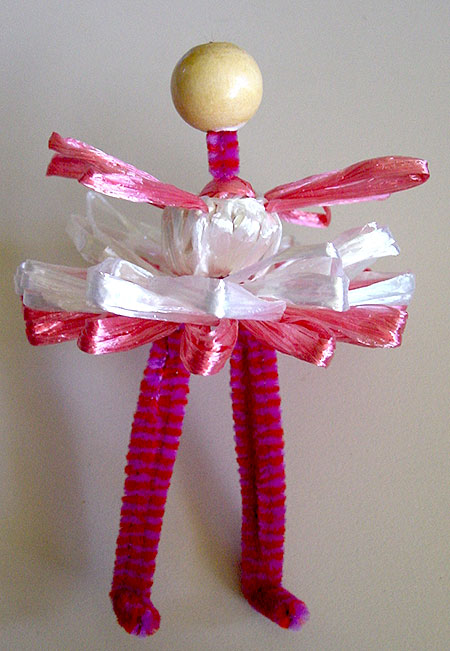
You can make many flower loom characters by joining the flowers in different ways but the most popular has always been the ballerina.
Don’t be afraid by the length of this tutorial. It just looks long because I took photos for each step to make it easier 🙂
To make a ballerina you will need to know:
- how to wind your loom
- stitch a back stitch centre and
- stitch a stem stitch centre
The materials you will need are:
- A loom with two rounds of pegs. I have used a Studio Twelve Multi-Fleur loom.
- 2 x 12″ chenille sticks
- Swistraw or ribbon straw in your choice of colours
- a bead for the head. The size will depend on the look you want and the size of your loom. I have used a ¾”/2cm bead. 1″/2.5cm will also work well.
- paint or permanent markers to draw the face
- glue. PVA or similar.
 |
Firstly you will need to make three flowers. One for the skirt, one for the bodice and one for the hair.
For the skirt, take one colour and wrap the bottom of your skirt as shown in the photo on the left. Go around the loom three times so that each petal has three loops. Use your choice of the flat or layered wrap. |
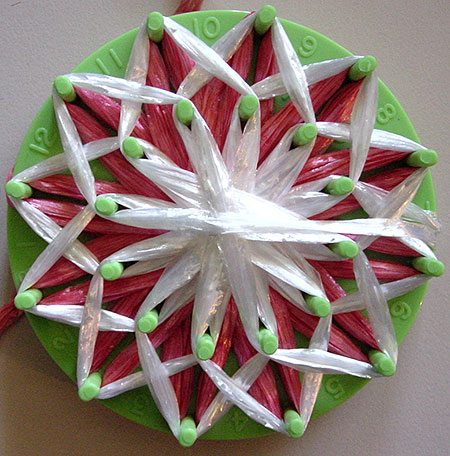 |
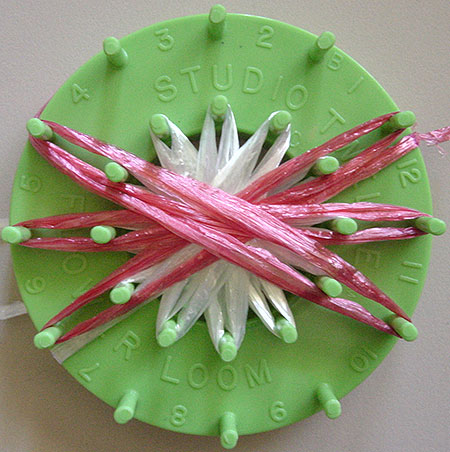
Change colours and wrap as shown in the photo on the left, or your choice of design.
See the straw daisies instructions for step by step photos on how to wrap this layer. Go around the loom three times. Again, use your choice of the flat or layered wrap. |
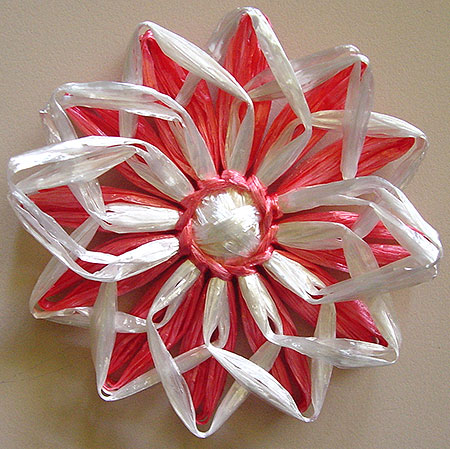 |
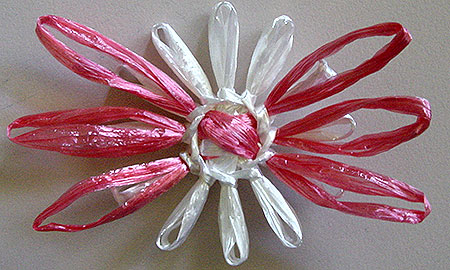
Stitch the centre using either colour. I like to work a back stitch centre covered with stem stitch.
Hide all the loose ends so they don’t show anywhere. I used a sharp needle to hide the ends under the centre on either side. |
 |
Next make the bodice and arms.
Using one colour wrap around the small round on your loom three times, as shown on the left. Cut the straw, leaving enough to stitch the centre if desired. |
 |
Change colours and wrap around half of the petals as shown on the left. Wrap each petal only once. |
 |
Stitch the centre using your choice of colours. Work a back stitch centre covered by stem stitch.
Trim the ends and hide them on the back. |
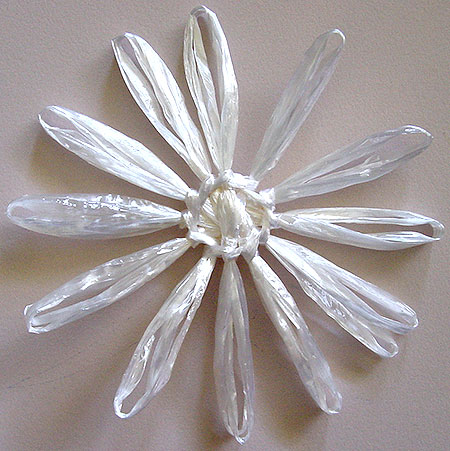 |
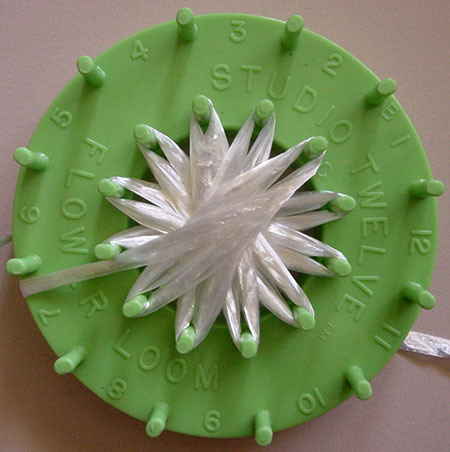
Lastly, make the hair.
Using your hair colour, wrap the largest round on your loom at least twice and stitch the centre using the same colour. Remove your flower from the loom. Hide the ends in the back. They won’t show when the hair is glued to the head. |
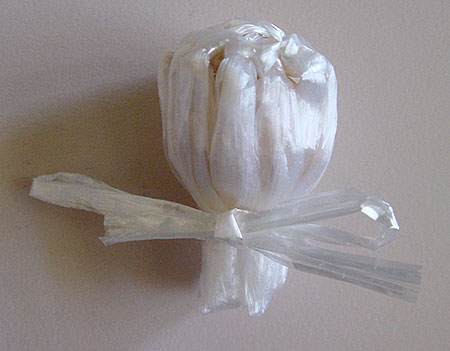 |
Dampen the flower slightly and press it down over the bead you will be using for the head.
Tie it underneath using a scrap of straw and set it aside to dry. Once it is dry you can remove the tie and your hair will be permanently shaped. |
 |
Now it’s time to put it all together 🙂
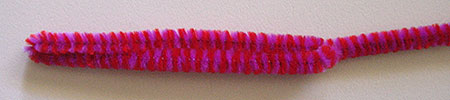
Measure 3½”/9cm from the end of each chenille stick and fold it up to form a double length for the legs. Give it a twist at the top to hold it in place. |
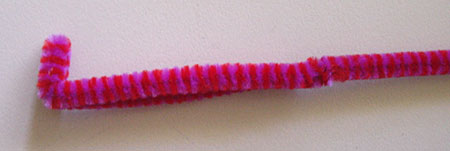 |
Bend up about ½”/12mm up from each end to form the feet. |
 |
Make a hole at the edge of the centre of the skirt so that it does not pierce the stitching and thread one chenille stick through the hole.
Insert the second leg on the other side of the centre. They should be about ½” apart. |
 |
Twist the chenille sticks together above the skirt and cut one off. |
 |
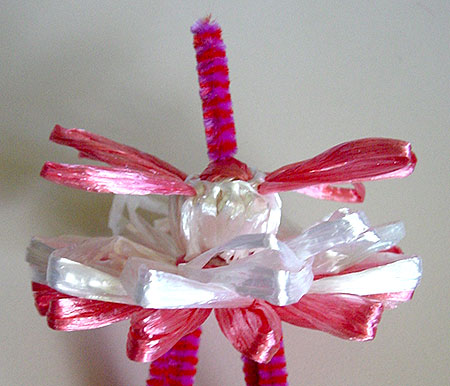
Pierce the bodice flower in the centre (with the arms on top) and thread the chenille stick through. |
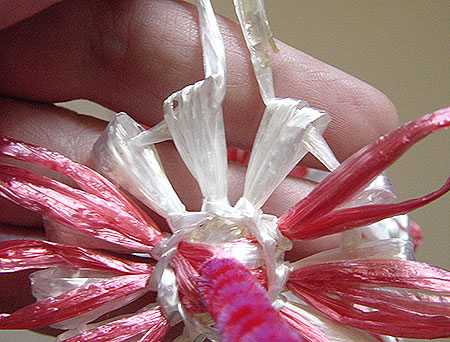 |
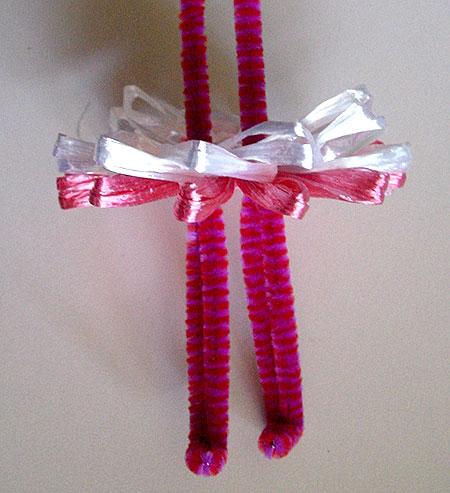
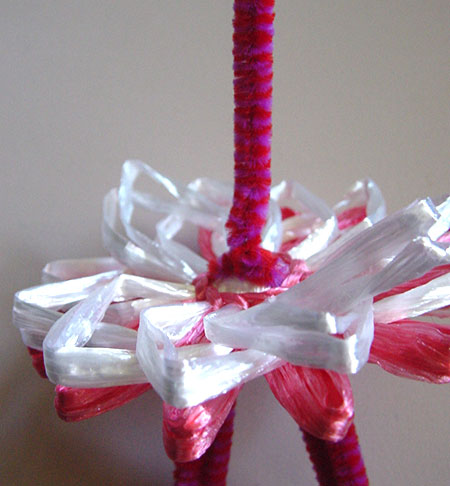
Take a length of straw the same colour as the small petals on the bodice and thread it through all of the small petals. |
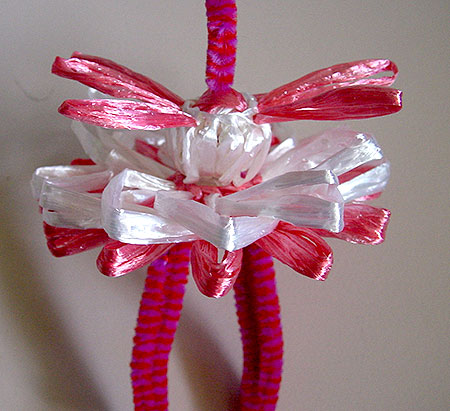 |
Gather tightly against the chenille stick to form the ballerina’s body.
This can be a little fiddly if your straw is quite stiff. Gather it, then use a blunt needle to push the gathering thread down to the ends of the petals and you’ll find it much easier. Clip the loose ends of the straw short and poke them inside the gathered puff to hide them. Push the bodice down towards the skirt so none of the chenille stick shows. |
 |
Cut off the remainder of the chenille stick, leaving about 1″ to glue inside the head. |
 |
Glue the bead onto the end of the chenille stick, leaving about ½” of the stick exposed to make the neck.
The bead will look a little small now but once you put the hair flower on top it will look in proportion. If you don’t want the chenille stick to show for the neck you can wrap it with some skin toned florist’s tape or some ribbon straw to hide it. |
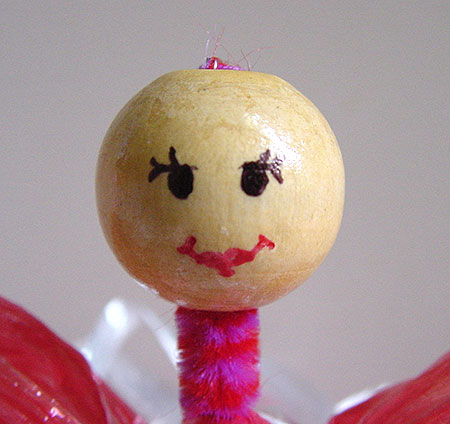 |
When dry, draw or paint the face on the bead. |
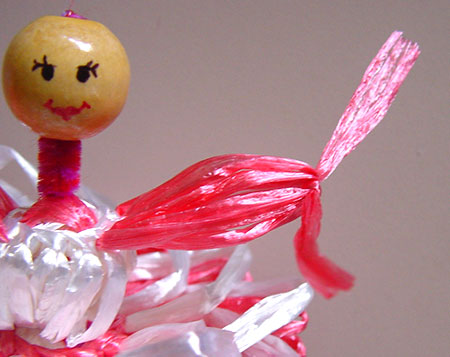 |
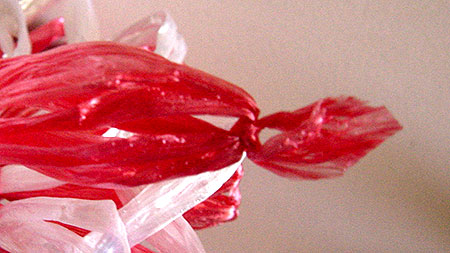
For the hands, cut a piece of straw and use it to tie the arm petals together by threading it through the loops and tying in a knot. |
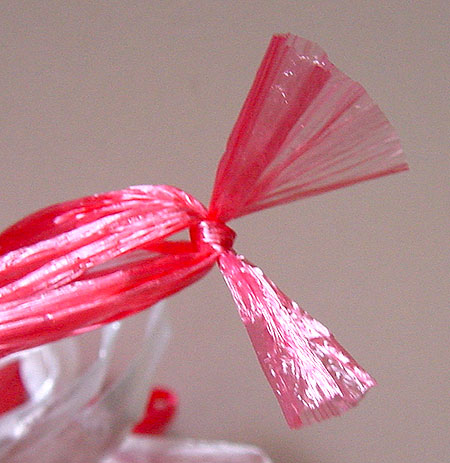 |
Clip the ends of the straw to about ½” and open them out. |
 |
Glue the two sides of the straw together. When dry, cut them into an almond shape to look like hands. |
 |
When the hair is dry, cut off three of the petals to within about ½” of the centre stitching to form the fringe/bangs.
Glue the hair to the head. If necessary, a piece of straw can be tied around the bottom of the hair to hold it in place while the glue dries. |
|
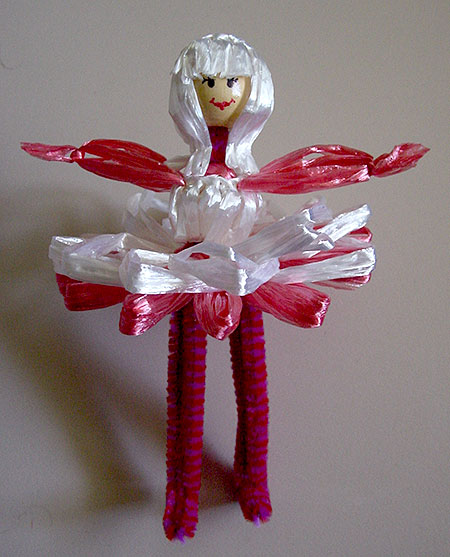
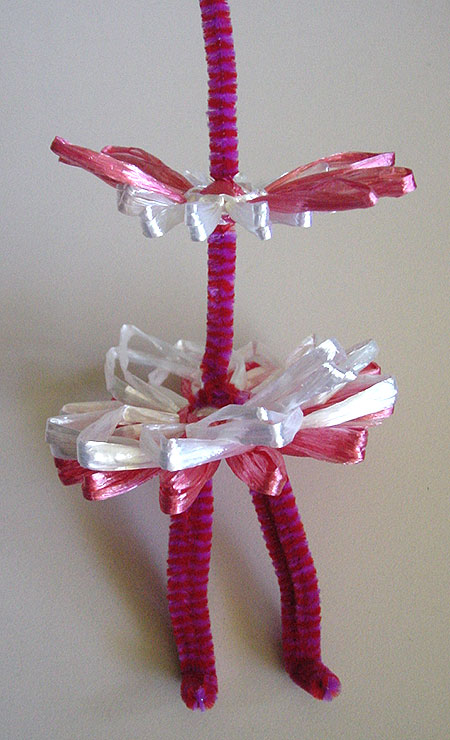
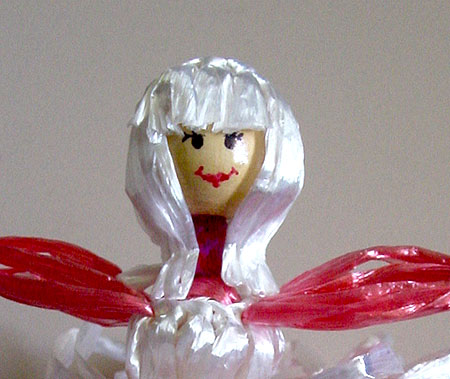
My finished ballerina. |
The project is based on the “Swistraw Dolls” project from “Swistraw and Flower Looms” by LeJeune Whitney, 1969. Updated text and images are copyright Sarah Bradberry, April 25th 2011. All rights reserved.