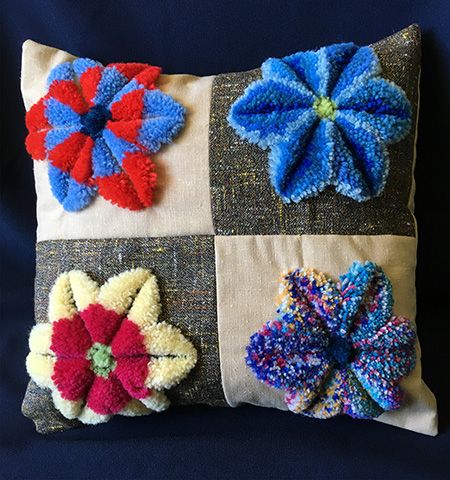
This pillow is worked in plushwork on four 20cm/8″ squares that were then sewn together and made into a cushion using the method in my envelope cushion tutorial.

To make German tufted wool embroidery you need a few simple tools, beginning with a template.
For this tutorial I used a vintage “Kay’s Practical Embroiderer” template but you can make your own. Download and print this pdf file, stick it to firm card stock and cut the templates out. Alternatively, you could cut them out of a sturdy plastic such as the side of a plastic milk carton or plastic ice-cream tub.
Place your fabric in a hoop and put the template in place. Make sure the grain of the fabric is straight, with threads going directly up and down and side to side (not at an angle).

A strong yarn will work best. I like to use a single strand of tapestry wool or two strands of fingering weight sock wool.
For this tutorial I will be using tapestry wool in four shades of blue (three are shown in the photo), with light green for the centre pom-pom.
Choose a fabric that does not have too tight a weave or you will have difficulty pulling the needle through.
For my cushion I used a medium weight fabric with mixed fibre content.

The centre pom-pom is worked first to hold the template in place.
Every time you start a new length of yarn, begin by tying a knot in the end.
Thread the other end in a sharp needle that is approximately the same thickness as your yarn.

To begin the pom-pom, bring the yarn up through the centre.

Then stitch down on the outer edge of the centre circle.

Bring the yarn up right next to the previous stitch on the same side.

Then down through the centre again.
This stitch is called surface satin stitch.

Continue around the centre until you have at least 2 stitches between each petal.
If you don’t want a pom-pom in the centre of the flower you can tack the template in place using sewing thread that you remove later.

Make another round of stitches.
For a full, plush pom-pom keep stitching until you can’t fit any more stitches through the centre circle.

Tie a knot on the back and cut your yarn.

Using your first petal colour, work exactly the same way across each petal. Going down on one side and up again on the same side. You should only have long threads on the front of your work.
I started with my darkest shade of blue.

This is how your stitching should look on the back.

Keep going until you reach the end of the petal.
If changing colours, tie off the yarn on the back as you did for the centre. If you are using just one colour, you can stitch to the end of the petal, then back towards the centre without cutting the yarn.

The first layer completed.
Isn’t it pretty?
Now we’re going to cover it up.
🙂

Work the second layer directly over the top of the first.
Work the stitches as close as possible to the previous row.

Keep working until you have completed 3 or 4 layers.
The number of layers you work will depend completely on your choice, the thickness of your yarn and the size of the motif you’re working.
I worked four layers on my cushion.

Now comes the scary part. Cutting up your embroidery!!!
Start by cutting through all the layers of embroidery on the pom-pom where I have drawn a circle.
Use a very sharp pair of pointed, medium sized scissors.
Cut one or two layers of thread at a time. Don’t try cutting all the way through in one go, you’ll hurt your fingers and break your scissors.

Look, a baby pom-pom!

Now that nothing disintegrated and you’re feeling brave, cut up the middle of the petals too.
Snick,
snick,
snick…

A petal!

Keep going and cut up the centre of all of the petals.
Now take a really close look and make sure you really have cut through all of the threads or you won’t be able to get the template out.

Carefully remove your template by pushing the threads between the petals.
Don’t pull on the template as you’ll bend or break it.
Cut any threads that are still holding on.

The finished flower.
You can work any colour scheme you can think of. For this flower I started with dark blue and worked each layer a shade lighter.
You can see several other ideas on my cushion, including using two different fingering weight, self striping sock yarns held together to make the speckled flower.

So why didn’t it all fall apart?
Look at the back of the work.
Each row of stitching is so close to the previous row that it holds it in place.
You can’t remove the threads unless you take a needle and a lot of patience to the back of the work and spend countless hours trying to pry them out.
Check out my plushwork pinterest board and you’ll see some quilts and cushions that are a hundred years old with all their flowers perfectly intact.

Hollow shapes can also be worked in this way.
Again, I’m using a template from the first set of Kay’s Practical Embroiderer. This shape is also included in the downloadable file, or you could use a very large, flat washer.

Work around the circle (or other shape), for three or four rounds.

This is how the stitching looks on the back.

Cut through the centre of the threads, just as you did for the pom-pom on the flower shape.

You’ll end up with larger pom-pom with a “mane” around the edge.
This technique will work for any hollow shape.

Remove the template or washer, making sure all the threads are cut all the way through.

The finished circle.

Long shapes are worked exactly the same way as the petals

A leaf worked in a single colour.

Several samples of circles and leaves.

Add a little embroidery and your picture is finished!

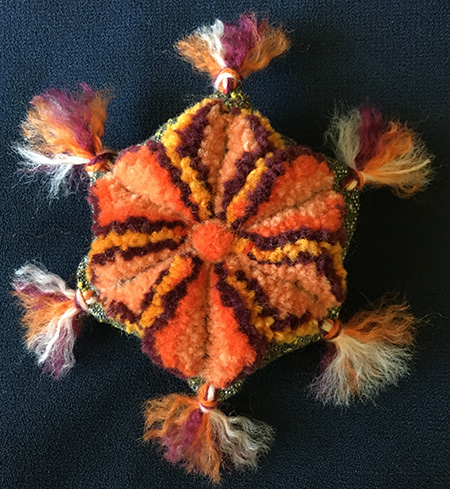
A word of warning: this technique is quite addictive. I started with this little pincushion and now I want to work tufted embroidery on everything…
Copyright Sarah Bradberry, November 30th 2015. All rights reserved. You may not edit, email, publish, or distribute the contents of this page in any form without the prior permission of the copyright holder.
