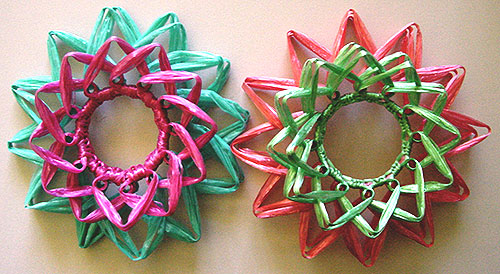
Flowers with large opened centres make great photo or mirror frames.
You could also use them as fancy surrounds for Christmas baubles if you can find foam shapes that fit in the middle.
You can create a large number of effecs with the open centre. Make double sided flowers for hanging or use the flat or layered wraps for different heights.
 |
To make a flower with a large open centre you will need a loom with three rounds of pegs. I have used a Studio Twelve Magni-Fleur loom. You will also need a type of glue that dries clear, such as PVA glue.
I have made my sample flowers with ribbon straw. Start by wrapping the large petals as shown in the photograph. If you’re making a surround for a Christmas bauble, start with small petals (shown later) so you have them on both sides.
|
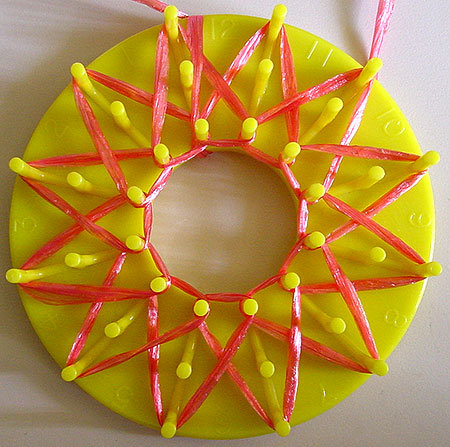 |
To make a flower with fluffed out petals use the “layered wrap” technique. This means you go all the way around the loom, wrapping each petal once. Go around the loom as many times as you like (in this case you’ll go around three times). |
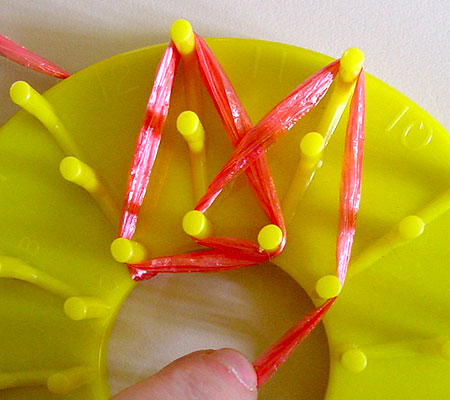 |
To make a flatter flower you use the “flat wrap” technique. This means you wrap one petal as many times as you want before going on to the next one.
In the photo on the left the first petal has been wrapped three times before going on to the next petal. |
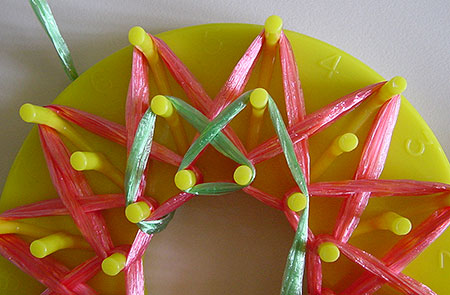 |
The next step is to wrap the small petals three times, using the flat or layered wrap technique (you don’t have to use the same technique on both rounds).
|
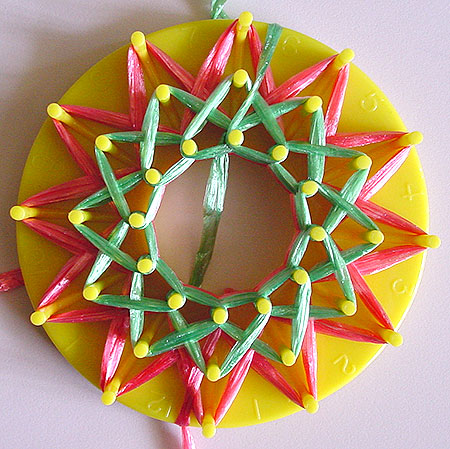 |
Wrap the small petals three times as well.
Cut your ribbon straw, leaving about a yard of ribbon straw to stitch the centre. Thread the tail end into a blunt needle. |
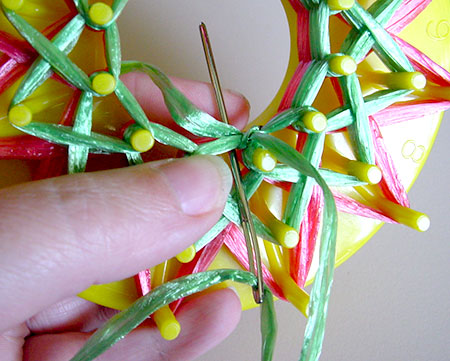 |
The centre is worked using buttonhole stitch.
Put your needle down behind the centre strand as shown in the photo. |
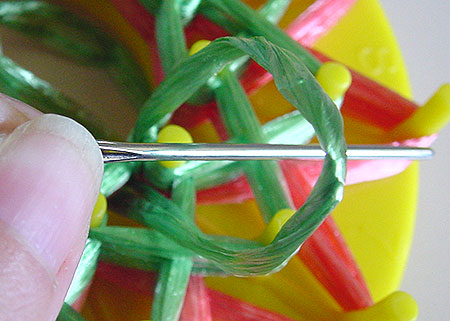 |
Pull the thread through until you have made a loop on the right side of your flower.
Put the needle through the loop and pull tightly to create the buttonhole stitch. Cover all the loose ends as you go and trim them close to hide them. |
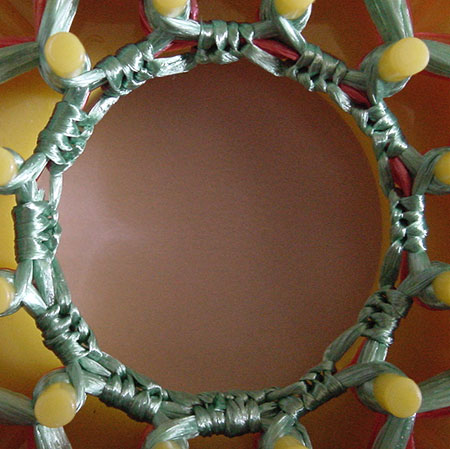 |
Work four buttonhole stitches in each section. Don’t be tempted to fit in more or you’ll have a lot of trouble getting the flower off your loom.
When you have finished stitching, push the top of your stitches toward the centre so they look like the ones in the photo. Hide the end of the ribbon straw by threading it into a sharp needle and threading it under the back of a few buttonhole stitches and cut it close. |
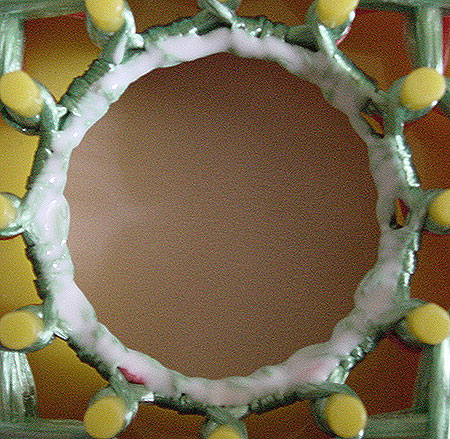 |
Paint the inside of the centre with glue and let it dry before removing it from the loom. This will keep the centre in shape once the flower is removed from the loom. |
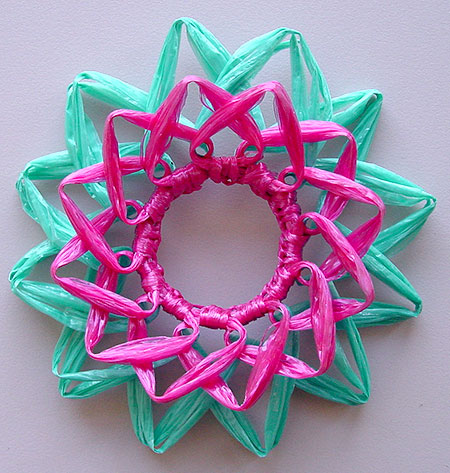 |
A finished flower made with the flat wrap technique. |
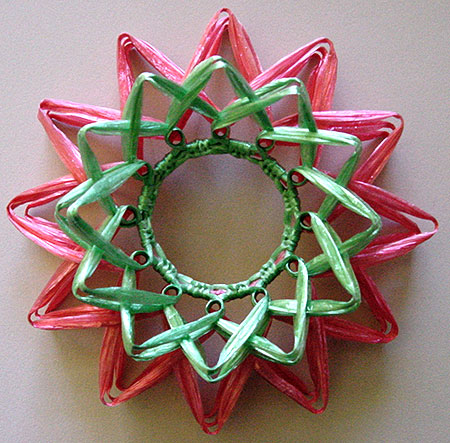 |
A finished flower made using the layered wrap technique. |
 |
Here you can see the difference in the height of the flowers.
If you stick a covered foam ball in the centre you can pull a layer of petals forward and pin them to the ball to create patterns. |
This text is based on the “Hole-in-the-middle wrap” instructions from “Swistraw and Flower Looms” by LeJeune Whitney, Copyright 1972. Images Copyright Sarah Bradberry, 10th April 2011. All rights reserved.
