See the small looms page for tutorials on many techniques for stitching the centre of your flower.
The Layered Wrap
The layered wrap is used for flowers with maximum volume. The difference between this wrap and the following “flat wrap” is most clearly seen when you make your flowers with Swistraw or ribbon straw.
It’s also a good way to wrap flowers that you want to stitch with an open centre because the exact middle of the flower is very obvious.
Winding the yarn onto your daisy loom is done the same way, no matter what shape your loom is.
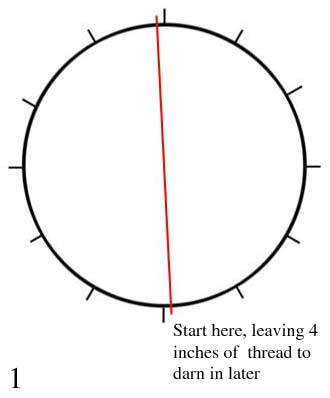
Hold your loom so that you have a pin or peg directly at the top and bottom.
Leave at least 4 inches of thread to darn in later. You can wind it around the knob on a daisy loom, or stick it to the back of a flower loom with some sticky tape.
Begin at the bottom, on the right of the pin and bring the end of the yarn (that is still connected to the skein) up to the left hand side of the top pin as shown in the diagram above.
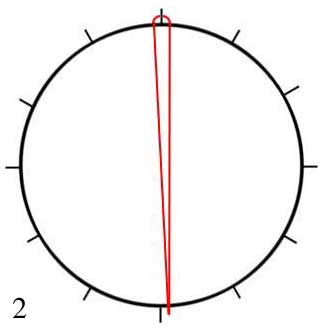
Wind your yarn around the back of the top pin, then back to where you started.
Don’t pull the yarn tight. It should be just snug enough to prevent it falling off. If you pull it tightly your flowers will be an uneven size and shape.
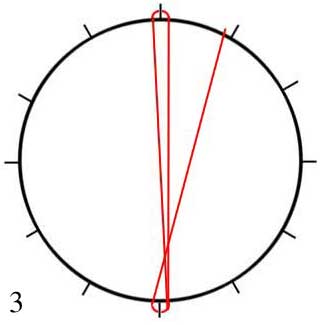
Wind your yarn around the back of the bottom pin, then up to the pin on the right hand side of the top one.
If this is awkward, rotate your loom anticlockwise while you wind so that the next pin is always at the top.
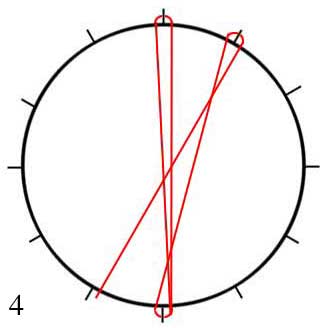
Bring the yarn back down to the right hand side of the next pin at the bottom as shown in the diagram above.
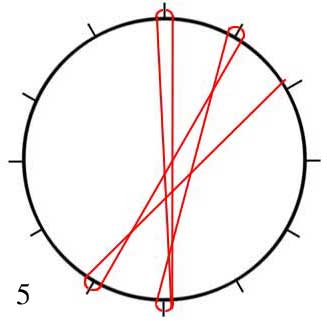
Continue winding in this manner until you have wound yarn around all the pins.
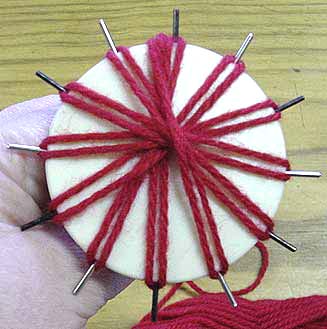
If you’re not using a very bulky yarn, winding around the loom just once might not be the look you’re after. Continue winding around all the pegs until your flower is as dense as you want it to be.

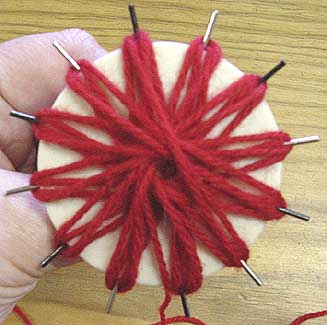
My loom on the left is wound twice with dk weight wool (that’s 8 ply to my fellow Aussies).
When you’re done, bring your yarn back to the centre of your flower, then measure the length of yarn you need to stitch your centre and cut the yarn.
I find that 12 inches is usually more than enough for most of the centre stitching styles on a 2 and a half inch loom.
Note: If you want to do a knotted edging leave an extra 12-15 inches of yarn.
For a list of tutorials on finishing the centre of your flower see the flower looms index page.
The Flat Wrap
The flat wrap is made in almost exactly the same way as the layered wrap. This wrap style creates flowers with less volume. When you use this winding method with Swistraw or ribbon straw your petals will look more formal and not fluff apart as easily.

To make the flat wrap, instead of working all the way around the loom multiple times you complete the wraps on each petal one at a time.
Begin at the bottom, on the right of the pin and bring the end of the yarn (that is still connected to the skein) up to the left hand side of the top pin as shown in the diagram above.

Wind your yarn around the back of the top pin, then back to where you started.
Don’t pull the yarn tight. It should be just snug enough to prevent it falling off. If you pull it tightly your flowers will be an uneven size and shape.
Now wind around the same two pins as many times as you desire.
Continue working around the loom once in the same way as you did for the layered wrap, only working all of the wraps for each petal before moving on to the next one.
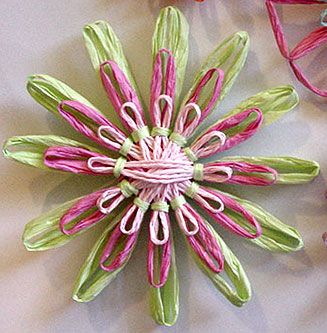
This paper flower was made using the flat wrap technique. It’s not immediately obvious because they sit directly on top of each other, but there are two layers of large green petals around the outside of the flower.
The flat and layered wrapping techniques can be combined in different layers of the same flower to create different effects.
Copyright Sarah Bradberry September 2006, updated April 9th 2011. All rights reserved.
