
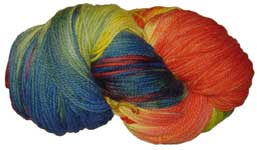
The rainbow dyeing technique is a wonderful introduction to dyeing your own yarns and fibre because you don’t have to worry about achieving an even colour.
You can dye finished yarn (commercial or handspun), roving, or fleece in wool, silk, alpaca, mohair, or any other protein fibre (fibres that come from animals). Rayon and nylon will also dye using this method. Another benefit is that you can buy most of your tools at garage sales or op shops for very little money.
You will need:
- 1 paper dust mask (a few cents at your local hardware shop)
- An apron or old shirt to protect your clothes
- Rubber gloves. The thin disposable ones work well. If you really hate rubber gloves and are careful to minimise your contact with the dyes you can use a barrier cream on your hands instead.
- 3 empty glass jars
(the 500ml size that most spaghetti sauce comes in are a good size) - An old teaspoon that you’ll keep just for dyeing
- A stick or old cooking utensil for poking your yarn to help the dye soak in (I use an old fork that I keep just for this purpose).
- An old saucepan that you’ll keep just for dyeing. Steel or unchipped enamel are the best types.
- Household white vinegar
- Dishwashing detergent
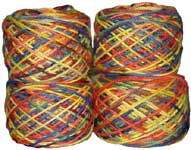
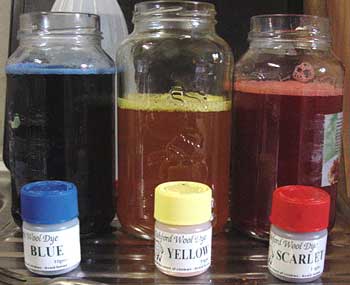
- 3 colours of Ashford’s acid dyes. I used the colours from the Rainbow Dye Kit: yellow, scarlet and blue
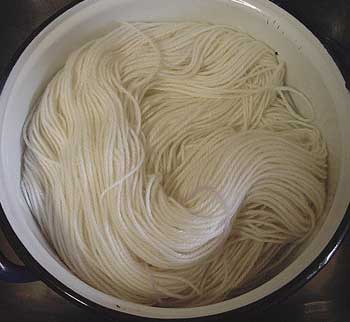
- Yarn or fibre for dyeing. In this example I dyed 200gm of 8 ply Holiday Brand handwash only 100% wool. You can also dye superwash wool, as well as any of the fibres listed above.
 |
1: Soak your yarn (or clean fibre) in warm water with a teaspoon of dishwashing detergent for at least half an hour.
Spin or squeeze out the excess water. You want your yarn or fibre to feel slightly damp but not dripping wet. |
 |
2: Put your yarn/fibre into the pot |
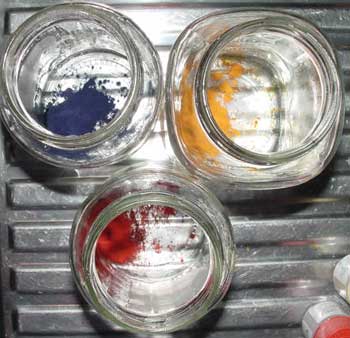 |
3: Take 3 jars and, wearing your gloves and dust mask, add 1/2 teaspoon of dye to each jar. |
 |
4: Add enough hot water to dissolve dye and mix well. You need to add just enough to dissolve the dye into a paste. You can now take off the dust mask as you won’t need it again.
5: Fill jars to 3/4 full with water 6: Add 2 tablespoons (30ml) of white vinegar to each jar. Mix well |
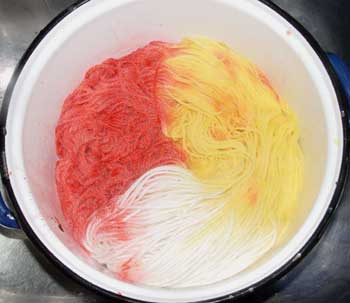 |
7: Now it’s time to put the yarn and dye together!
Pour some dye liquid into each of three separate areas. Use just enough dye liquid to colour the yarn/fibre without leaving it sitting in a puddle. The colours will mix where they meet. You can pour the dye in any sequence you like. I’ve used pie wedges so that I can have green, orange and purple where the original colours meet. |
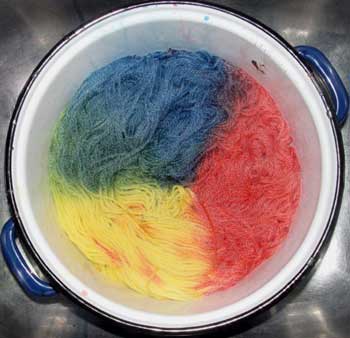 |
8: Press each colour gently until you cannot see any white. DO NOT STIR. It is important to press your wool/fibre gently so that it won’t felt and mat together.
9: Place the lid on your pot. It’s important that your lid fits properly on your saucepan so that your fibre doesn’t dry out and burn. |
 |
10: Cook for 30 minutes
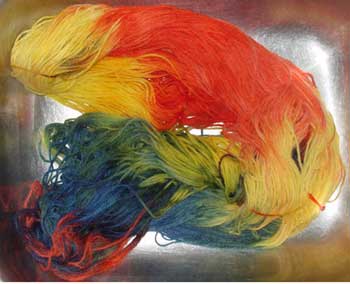
If you cook at a low temperature (light simmer) you will get bright colours If you cook at a high temperature (maximum temp) you will get dark colours. 11: Let your wool/fibre cool down until it it can be handled comfortably and rinse in water that is as close to the temperature of the wool as possible. If it isn’t sitting in any coloured dye liquid you can safely leave it overnight to cool down. If you’re like me, you’re just not that patient! 12: Lay or hang out your yarn or fibre to dry in the shade. If you have an old fly screen or something similar, you can lay this across a couple of chairs and put your wool on the screen so that you have an even air flow and your wool will dry much faster. |
You can easily dye more than 200gm of yarn or fibre at once. Make up a larger amount of dye, use a large pot (I use an old Fowler canning kettle that can be seen in the photos below), and put your yarn or fibre in about 1/3 at a time. Add more fibre, repeat steps 7 and 8, then repeat if necessary.
Experiment with various colours and different strengths of dyes for an infinite number of results. 1/8 of a teaspoon of dye in each jar will give pale pastel shades, different amounts of the same colour in each jar will make various shades of the same colour.
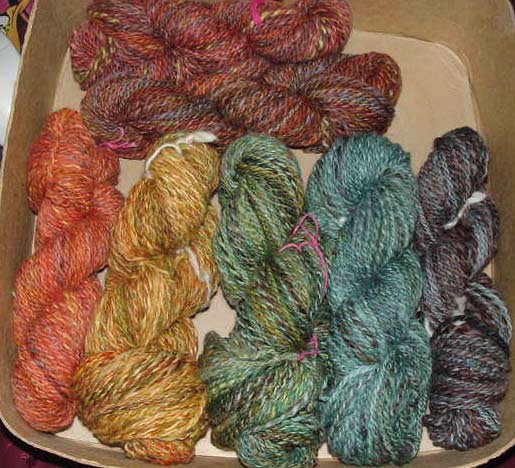
Here are some I prepared earlier…
Below are some fibres that I have dyed using the same technique. Note: The dyepots shown below have quite a bit more liquid in them than they should for the best results. Ideally you should just have enough liquid to colour your fibre or yarn without making puddles of dye. Click on the thumbnails for a full sized image.
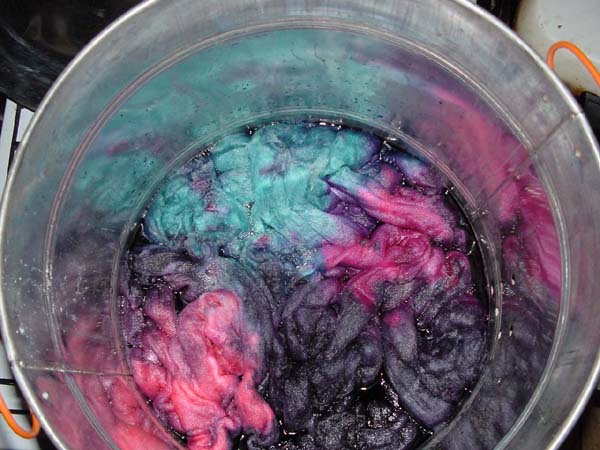
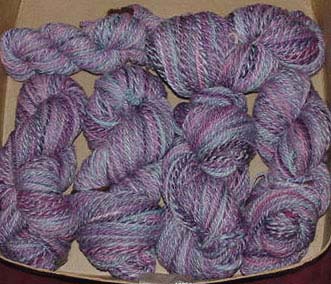
22 micron merino roving dyed with hot pink, teal, purple and navy blue. I split the roving lengthways and spun a 2 ply, 8 ply weight yarn.
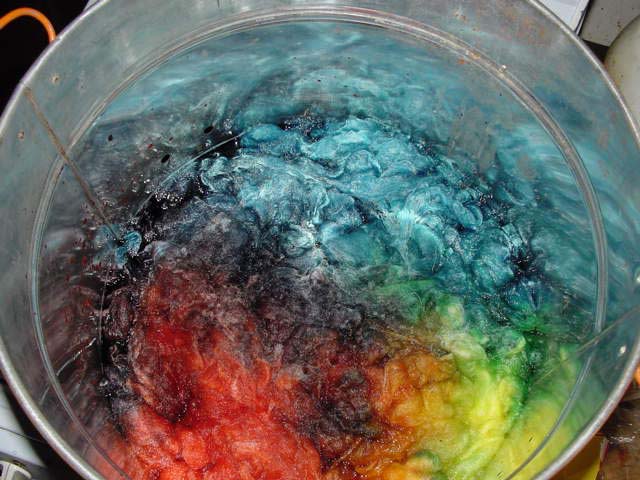
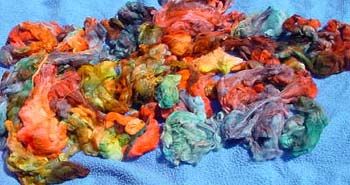
Australian Finnsheep fleece dyed with yellow, scarlet and teal. I separated the dyed locks into their various colour groups, then flicked the tips (3 or 4 locks at a time) and spun it into a 2 ply, 12 ply weight yarn. I wouldn’t normally spin Finn fleece this thick but the sheep had missed a shearing and the wool is quite coarse, rather than the buttery soft quality that Finn wool normally has. Because I used too much dye liquid the yellow and scarlet dye mixed too much and I didn’t end up with any red yarn.

Photos and text copyright Sarah Bradberry. All rights reserved.
The text is based on instructions by Ashford’s Handicrafts of New Zealand and is used with their express permission.
To find your local Ashford stockist, visit the Ashford website at http://www.ashford.co.nz