
 |
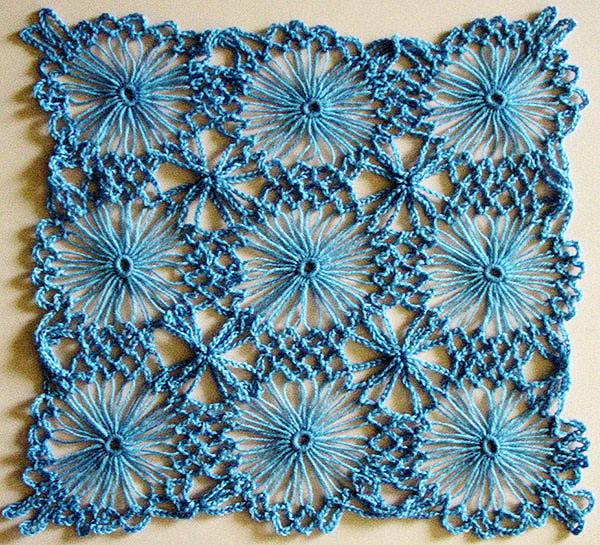
The small flower join is used to join loomed flowers with twenty four petals. | |||||||||
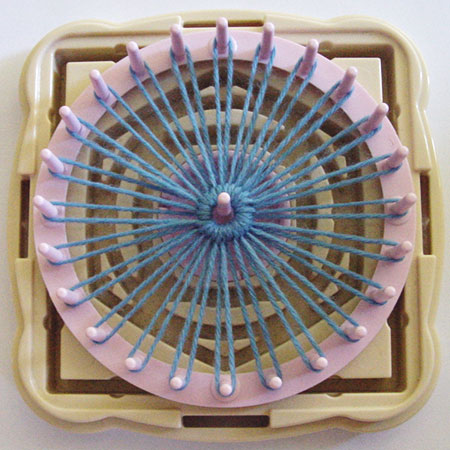 |
I have used the large circle on the Clover Hana-Ami loom to make the flowers for my sample piece | |||||||||
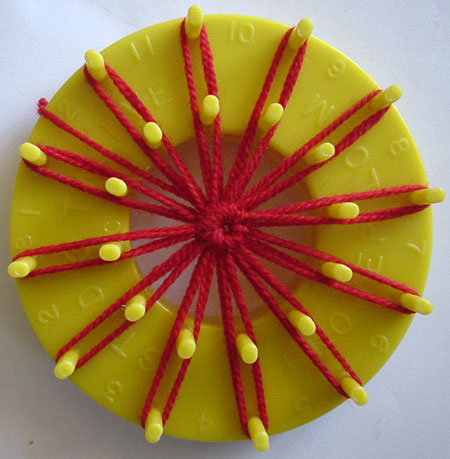 |
but you can also use the Studio Twelve Multi-Fleur loom, or any other twelve petal loom that makes similar sized flowers.
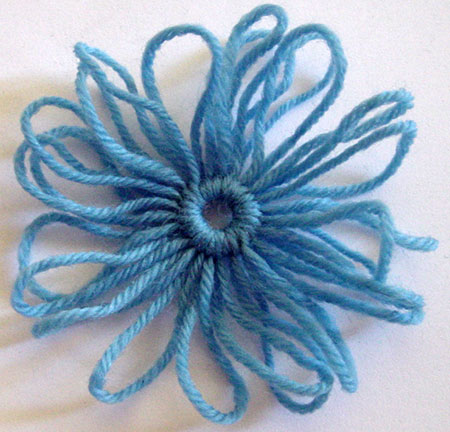
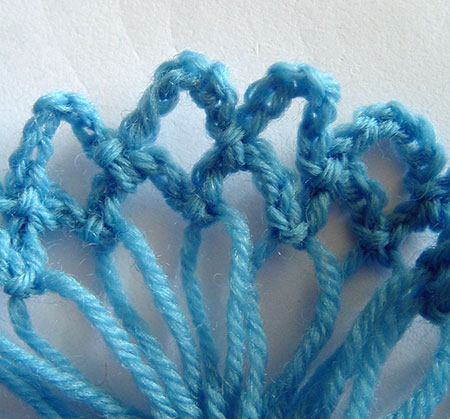
Make a flower with two rounds of yarn |
|||||||||
 |
and separate the petals to create a flower with twenty four petals. | |||||||||
 |
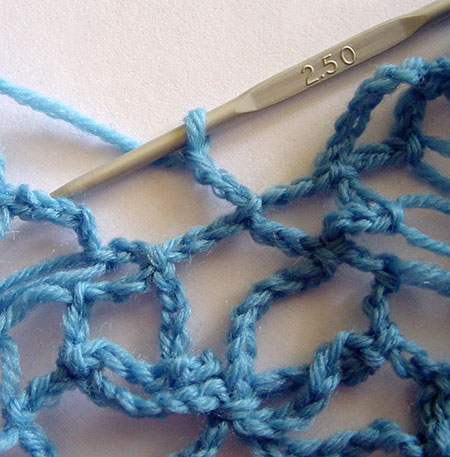
For my sample I am using fingering weight yarn and a 2.5mm crochet hook. To use this method with different sized flowers and yarns, simply change the number of chains worked.
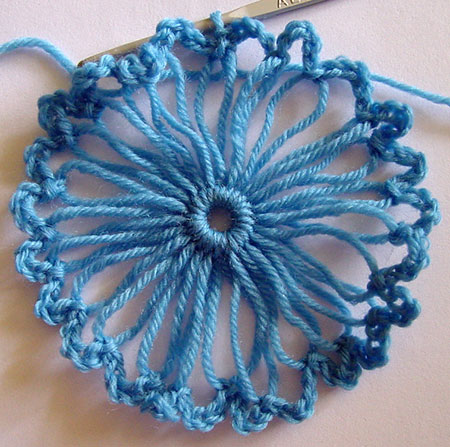
The number of chains should always be an odd number. I have worked an open centre on my flowers but you can stitch any centre of your choosing. First round of all flowers *slip stitch into a petal, chain 5; repeat for each petal Join to the beginning of the round with a slip stitch. |
|||||||||
 |
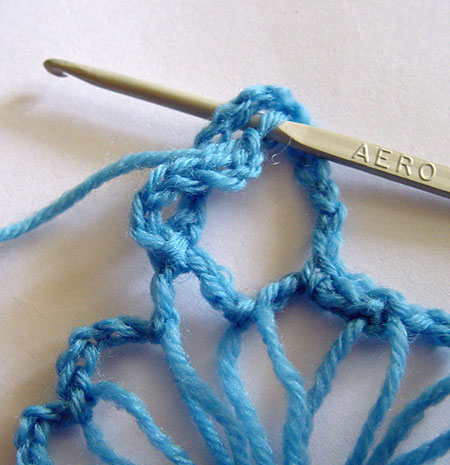
Round 2
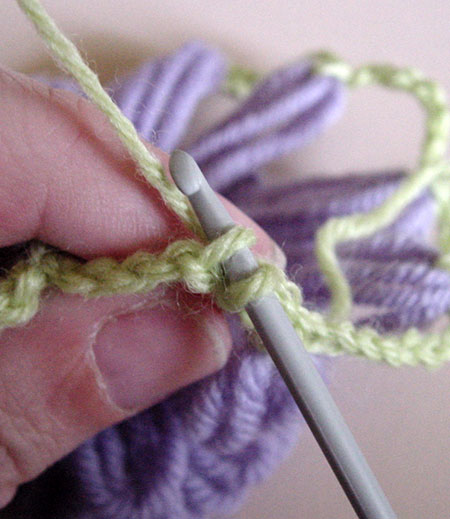
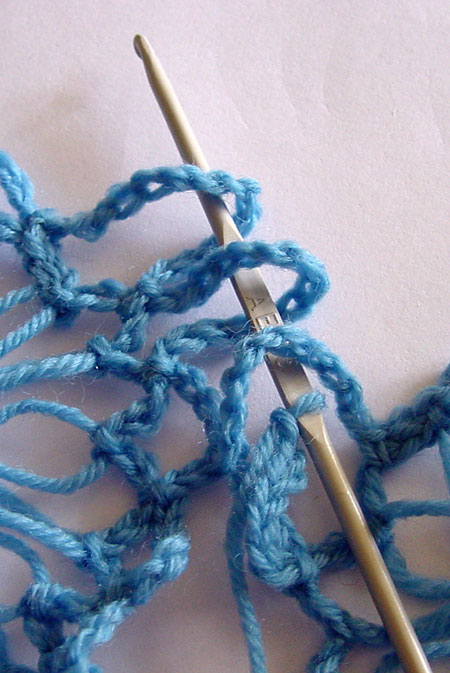
Slip stitch into the back of the first two chain. (This photo is from a different tutorial but it shows the step correctly). |
|||||||||
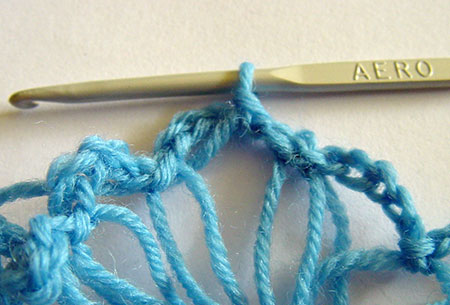 |
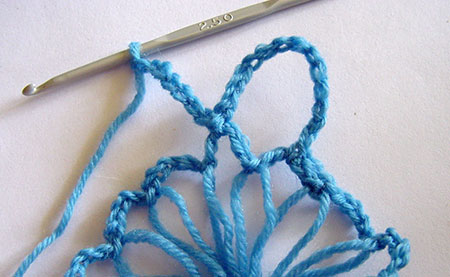
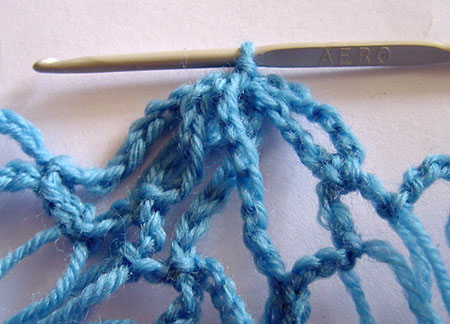
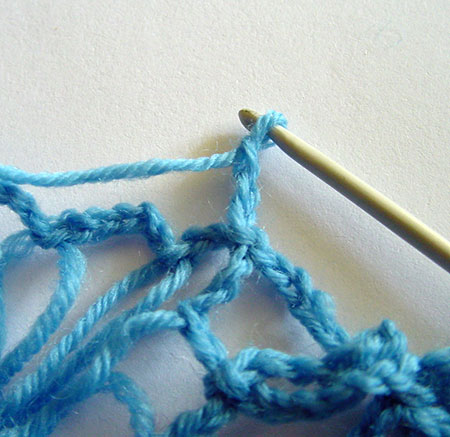
** slip stitch into the loop created by the chain stitches. Chain 7; | |||||||||
 |
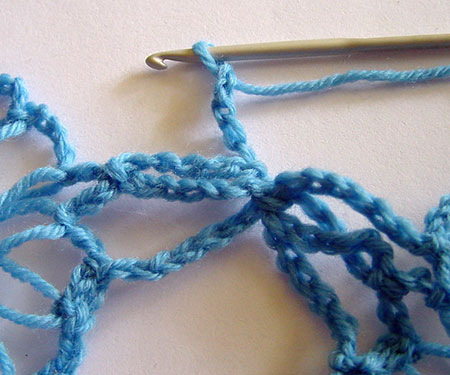
repeat from ** in the next three loops formed by the chain stitches. | |||||||||
 |
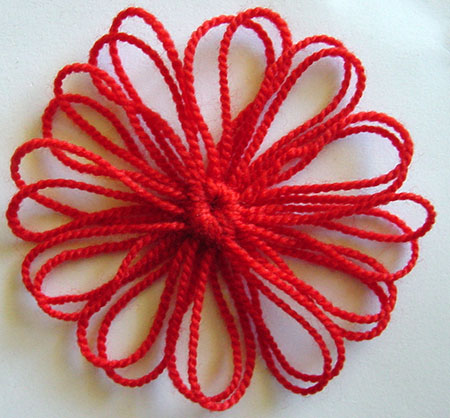
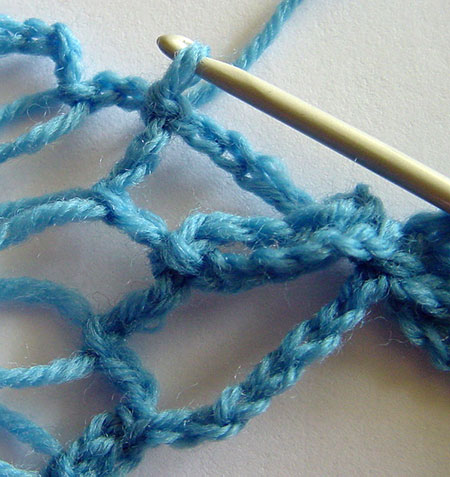
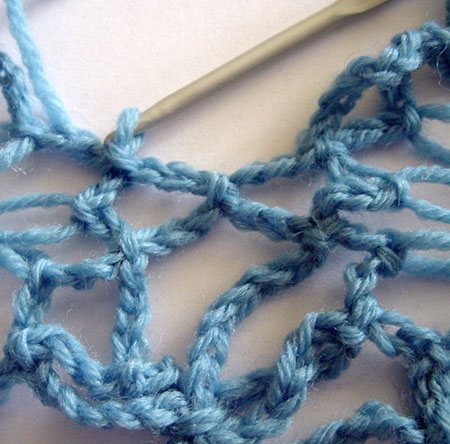
*** Slip stitch into the next petal, chain 15; repeat from *** once more into the next loop formed by the chain stitches. | |||||||||
 |
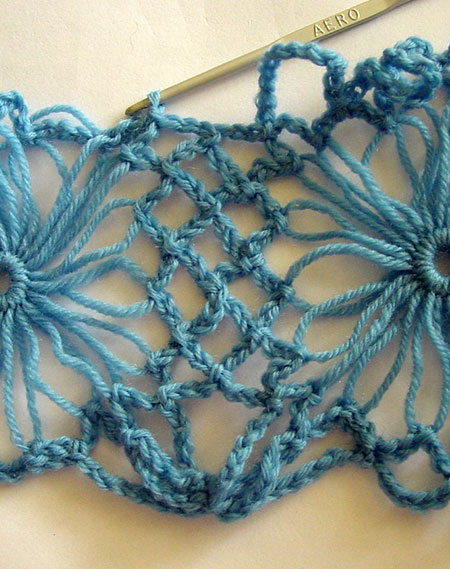
Continue working four short loops, then two long loops all the way around.
Join to the beginning of the round with a slip stitch. |
|||||||||
|
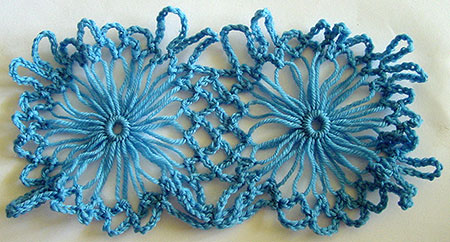
The motifs are joined in the following order
You can make each row as long as you like. Joining the second motif Take your second flower and work the first round as you did for the first flower. |
|||||||||
|
Slip stitch to the centre of the first loop of chain stitches as you did for the first flower. | |||||||||
 |
chain 15, join to the next loop formed by the crochet stitches with a slip stitch, chain 7 | |||||||||
 |
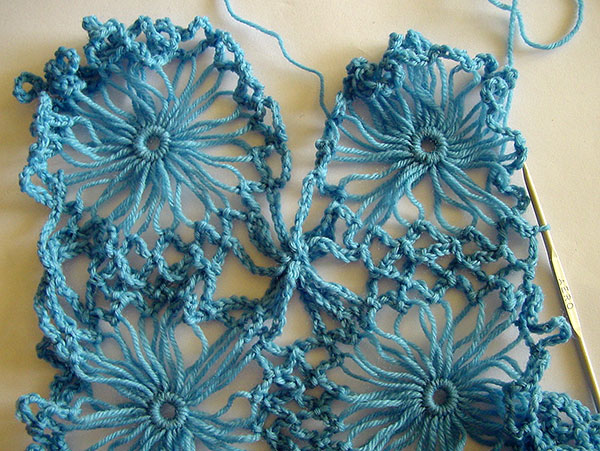
Put your hook through the large loop you just worked | |||||||||
 |
then through two large loops on the first motif | |||||||||
 |
and work a slip stitch | |||||||||
 |
chain 7 | |||||||||
 |
and join to the next loop on the second motif with a slip stitch. | |||||||||
 |
Chain 3 | |||||||||
 |
join to the next small loop on the first motif with a slip stitch, chain 3 | |||||||||
 |
join to the next small loop on the second motif with a slip stitch. | |||||||||
 |
Join the next three small loops in the same way. | |||||||||
 |
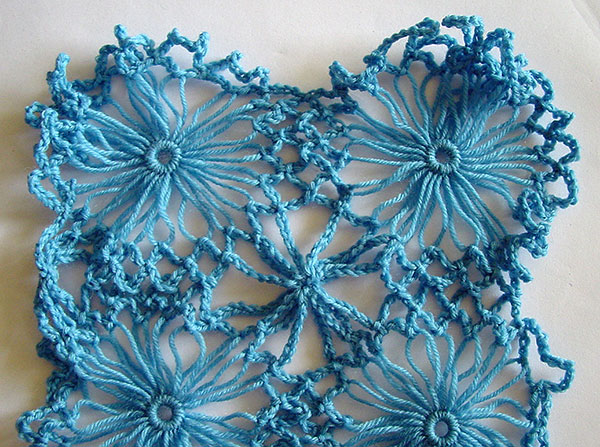
Continue working around your second motif without joining any more loops.
Note that the large loops at the top aren’t joined together yet. Keep adding more flowers to your first row until it is as long as you desire. |
|||||||||
|
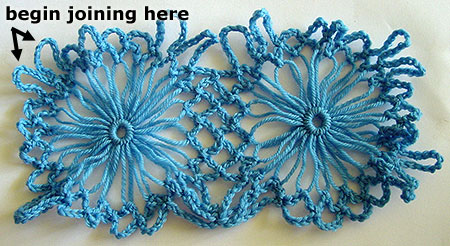
Adding the second row of motifs
Work the first round of your next motif and slip stitch to the centre of the chained loop as you have for your other motifs. |
|||||||||
|
The second row of motifs are joined much in the same way as the first.
Chain 14, slip stitch into the next loop of chain stitches, chain 7 |
|||||||||
|
put the hook through the large loop just worked. | |||||||||
 |
You will begin by joining your motif to the large loops on the very left hand side of the first row. | |||||||||
|
Put your hook through those two loops, | |||||||||
|
slip stitch, | |||||||||
|
chain 7 | |||||||||
|
slip stitch into the next loop of chain stitches on the motif you are adding to the second row. | |||||||||
|
Chain three | |||||||||
|
slip stitch to the small loop of chain stitches on the motif on the first row, | |||||||||
|
chain three and slip stitch to the motif on the second row | |||||||||
|
and so on, just as you did for previous motifs. | |||||||||
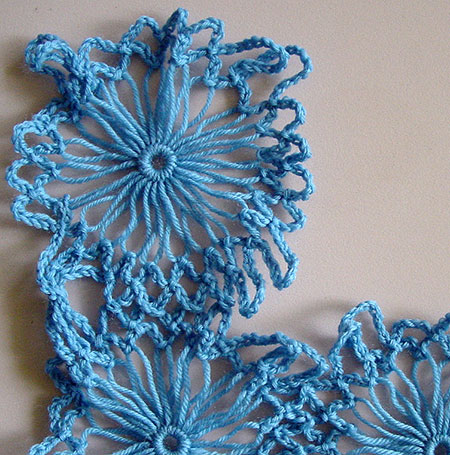 |
Continue around without joining any more loops.
Notice that you now have six large loops that are not joined together. These will be joined next. |
|||||||||
|
Work the first round of your next motif and slip stitch to the centre of the chained loop as you have for your other motifs. | |||||||||
|
Chain 14, slip stitch into the next loop of chain stitches, chain 7 | |||||||||
|
put the hook through the large loop just worked. | |||||||||
 |
This time you’ll be putting your hook through 6 large loops before working the slip stitch. | |||||||||
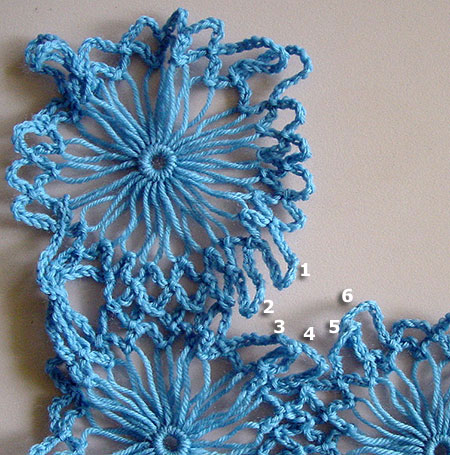 |
Start with the loops from the first motif on the second row, then the last motif on row 1, and then the second last motif on row 1.
Work your slip stitch, chain 7, join with a slip stitch in the next loop of chain stitches on the new motif you are joining. |
|||||||||
Join the small loops to the corresponding motif on row 1 |
||||||||||
Continue working all the way around, leaving the large loops free and joining the small loops to the first motif on row two. |
||||||||||
Continue adding more motifs and rows in this way. Join large loops together at the edges, or wherever four motifs meet. |
||||||||||
|
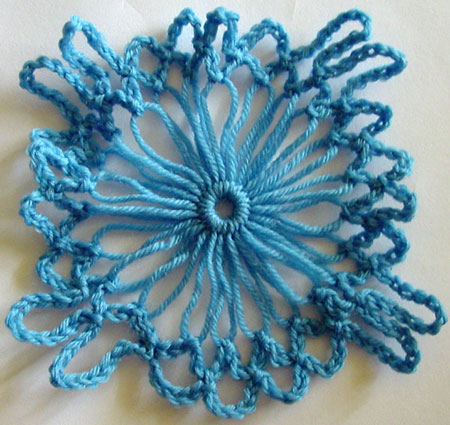
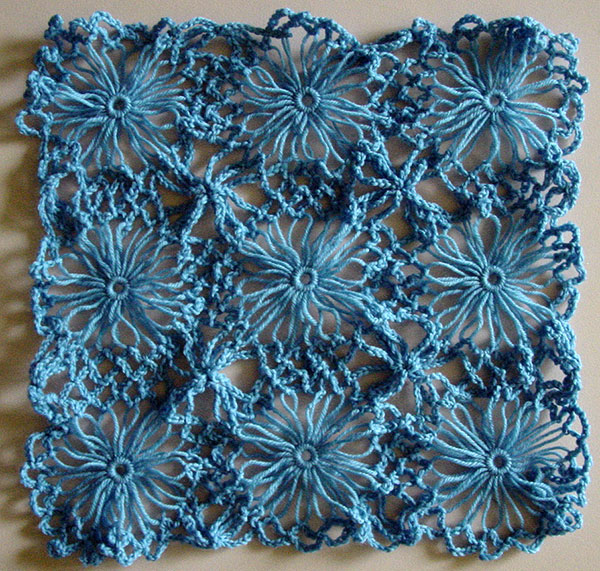
If you want to, block your finished project to see the full effect of the small flowers between motifs. My sample is 100% wool and was washed and laid flat without pinning. It is still damp in the photo. You may wish to pin out your sample to hold it in place while it dries. |
||||||||||
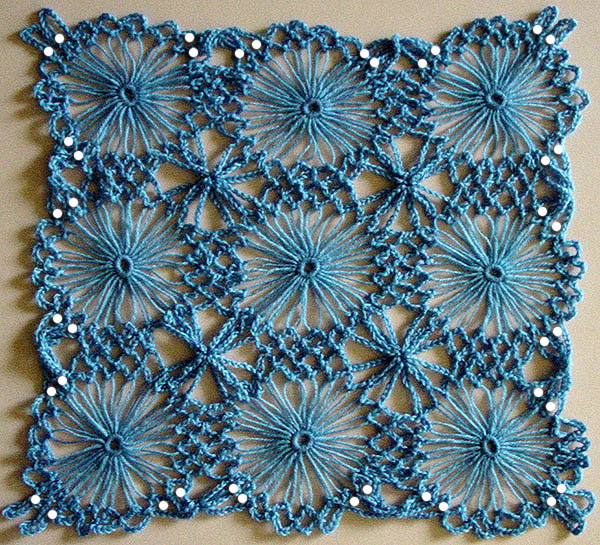
If you want a scalloped edging instead of a flat one, work small loops where indicated on my sample. These loops will stand free instead of being joined to other loops. |
||||||||||
Copyright Sarah Bradberry, March 9th 2011. All rights reserved.