
The simple crochet join is made with a single thread (no thousands of pesky ends to darn in) and can be used to make your loomed flowers into items of any size.
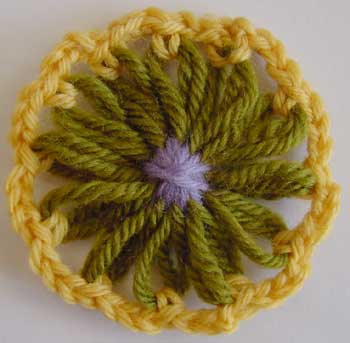 |
This flower was edged with dk weight wool and a 4mm crochet hook. The flower itself was made on a vintage KnitWit loom which is slightly smaller than the KnitWit looms produced around 2006.
To adjust the size of this edging for any size flower and any weight yarn just work more or fewer chains between petals. Edging For a Single Flower Join yarn to the first petal with a slip stitch, *3 chain, slip stitch in next petal; repeat from * to last petal, 3 chain, join to first slip stitch with another slip stitch. |
 |
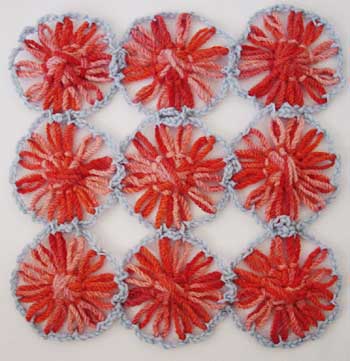
To Join Many Flowers Together
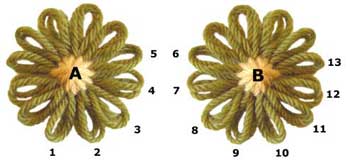
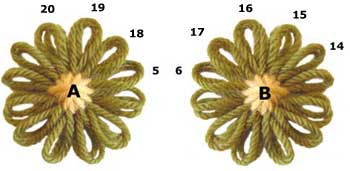
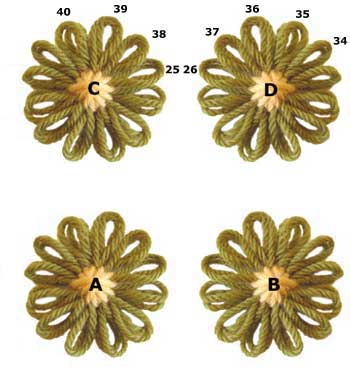
This edging was worked with a 3.5mm crochet hook and fingering weight yarn. To adjust the size of this edging for any size flower and any weight yarn just work more or fewer chains between petals. Step 1: Using the diagram at the left as a guide, work a slip stitch in petal 1, 4 chain, slip st in petal 2, 4 chain, slip st in petal 3, 4 chain, slip st in petal 4, 4 chain, sl st in petal 5, sl st in petal 6 (on flower B), 4 ch, sl st in petal 7, sl st in petal 4 (to join to flower A), *4ch, sl st in petal 8; repeat from * for petal 9 and all the way around to petal 13 |
 |
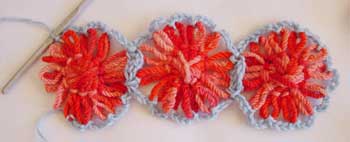
Keep adding more flowers in the same way until your first row is as wide as you want it to be.
My rows are 3 flowers wide but you can make them as wide as you like. |
 |
Step 2: Now work across the top of the row.
*4ch, sl st intp petal 14; repeat for petal 15 and all the way round to petal 17, 4 ch, slip stitch in the slip stitch that joins petals 5 and 6, **4ch, slip st into petal 18; repeat from ** for petals 19 and 20 |
 |
Repeat the process until you have crocheted all the way across the top of your row. |
 |
Step 3: Next you will join the second row of flowers.
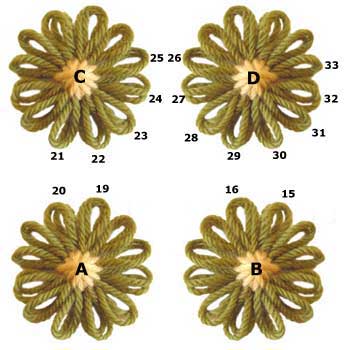
Slip st into petal 21 (on flower C), 4ch, sl st into petal 22, sl st into petal 19 (to join flowers C and A) 4ch, sl st in petal 23, 4ch, sl st in petal 24, 4ch, sl st in petal 25, sl st in petal 26 (on flower D), 4ch, sl st in petal 27, sl st in petal 24 (to join flowers D and C), 4ch, sl st in petal 28, 4ch, sl st in petal 29, sl st in petal 16 (to join flowers D an B), 4ch, sl st in petal 30, sl st in petal 15, 4 ch, sl st in petal 31, 4 ch, sl st in petal 32, 4ch, sl st in petal 33 |
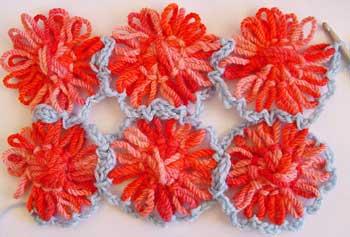 |
Add the rest of your flowers to row 2 in this way. |
 |
Step 4: Work across the top of the new row.
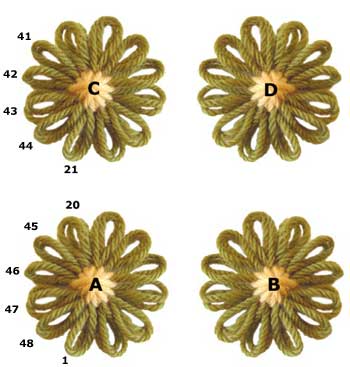
4ch, sl st in petal 34, 4ch, sl st in petal 35, 4ch, sl st in petal 36, 4ch, sl st in petal 37, 4ch, sl st in the slip st that joins petals 25 and 26, 4ch, sl st in petal 38, 4ch, sl st in petal 39, 4ch, sl st in petal 40 Repeat across the row. |
 |
Repeat steps 3 and 4 until you have added as many rows as you like. |
 |
Step 5: Now work down the left hand edge.
*4ch, sl st in petal 41; repeat from * for petals 42-44, 4ch, sl st in the sl st that joins petals 21 and 20, **4ch, sl st in petal 45; repeat from ** for petals 46-48. Repeat this process all the way down the left hand side of your flowers. When you reach the last one, 4ch and sl st into petal 1. |
 |
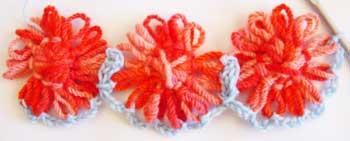
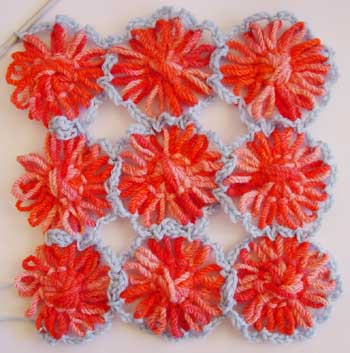
I really like the ruffled look of this edging before it is blocked |
|
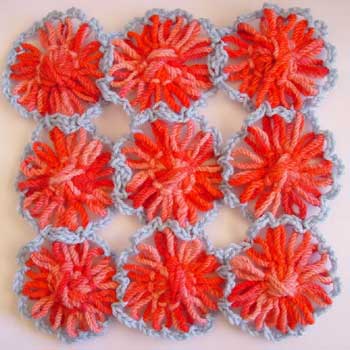
Here is the same piece after I washed it and pinned it out to dry. Not a lot of difference, but the petals are much better behaved 🙂 |
Copyright Sarah Bradberry March 2007. All rights reserved.