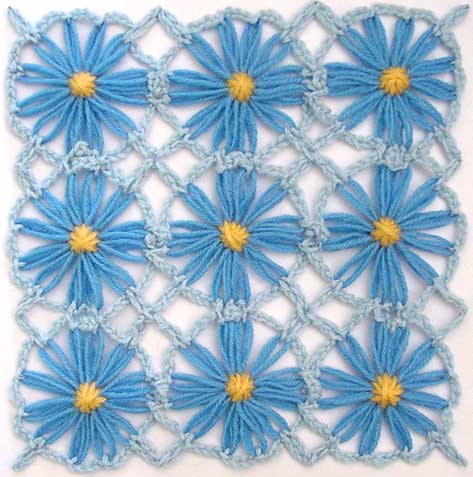
The picot join is made with a single thread (no thousands of pesky ends to darn in) and can be used to make your daisies into items of any size.
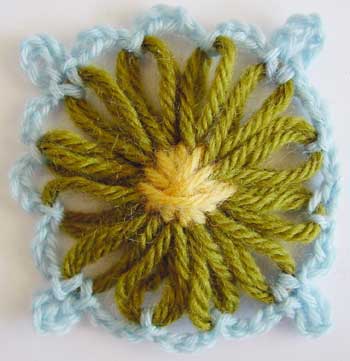 |
This flower was edged with fingering weight wool and a 3.5mm crochet hook. The flower itself was made on a vintage KnitWit loom which is slightly smaller than the KnitWit looms produced around 2006.
To adjust the size of this edging for any size flower and any weight yarn just work more or fewer chains between petals. The number of chains between each petal should be an even number. The number of chains in each picot is one more chain than you work between petals. Edging For a Single Flower Join yarn to the first petal with a slip stitch, *4 chain, slip stitch in next petal, 4 ch, slip st in next petal, 5ch, slip stitch in the same petal, 4 ch, slip st in next petal; repeat from * around the flower, ending by joining with a slip stitch into the first slip stitch. |
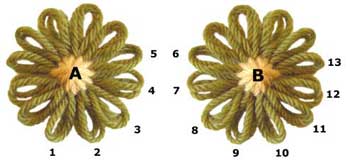 |
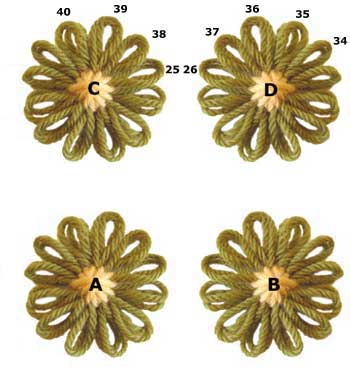
Step 1: Slip st in petal 1, 4 ch, sl st in petal 2, 4 ch, sl st in petal 3, 5 ch, sl st in petal 3 (picot formed), 4 ch, sl st in petal 4, 4 ch, sl st in petal 5, sl st in petal 6, 4 ch, sl st in petal 7, sl st in petal 4 (to join to flower A), 4 ch, sl st in petal 8, 2ch, join to picot in flower A with a sl st, 2 ch, sl st in petal 8 (picot), 4 ch, sl st in petal 9, 4 ch, sl st in petal 10, 4 ch, sl st in petal 11, 5 ch, sl st in petal 11 (picot), 4 ch, sl st in petal 12, 4 ch, sl st in petal 13 |
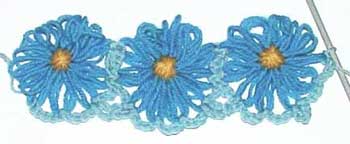 |
Continue adding as many flowers as you like to your row in this manner |
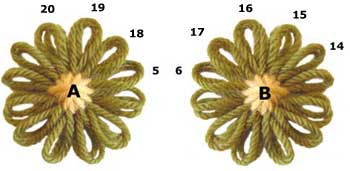 |
Step 2: 4 ch, sl st in petal 14, 5 ch, sl st in petal 14 (picot), 4 ch, sl st in petal 15, 4 ch, sl st in petal 16, 4 ch, sl st in petal 17, 5 ch, sl st in petal 17 (picot), 4 ch, sl st in the sl st joining petals 5 and 6, 4 ch, sl st in petal 18, 2 ch, sl st into picot on petal 17, 2 ch, sl st in petal 18, 4 ch, sl st in petal 19, 4 ch, sl st in petal 20 |
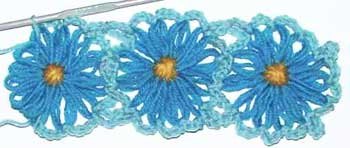 |
Continue working across your row of flowers in this way until you reach the last one. |
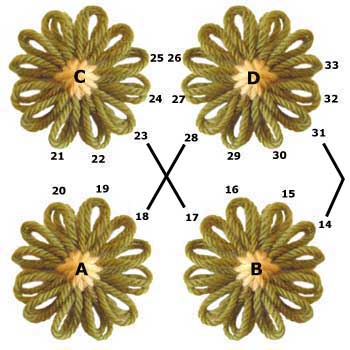 |
Step 3: Sl st in petal 21, 4 ch, sl st in petal 22, sl st in petal 19 (joining flower C to flower A), 4 ch, sl st in petal 23, 2 ch, sl st in the sl st that joins the picots in petals 17 and 18, 2 ch, sl st in petal 23, 4 ch, sl st in petal 24, 4 ch, sl st in petal 25, sl st in petal 26, 4 ch, sl st in petal 27, sl st in petal 24, 4 ch, sl st in petal 28, 2 ch, sl st in the sl st that joins petals 17, 18 and 23, 2 ch, sl st in petal 28, 4 ch, sl st in petal 29, sl st in petal 16 (joining flowers D and B), 4 ch, sl st in petal 30, sl st in petal 15, 4 ch, sl st in petal 31, 2 ch, sl st in the picot on petal 14, 2 ch, sl st in petal 31, (picot), 4 ch, sl st in petal 32, 4 ch, sl st in petal 33 |
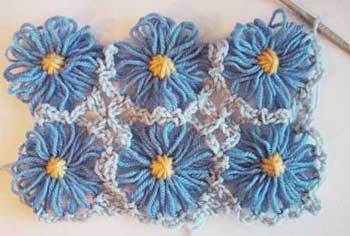 |
Continue across the row until you have added all of your flowers for the second row. |
 |
Step 4: Work across the top of your flowers
4 ch, sl st in petal 34, 5 ch, sl st in petal 34 (picot made), 4 ch, sl st in petal 35, 4 ch, sl st in petal 36, 4 ch, sl st in petal 37, 5 ch, sl st in petal 37 (picot), 4 ch, sl st in sl st joining petals 25 and 26, 4 ch, sl st in petal 38, 2 ch, sl st in picot on petal 37, 2 ch, sl st in petal 38, 4 ch, sl st in petal 39, 4 ch, sl st in petal 40 |
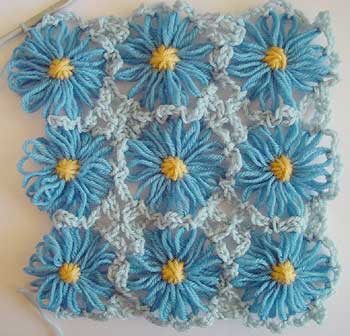 |
Continue across the row until you reach the last flower.
Add as many rows as you like by repeating steps 3 and 4 then finish the left hand side as follows. |
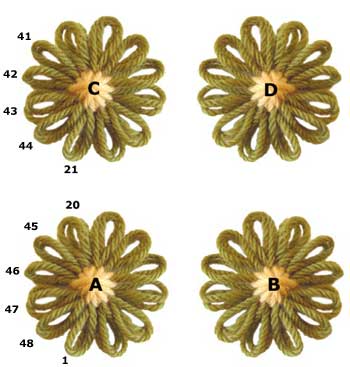 |
Step 5: 4 ch, sl st in petal 41, 5 ch, sl st in petal 41, 4 ch, sl st in petal 42, 4 ch, sl st in petal 43, 4 ch, sl st in petal 44, 5 ch, sl st in petal 44 (picot), 4 ch, sl st in the sl st that joins petals 20 and 21, 4 ch, sl st in petal 45, 2 ch, sl st in the picot in petal 44, 2 ch, sl st in petal 45, 4 ch, sl st in petal 46, 4 ch, sl st in petal 47, 4 chain, sl st in petal 48, 5 ch, sl st in petal 48 (picot)
Continue working down the side of the flowers, joining picots together wherever they meet until you reach the end, then 4 ch and sl st to petal 1. Cut yarn and fasten off. |
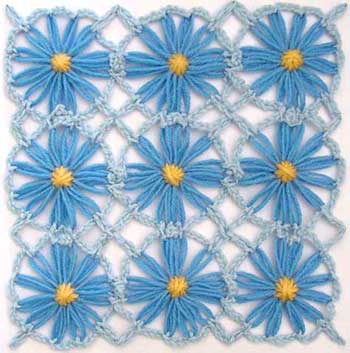 |
If you don’t like the scrunched texture of the edging, soak your work and pin it out, stretching slightly to open up the crosses formed by the picots. |
Copyright Sarah Bradberry March 2007. All rights reserved.
