
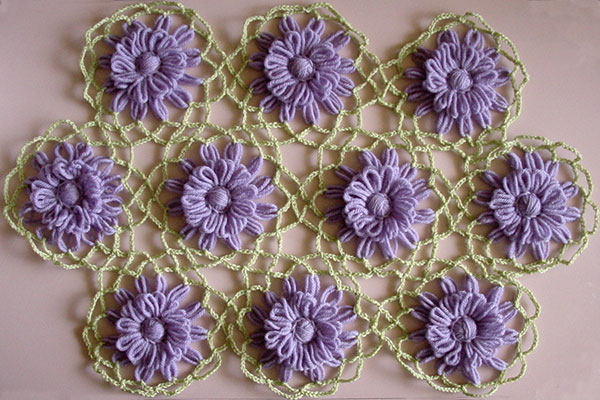
The lace crochet join is one of the most popular joins for retro style shawls.
Use a large loom and bright colours for the retro look, or a tiny loom with single flowers and fine perle cotton threads to make a 1930’s style table cloth or runner.
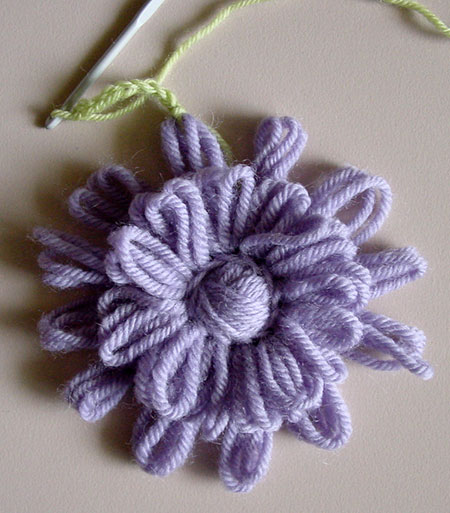 |
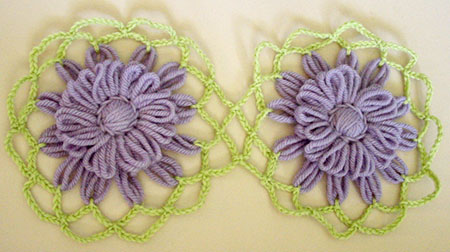
For my sample I have used 4″ flowers made with dk weight wool (Australian 8 ply weight), with three rounds on each of the flowers.
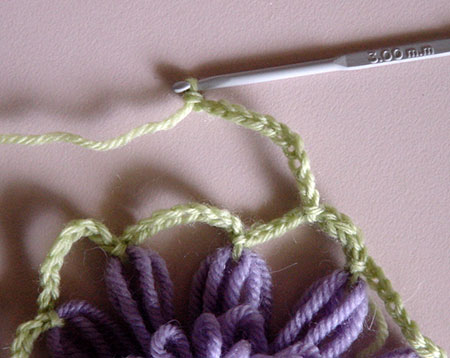
I’m using a 3mm crochet hook and fingering weight wool for the crochet join. You can use this technique on any size flowers and yarn, just change the hook size to suit your yarn and the number of chain stitches used. The only rule you need to remember is that you should always have an odd number of chain stitches. Round 1 * Join yarn to the first petal with a slip stitch, chain 9; |
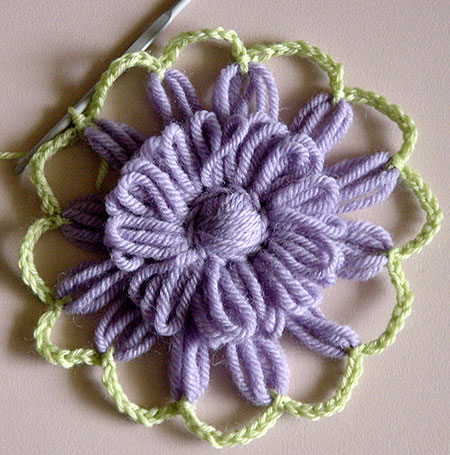 |
repeat from * into each of the remaining 11 petals.
Join to the beginning of the round with a slip stitch. You now have loops of chain stitches between the petals. |
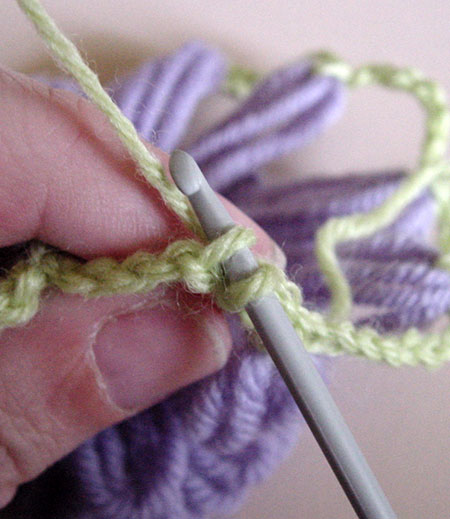 |
Round 2
The second round begins with some slip stitches to get you to the centre of the chain loop. Work a slip stitch into the back of each of the first four chain stitches of the previous round. |
 |
** Work a slip stitch into the chain loop, |
 |
chain 11; |
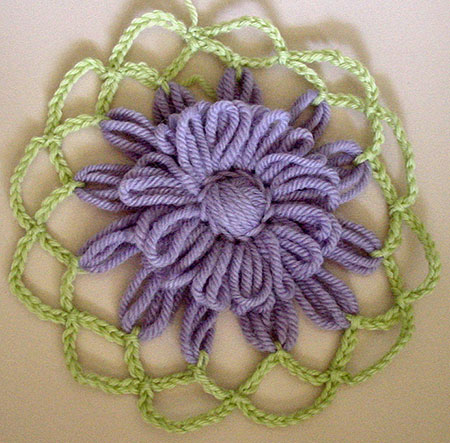 |
repeat from ** in each chain loop all the way around.
Join with a slip stitch to the slip stitch at the centre of the first chain loop. |
|
Joining motifs
From now on you can join your motifs as you work the second round of the edging. Work the first round as before and work the instructions that come before ** on the second round. |
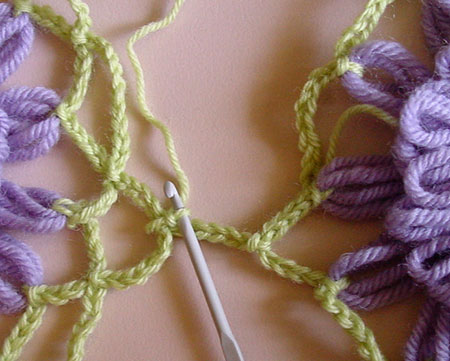 |
Work a slip stitch into the chain loop,
*** Chain 5, slip stitch into a loop on the first flower |
 |
chain 5, slip stitch into the next loop on the second flower; |
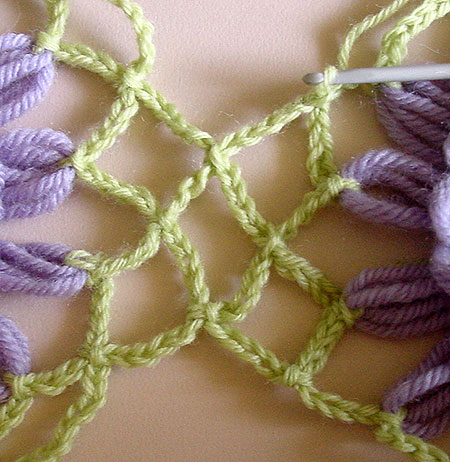 |
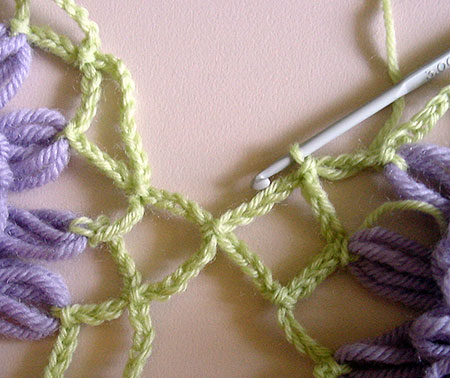
repeat from *** once more, working into the next loops on each flower |
 |
Continue working around the flower without joining any more loops as you did for the first flower (chain 11, slip stitch into the next petal) |
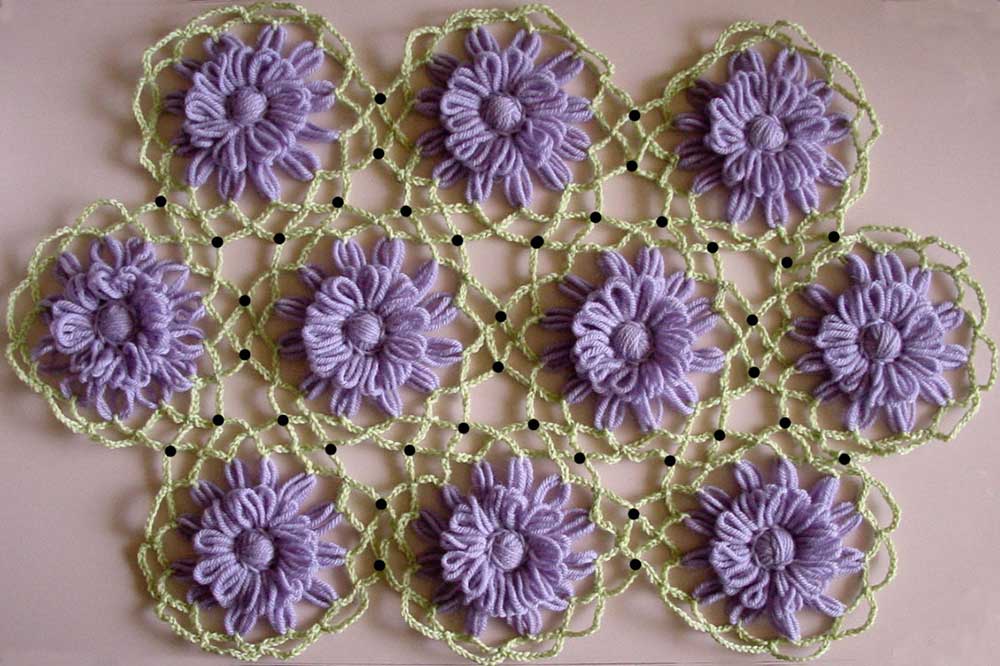
Continue adding flowers in the order of your choice. You’ll probably find it easiest to work in rows the first time.
The black dots in the photograph above show where each flower joins to another as you work.
Copyright Sarah Bradberry, February 27th 2011. All rights reserved.