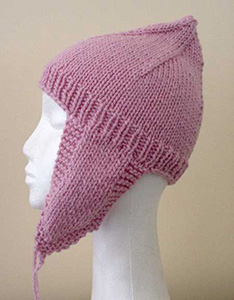
I thought I would share my two favorite tips for knitting hats with ear flaps.
First, when knitting from the flaps up, cast on for flap #1 with a long tail cast on, and leave 12 – 14 inches of waste yarn. Do the same for making flap #2.
Next, make the first flap, break yarn. Knit the 2nd flap, and cast on the required stitches to reach the first flap – this is the back neck of the cap. Knit in pattern across the first flap, and turn. Knit back across flap #1, the cast on stitches and flap #2. At this point I do another 2 or 3 rows in pattern across both flaps and the stitches in between, ending with a wrong side row. This gives an extra 3/4 inch or so of knitting at the back of the neck, which adds a lot to its comfort, I think. Then cast on the remaining stitches from flap to flap for the front of the hat and finish as usual.
Back to the waste yarn tails. I do not like to do I cord, so I cut several lengths of yarn, 24-26 inches long, and using a crochet hook or large eye needle, I weave these extra strands into the first few stitches of the ear flap with the yarn tails hanging down next to the cast on tail. I like to
have 9 pieces of yarn. I put the hat on a table with a weight on it, and braid the yarn into the tie – holding the yarn firmly so it braids flat and even. tie a knot when there is about 2 inches of yarn left, and trip the ends even to make a tassel. I have done several hats this way and the ties look quite cute.
Judy Schroeder
