
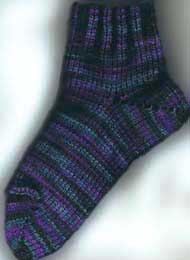
(Note from Clarisse: There are only a couple of adjustments I will make to his “Secret Formula”. Make the heel/toe measurement a little wider so it’s less pointy and make the sock length shorter. I had to “frog” a little cuz the sock was a bit too long)
Okay, here’s the sock pattern, compliments of Karen and myself. If you want the annotated version, keep reading. If you want just the straight skinny pattern, you’ll find it at the end of this document. If you want ice cream, go to 7-11.
Okay. Get lots of weights out – here goes:
Conditions For Making Mark’s Birky Sox:
1.) These are also known as Subversive Socks because they only work if you’re a brand new knitter to the Bond, and you like to live life on the edge, and you decide to skip over making that baby cap in the Beginner’s Book. You skip the baby cap, you’re on your own, hon. YOU HAVE BEEN WARNED.
2.) You have to follow these instructions to the letter. One deviation -ne tiny little steerage away from the correct and proper path of following EACH and EVERY instruction – and you will have entered the dark world of Creativity, and it’s a lonely road indeed. YOU HAVE BEEN WARNED.
3.) If you’ve never used cotton before, you’re going to learn a new song to hum while making the Birky Sox. It’s called “Twist & Shout.” It’s a little ditty that in ways similar to the loops in your cotton, it’s not a catchy little number. YOU HAVE BEEN WARNED. (BTW, you don’t have to use cotton. You can use worsted, rayon, dacron, or the fibrous husks of the inner bark of the lumlula tree. This is one of the few opportunities in this pattern where you will have an option. In fact, it’s the only opportunity.)
Okay. Let’s proceed. With caution.
Make a swatch just as the ISM manual describes. Uppp?? I heard that! Yes, you do have to swatch. If you don’t want to swatch, then maybe you should come up here and sit in the front row by me. And throw that gum away in the rubbish bin and quit bothering Amy. You have to swatch because you need to figure out how many stitches per inch you knit on your Bond. Those of you who are of an anal retentive nature will probably have about 6-8 crabbed stitches per inch. Those of you who live in Hawaii and don’t need to make these socks will probably have about 5-6 stitches per inch. When I used the cotton, my swatch came out at 5 sts/inch. I live in England. Go figure.
The Secret Formula: This is the thing that you send via e-mail to all your friends who want socks. They fill out the details in The Secret Formula and send them back to you, and then you make the socks and send them back to them and then they send you thank you notes and then you’re so pleased with yourself that you send them The Secret Formula again because their foot size might have changed and they don’t like red anymore so then they send The Secret Formula back to you and you make more socks.
Tape measures at the ready, please!
THE SECRET FORMULA:
If you are one of those lucky people with standard foot measurements, here are some suggested numbers. If not continue below to get socks that fit your feet!
Men’s Birky Sox:
A = 38
B = 21
C = 35
D = 37
E = 9
Women’s Birky Sox:
A = 36
B = 15
C = 27
D = 28
E = 8
A = Ankle measurement x sts per inch. A = ______. Round up or down so this # is divisible by 4 with 2 left over.
R = Length of ribbing wanted x rows per inch. R =______.
SL = Length of sock desired (measure from ankle bone up towards knee to wanted length and subtract the ribbing length). SL =______. Note: You can rib the entire SL if you want.
FL = Length of foot (base of toe to front of heel) + 1/2″ or so for ease x rows per inch. FL = ____.
HT = ______. Small Children 1/2″ x sts per inch. Women 3/4″ x sts per inch.
Men 1″ x sts per inch. Note: These numbers can be changed: less will give you a pointier heel/toe, more will give you a squarer heel/toe.
If you’re REALLY a beginner, here’s some abbreviations and/or terms you need to know:
WY = waste yarn. This doesn’t mean that stringy thing that holds together your pork roast. This means that chartreuse yarn that you had left over from crocheting your prom dress.
Ravel Cord: go buy some from Lea-Ann who sponsors the Bond list. She’s wonderful, and so is her ravel cord.
RC = row counter. The lovely Lea-Ann also sells row counters. If you don’t have one, drop a Jelly-Belly into a beer can each time that carriage sucker goes across the board.
K = knit. But I bet you figured that one out, eh? Clever you.
HP = holding position. Making sure you keep all the loops against the board, pull the hooks all the way to the front. Now the carriage won’t knit. Cool, huh?
WP = working position. This is when the needles are pushed back just enough so that those latchy things start to close, but before they actually do. If the latchy things do close, gnash your teeth and go back and make the baby cap.
ndl = needle. You don’t need to buy any vowels; you can guess them.
carr = carriage, not a fast carrrrrr.
CO = cast on. Not off. On. Definitely on.
e-wrap = (Did someone not do his or her homework?) Read your book!
Finally, one more word, and then you can get going. We have to have a little chat here. It’s about your weight problem. If you’re brand new to this world of the Bond ISM, then you might be tempted to think that that hem thing – the black jobber with all the slotty holes in it – is all you’ll need to be merry in this life. Sadly, you are wrong. You must – could we have that verb again, please – you MUST use hanging weights on this project, or you are doomed. If you’ve been a good little Bonder, you will have not only subscribed to the Bond list, but you will have seen endless discussions about weights and the creative methods people have come up with to hold their knitting together on the ISM. These people aren’t kidding – they’re serious – and you, too, must come up with something in addition to the
hanging hem (that black thing) in order to keep everything on the machine. My preferred choice of the moment is kitchen knives. Yes, you heard me. Go grab all the butter knives out of the drawer. Take three of them, wrap rubber bands tightly around both ends, and then hang them on with bent paper clips or Christmas ornament hangers, or the retainer that your kid won’t wear to school because Jamie teases her. You can tell when you need the weights. At first the little loops will start looking just the tiniest bit flabby and loose. You might get away with one more carriage swipe before you have to hang the weights. You might not. But if you unwisely choose to knit more than one row after that first indicator (the wobbly, sticky-up kind of loops), you can count on the row after that to be one
where there are more loops hanging in mid-air than in an air show over Peoria. Start hanging the knives. Lots of ’em. Everywhere. Too many is better than many. If one of those loops even looks cross-eyed at you, you hang a knife on
it. For those of you who are inclined to less violence and don’t want to be setting bad examples with all of these knives, you may use fishing weights (don’t lick your fingers or pick your nose after handling all that lead). Or you can use tea infusers filled with two-pence coins. Depending on how squirmy he is, you might even hang a nephew or two on your knitting with one of those Christmas ornaments. You figure this part out; you’re clever. Anyway, once more for all you non-believers: WHEN IN DOUBT, HANG WEIGHTS.
Okay . . . here we go . . . .
Hang hem on _______(A) needles. K a few rows of WY. K 1 row ravel cord.
With your chosen yarn, e-wrap CO across these needles. RC000. Half of the sts are to the left of 0, and half are to the right. (duh!) Manually K the first row. Then K _____(R). End with COR, but if you don’t, just K 1 more row.
Convert to 2 x 2 rib (this is dirty talk, but hey, you were the one that made the decision to skip the baby cap) by letting the 3rd st from left drop down to ravel cord and latch it up. Do this to the 4th st, then skip 5th and 6th, do it to 7th and 8th, etc. If you rounded properly, you will not have to latch up the last 2 sts on the right. If you didn’t round
properly, well, then you have to dig your own self out of your own bloody mess of things and don’t bother me by writing back forty-five pages of flames.
RC000. K stocking st to RC _____(SL). (For the second sock, K 1 more row to reverse the shaping which will put the seam, the heel, and the toe on the opposite side).
HEEL (K with the next size smaller keyplate if the yarn will K)
Okay. Now this is where it starts to get a bit scary. Run around the house and gather together all of your weights of choice and your Christmas ornament hangers. Ready? Steady? GO!!
COR. Pull all ndls left of 0 to HP (holding position). Shape heel by pulling 1 ndl on carr side each row to HP until you have _____(HT) sts in WP (working position). COL. K 1 row. Reverse the shaping by pushing 1 ndl opposite the carr to WP every row until all ndls right of 0 are in WP. MAKE SURE THE LATCHES ARE OPEN ON THESE NDLS! End with COR. All ndls are in WP. Note: This is where claw weights come in handy. Extra weight on the heel is the key to success.
And that, my friends, is an understatement. I’ve been carrying around extra weight on my heels for forty-four years now, and I can safely tell you that I’ve never regretted a moment of it, and I have seen great success in my life. BTW, new Bonders, “claw weights” are not made from bear. They’re made from lead, and the lovely Lea-Ann sells them. I myself have not tried them yet – I’m saving that treat to myself for when I return to America – but those of you who are resident in that fair land can order them – and should order them – from Lea-Ann. She sponsors our list, she has an incredible array of products germaine to our strange hobby, and she has a comforting, wonderful e-mail voice that assures you that indeed, you can do this and still have a life. Yes, that’s a bias on my part, but hey, don’t forget – it was YOU who decided to abandon that baby cap and set off for more exotic parts. Lea-Ann sells claw weights. Buy some.
RC000. Change back to the original keyplate. K even to RC _______(FL).
NOTE: I sort of skipped this direction on one of the socks that I was making, and it makes the sock look real funny if you forget to switch back to the original keyplate.
TOE (smaller keyplate, if possible) All this keyplate switching is making me dizzy. BTW, new Bonders, you know that waxy donut thing that you rub on the little bits of your keyplate and and then it leaves wax shavings all stuck in the little slots on your machine? Go buy a spray bottle of silicone spray. Ssssst! and your carriage will FLY across that board! Sssssst!
The Toe is done just like the heel…
COR. Pull all ndls left of 0 to HP. Shape toe by pulling 1 ndl on carr side to HP until you have _____(HT) sts in WP. COL. K 1 row. Reverse the shaping by pushing 1 ndl opposite the carr to WP every row until all ndls right of 0 are in WP. COR. K 1 row. K 1 row ravel cord, then a few rows WY. Remove from machine.
Knit a second sock reversing the shaping as noted, unless, of course, you have two left feet. Then you would make the second sock exactly as you did the first.
FINISHING
Choose one of the methods below to close toe. Sew side seam.
Binding Off: Although this is fast, it will form a bit of a ridge. Rehang half of the toe sts from RC, right side facing you on the machine. Take the other half of the toe sts with the wrong side facing you and hang on the same needles. Bind off a bit loosely.
Grafting: Fold the toe in half with the right sides facing you. Follow the instructions for “Grafting” in the ISM manual ( pg. 28).
After this, you must go to the nearest footwear shop at once and purchase a pair of Birkenstocks. You will want to be there early in the morning because there will be quite a run on Birkys because they’ve been declared the Shoe of the Gnu Millennium. No one is allowed to wear uncomfortable shoes in the Gnu Millennium. To incorporate this new look into your ensemble, you must do as I do: show up at fancy, high-brow music recitals with Birkys on. Tap your feet in rhythm to the Haydn. Church is a definite place where Birkys must be worn. The same is true for riding double-decker buses and heading up shopping expeditions at Selfridge’s on Oxford Street. I particularly recommend wearing your new sox and new Birkys at the High Ambassador’s next ball. If anyone has an intarsia pattern for a corgi, I’d like to make the Queen a pair of Birky sox for her next do.
And finally, please drop me an e-mail and let me know how you got on. I hope this goes well for you and you find great satisfaction in your creation(s)!
Mark Thrailkill
[email protected]
This is the non annotated version of the pattern for those of you who like peace and quiet while you work.
Mark’s Birky Sox (aka Subversive Socks)
Make a swatch just as the ISM manual describes.
Necessary Numbers
If you are one of those lucky people with standard foot measurements, here are some suggested numbers. If not continue below to get socks that fit your feet!
Men’s Birky Sox:
A = 38
B = 21
C = 35
D = 37
E = 9
Women’s Birky Sox:
A = 36
B = 15
C = 27
D = 28
E = 8
A = Ankle measurement x sts per inch. A = ______. Round up or down so this # is divisible by 4 with 2 left over.
R = Length of ribbing wanted x rows per inch. R =______.
SL = Length of sock desired (measure from ankle bone up towards knee to wanted length and subtract the ribbing length). SL =______. Note: You can rib the entire SL if you want.
FL = Length of foot (base of toe to front of heel) + 1/2″ or so for ease x rows per inch. FL = ____.
HT = ______. Small Children 1/2″ x sts per inch. Women 3/4″ x sts per inch. Men 1″ x sts per inch. Note: These numbers can be changed: less will give you a pointier heel/toe, more will give you a squarer heel/toe.
Hang hem on _______(A) needles. K a few rows of WY. K 1 row ravel cord. With your chosen yarn, e-wrap CO across these needles. RC000. Half of the sts are to the left of 0, and half are to the right. Manually K the first row. Then K _____(R). End with COR, but if you don’t, just K 1 more row.
Convert to 2 x 2 rib by letting the 3rd st from left drop down to ravel cord and latch it up. Do this to the 4th st, then skip 5th and 6th, do it to 7th and 8th, etc. If you rounded properly, you will not have to latch up the last 2 sts on the right.
RC000. K stocking st to RC _____(SL). (For the second sock, K 1 more row to reverse the shaping which will put the seam, the heel, and the toe on the opposite side).
HEEL (K with the next size smaller keyplate if the yarn will K)
COR. Pull all ndls left of 0 to HP (holding position). Shape heel by pulling 1 ndl on carr side each row to HP until you have _____(HT) sts in WP (working position). COL. K 1 row. Reverse the shaping by pushing 1 ndl opposite the carr to WP every row until all ndls right of 0 are in WP. MAKE SURE THE LATCHES ARE OPEN ON THESE NDLS! End with COR. All ndls are in WP. Note: This is where claw weights come in handy. Extra weight on the heel is the key to success.
RC000. Change back to the original keyplate. K even to RC _______(FL).
TOE (smaller keyplate, if possible)
Done just like the heel…
COR. Pull all ndls left of 0 to HP. Shape toe by pulling 1 ndl on carr side to HP until you have _____(HT) sts in WP. COL. K 1 row. Reverse the shaping by pushing 1 ndl opposite the carr to WP every row until all ndls right of 0 are in WP. COR. K 1 row. K 1 row ravel cord, then a few rows WY. Remove from machine.
Knit a second sock reversing the shaping as noted.
FINISHING
Choose one of the methods below to close toe. Sew side seam.
Binding Off: Although this is fast, it will form a bit of a ridge. Rehang half of the toe sts from RC, right side facing you on the machine. Take the other half of the toe sts with the wrong side facing you and hang on the same needles. Bind off a bit loosely.
Grafting: Fold the toe in half with the right sides facing you. Follow the instructions for “Grafting” in the ISM manual (pg. 28).
This pattern is © Mark Thrailkill, all rights reserved. Image © Clarisse Gibson.