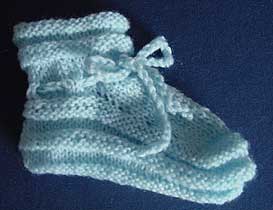
Materials
Straight needles plus at least one double-point needle in similar size; baby (or other) yarn (see gauge note below)
Gauge
After they’ve been washed a few times, 8 stitches to the inch. I’ve made the same pattern in bigger yarn on bigger needles and gotten slippers for the whole family, so I suggest using whatever yarn you have at the appropriate tension for it.
Pattern
Pattern Ridge 1: K 1 row; P 1 row; K 1 row; P 1 row
Pattern Ridge 2: P 1 row; K 1 row; P 1 row; K 1 row
Cast on 36 stitches then do Pattern Ridge 1 and Pattern Ridge 2 twice so there are 4 ridges – two on each side.
[ I have also made grownup versions with 16-20 rows of K2, P2 ribbing around and that works pretty well too]
P 1 row
K2 tog, YO, K1 – repeat across. [If scaling pattern up or down for yarn/needle changes, do NOT change the 36 stitch number; otherwise the two nicely centered holes at the front center instep that this process makes will get shifted one way or the other … at least if _I_ do it, even when I try to correct for it!]
P 1 row
K 12, slip onto waste yarn. K 12, keep on needle. Put last 12 stitches onto waste yarn. [or holders, safety pins, whatever.]
K 26 rows stockinette stitch on middle 12 stitches [or what looks like the right length – I usually use only 22-24 rows] [It is very helpful in the picking-up-stitches process later if you slip the first stitch of each row, and I always gild the lily by purling the last stitch in every row, just so that the “end stitches” look uniformly nice … but the useful part is having one large stitch for every two rows of knitting when you’re picking up stitches later]
End with a purl row. Break yarn. Now, with right side facing, attach yarn at the right-hand side by the waste yarn, ready to pick up those 12 stitches [think upside-down “T” and join yarn at upper right hand corner of the rightmost sidebar]
K 12, pick up 16, K12 across, [USE DOUBLEPOINT], pick up 16, K 12 [The picking up of 16 along each side used to bug me since one for every two rows (one “end stitch”) wasn’t enough but one for every row (knit into front and back of each “end stitch”) was too many. Now I pick up one stitch in the first “end stitch”, two in the second, and alternate
till I get 16 and that works well] Total = 68 stitches
Go back to pattern (now starting on opposite side as before, so that there is a ridge of purl stitches meeting the stockinette of the instep) and make a total of 4 ridges, two on each side.
Then:
K1 [or slip one, whichever], K 2 tog, K 29, K 2 tog, K 2 tog again, K 29, K 2 tog, K 1 turn
P1, P2 tog, P 27, P 2 tog TWICE, P 27, P 2 tog, P 1 turn [what you’re doing really, is setting up decreases on each end for the heel as well as paired decreases in the center front for toe shaping, while maintaining the pattern ridges]
K 1, K 2 tog, K 25, K 2 tog TWICE, K 25, K 2 tog, K 1
P1, P 2 tog, P 23, P 2 tog TWICE, P 23, P 2 tog, P1
P 1 row (first row of Pattern Ridge 2)
Bind off knitwise. Sew up along center back of ankle/heel/sole.
Cord Option One (the one that came with the original pattern): Crochet a chain of 80 stitches using two strands yarn held together and a hook appropriate for needles.
Cord Option Two (for knitting purists; it’s quite a bit slower) Knit “I-cord” for drawstring.
Pattern Copyright Samantha K Davenport. E-mail: [email protected] Image Copyright Sarah Bradberry 2003
