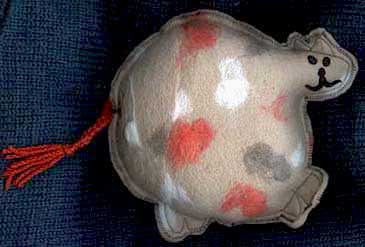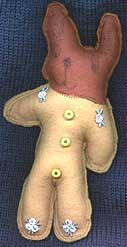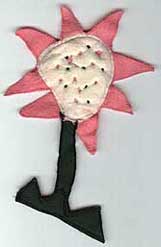


These creations were designed by Brittany Overton, age 6
The leopard is named Cuddles, the teddy bear is called Steven and the flower on the right is just a flower 🙂
Felt creations can be made in any size and you really don’t need any complicated sewing skills to make them.
The steps are as follows:
1: Get your child to draw an animal, flower, building, etc on a piece of paper. Your creation will be easier to sew together if you tell them to make it fill the whole piece of paper and that any legs should be a bit fat. We used A4 size paper which is about 21 x 29cm.
2: Cut out around your child’s drawing and use it as the pattern to cut out your felt. Alternatively, if you want to keep the drawing you can photocopy or trace it first.
3: Place your felt pieces together with wrong sides facing. Sew around the outside with a straight st, approximately ¼ of an inch from the edge, making sure you leave an opening for the stuffing. Zig zag stitch around the edge of the felt, then stuff and sew the hole closed.
If you’re using more than one colour for your creation sew the different coloured pieces together first. For example, we sewed the dark sections of the head of the teddy bear (on the left) to the body before sewing the front and back together. From experience we’ve found that it’s best to sew the pieces together with a straight st and then zig zag along the edge as you did when sewing around the edges of the toy.
4: Add any embellishments of your choice with hot glue (adults only!), fabric glue, embroidery, pen, or any technique you can think of!
Tips:
If your child’s drawing is too small, enlarge it on a photocopier first.
Don’t fix your child’s “mistakes” if they are happy with their design. It will not only give your child added confidence that they “got it right”, but will also add charm and individuality to their toy.
Keep safety in mind if you’re making your creation for a baby or child under 3. Don’t use anything that can be pulled off or swallowed.
Copyright © Sarah Bradberry 1999
