
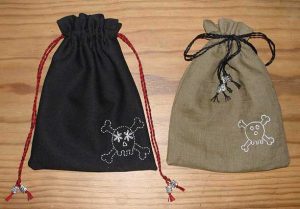
Pattern
Materials
- 2 pieces of fabric 21x 29cm. A light to medium fabric works best such as homespun cotton or gingham.
- Sewing thread
- Embroidery thread for your choice of design.
- 1.25m of cord
- 4 beads (optional)
You can download the skull designs used on these bags here.
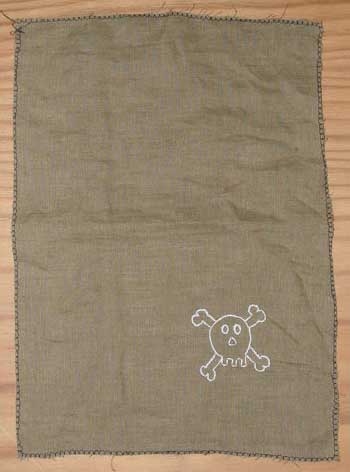
Embroider your design on one of the pieces of fabric, making sure to leave a minimum of 2.5cm all the way around your design so none of it will end up in the seam allowance!
Neaten the edges of both pieces of fabric using a zigzag or overcast stitch.

With the right sides facing each other, stitch around three sides using a 1.5cm seam allowance. Leave the top 9cm of each long side unstitched.
Trim the bottom corners.
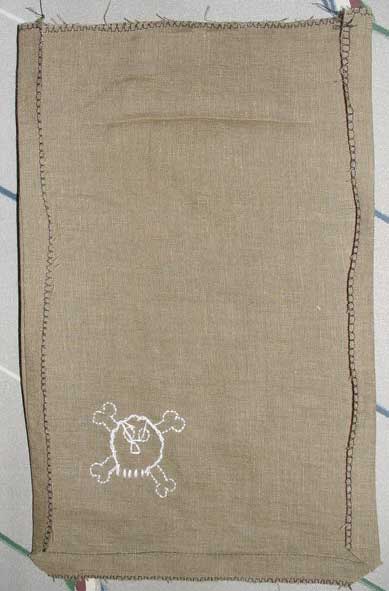
Iron the seams open on the wrong side, folding over the raw edges of the unstitched portion at the top of each long side at the same time (it will fold over automatically when you iron the seams open).
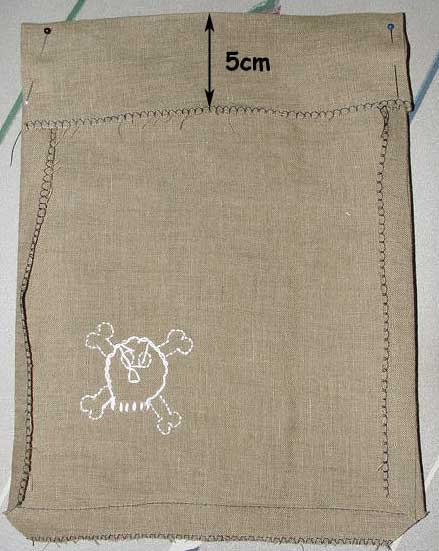
Fold a 5cm hem on each side at the top. Pin.
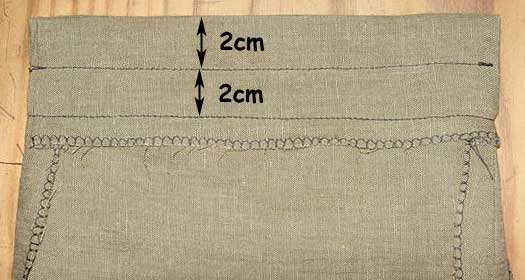
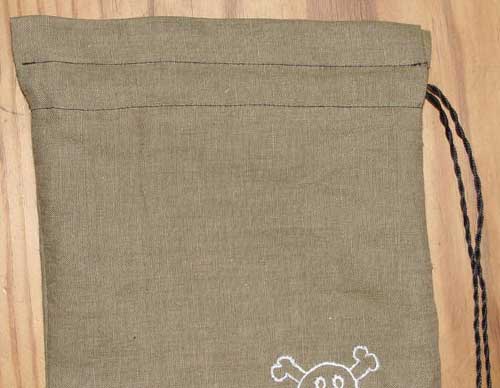
Making sure not to stitch the two sides of the bag together, sew the hem down 2cm from the top of the bag. Then sew a second line 4cm from the top.
Repeat for the other side of the bag.
Turn the bag right side out.
Cut your cord in half.
Starting at the right hand side of the bag, thread one piece through the channel made between the lines you just stitched on both sides (both ends of the cord should end back at the right hand side).
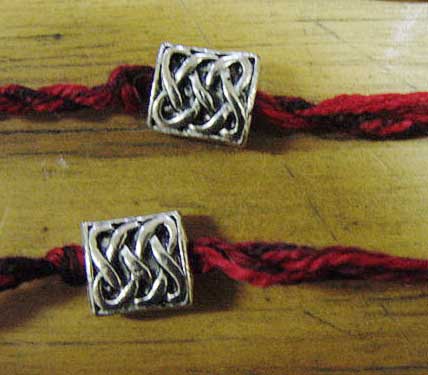
Thread a bead onto to each end of the cord and tie a knot to stop them falling off. Then tie the ends of the cord together above the beads using an overhand knot.
Repeat with the other piece of cord, starting at the left hand side.
Copyright Sarah Bradberry June 2006. All rights reserved.