
This review first appeared on my blog on May 11th, 2010
Way back on my birthday I won a Hazel’s Adjust-O-Peg loom on ebay. You know how it goes with gadget acquisition, someone on Ravelry had asked what they’re like, I thought they looked nifty so I bought one. The seller had two, I wouldn’t have just bought one knowing someone else was interested.
Anyway, to make a long story short, I got the flu and spent a week or so making stuff with it while I held fevers at bay so I thought I’d give a review.
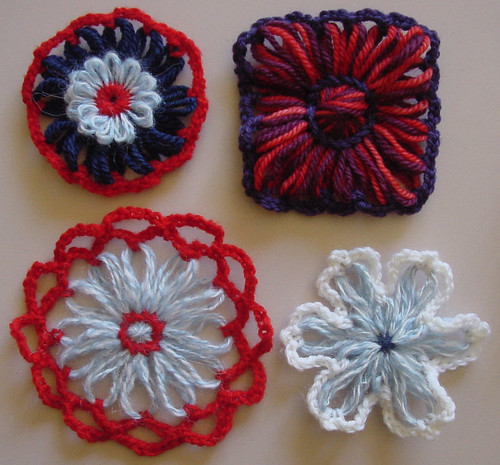
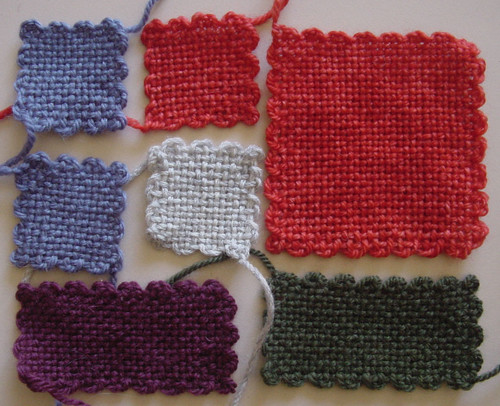
Here are my favourite samples.
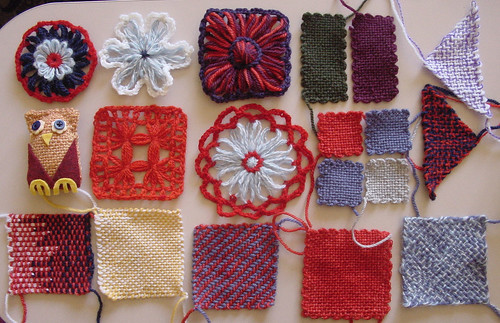
It rocks on so many levels 🙂
The very short instruction sheet says you can weave with it, use it as a wire jig for making dip film flowers and also use it as a flower loom, but that was just the beginning!
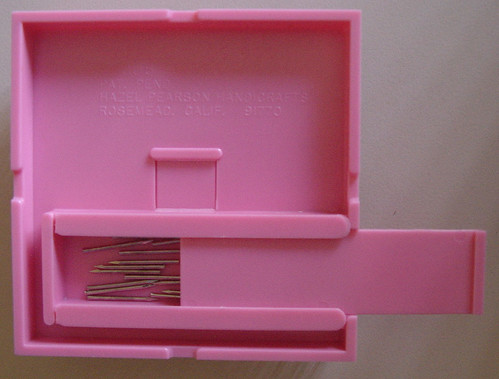
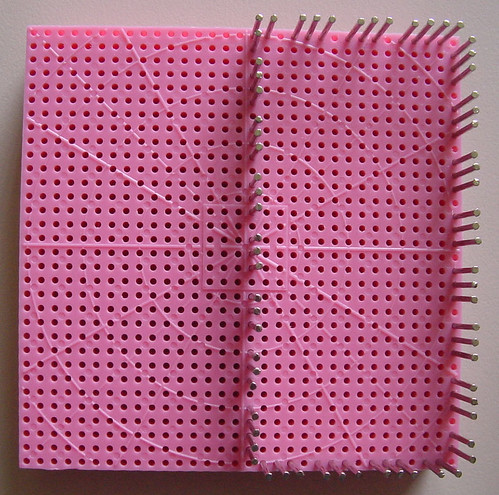
The loom itself is a very sturdy pink plastic that looks brand new, despite being 30 – 40 years old. The pins are tiny nails, like the ones used to hold the back in picture frames. My Dad told me they’re called “panel pins” in the UK but he couldn’t remember what they’re called in Australia. This means that you can always buy more if you need to, or if you find a pinless loom at the op shop.
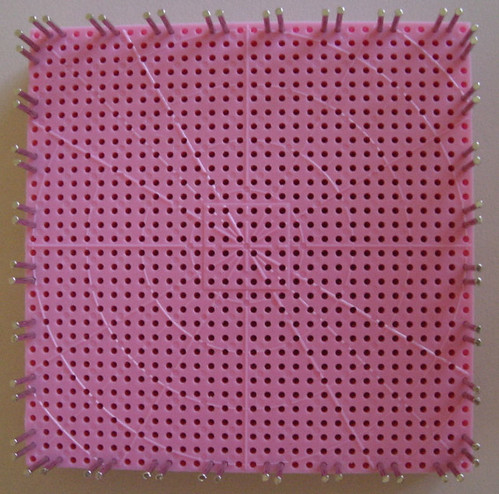
I tried plain weaving first. The instructions suggest putting the pins in using a small pair of pliers. You can put them in with just your hands but my fingers got sore so I went and found my pliers 🙂
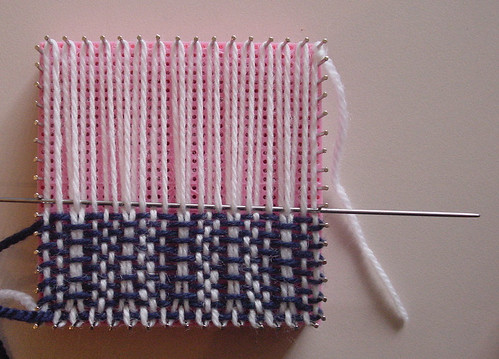
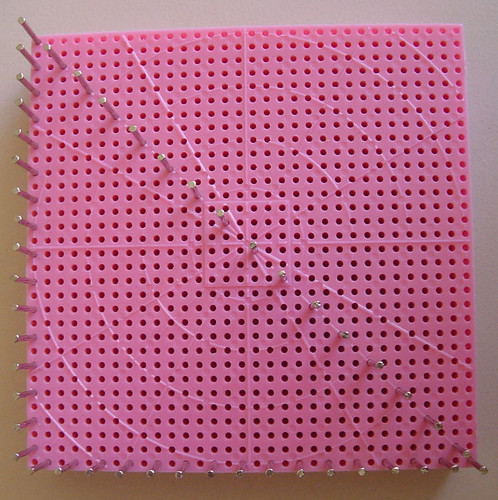
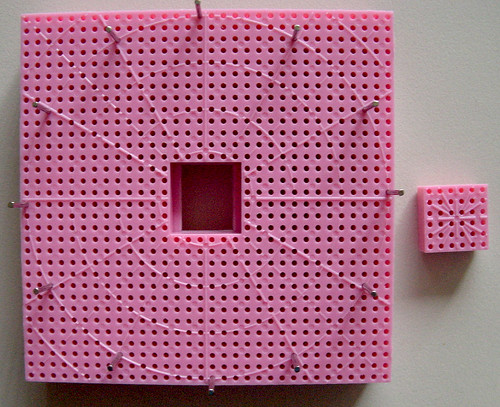
Here’s a picture of the loom set up for basic weaving. It’s 4″/10cm square and has 32 holes along each side.
The pins are stored under the loom in a little box with a sliding lid.
For the most part, the pins are held in very firmly. Some of my pins were a little loose but I either just put a different one in instead, or used them as it was. I found replacing them to be the best idea because if I left the loose ones in sometimes they came out during weaving. If you buy extra from the hardware shop you can toss the loose ones into your toolbox for other uses.
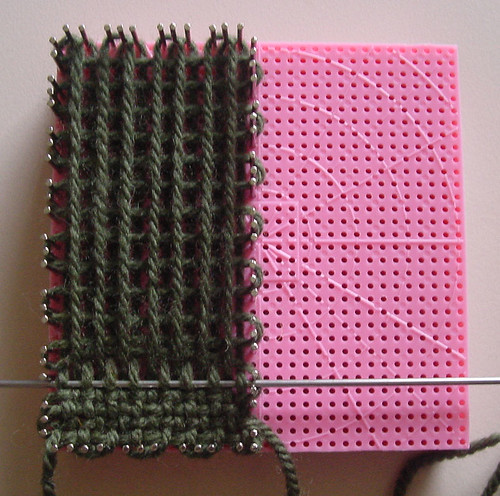
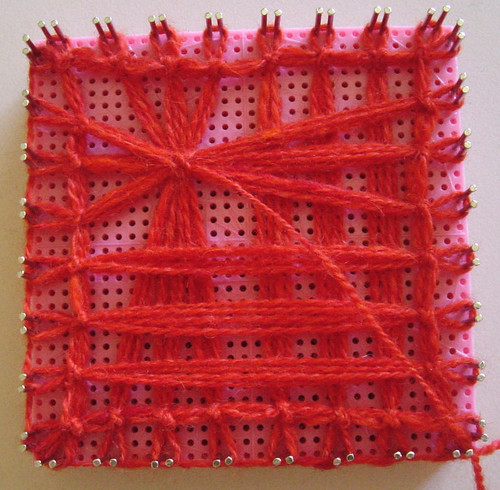
I tried plain weave, some twill and clasped weft. I also tried a rib weave (as shown “in progress” below) but I stuffed that one up. No fault of the loom though!
I used dk weight yarns and they worked out really well. For heavy yarn you can just put the pins further apart and for really fine yarn you could put a pin in every hole (you’d need to buy more).
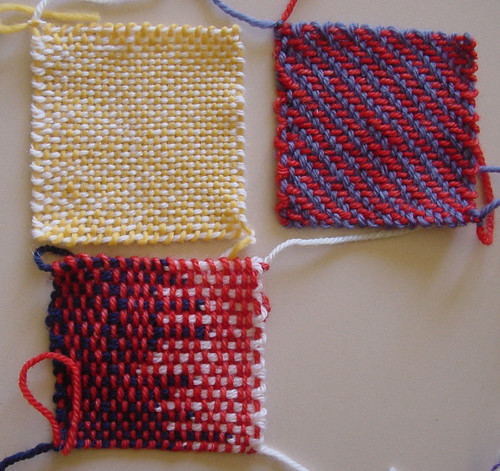
Then I tried a continuous weave on the bias. I used a dk weight yarn and fingering weight yarn held together.
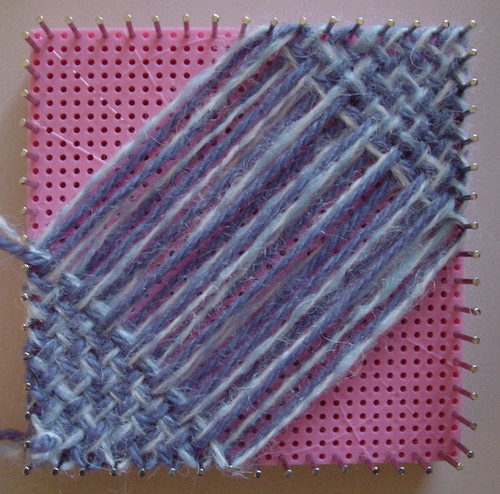
I really liked working this on the Adjust-O-Peg loom because you can remove the corner pins for easier access and put them in just when they’re needed at the end.


I also set up and wove a continuous weave triangle or two. I had no trouble with the yarn popping off the pins at all.

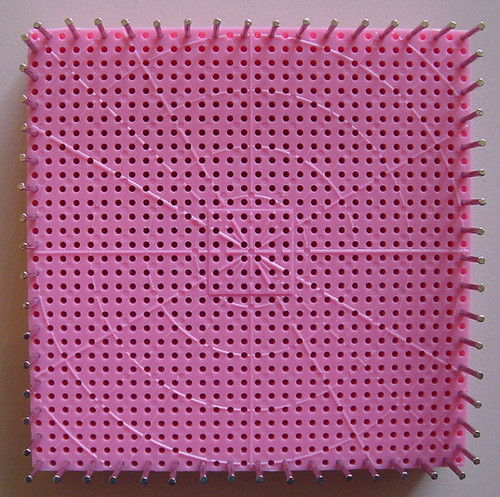
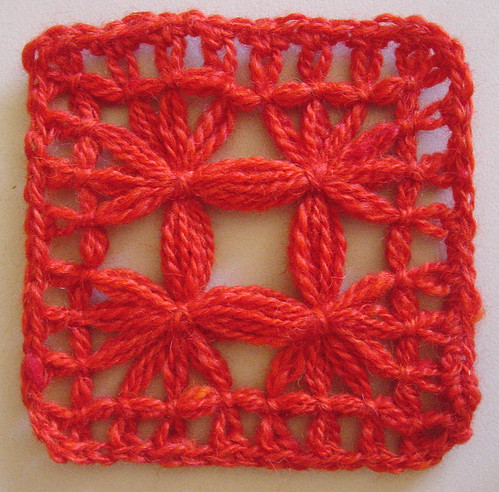
Next I tried using it as a flower loom. You can use it as a 12 petal round loom, with a choice of four different sized circles or a square flower loom with a choice of many sizes due to the grid layout of the holes.
The instructions say to make a round flower by putting your pins in the loom on the bold lines of the circular grid but I found that they are usually near the lines rather than on them. This wasn’t a problem with the finished flowers though as they are pretty evenly spaced around the circle regardless.
First you put in your pins and pop the centre square out of the loom by pushing it from the back. It’s held in quite firmly but with a good push from the back it will come out.

I only made a couple of flower samples because I could have kept going forever :). Just as with any flower loom with upright pins, I didn’t find this loom terribly suitable for Teneriffe lace style weaving as the pins get in the way. They don’t get in the way when weaving squares though.
I found that the hole in the centre of the loom is big enough to gain any access that you need when stitching the middle. The pins are also long enough that the petals won’t pop off unless you’ve done a large number of rounds. If you get into the habit of putting your thumb over the pins as you stitch this will help with puffier flowers.
You can make any combination of flowers as you like. I made a plain 12 petal round flower, a round flower with smaller inner flower, a plain square flower and a flower that has 6 long petals and 6 short ones. There are an infinite number of flowers that you can make by combining larger and smaller circular and square and any other shape you can make and stitch with a flower centre. Combine that with the flower loom techniques on my small looms page and you’ll be very busy 🙂
After this I got out my Weavettes to check out the pin placement and try some Weave-It style weaving. I found that you can use the Adjust-O-Peg as a 2″x2″, 2″x4″ and 4″x4″ Weave-It/Weavette loom. You definitely need to buy more pins to weave the 4″x4″ square.
I wove the smaller pieces with the pins to one side, but I would suggest centering them on the loom to balance the loom in your hand while weaving.
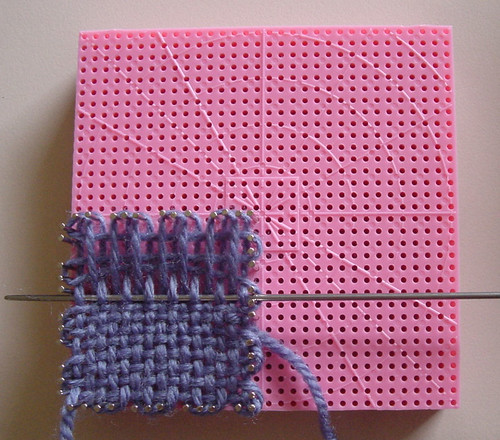
In the interest of being totally honest in my review, I wove my 4″x4″ square on my Weavette loom because I couldn’t get to the hardware shop with the flu, but the Adjust-O-Peg has exactly the right number of pin holes to use it as a 4″x4″ loom if you buy extra pins.
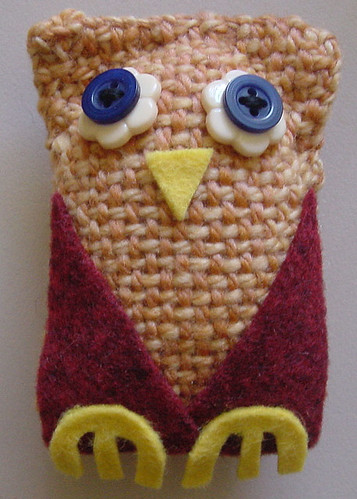
Next I tried weaving a basic rectangle with two rounded corners and made an owl out of it :-). I plan on trying out other shapes as well.
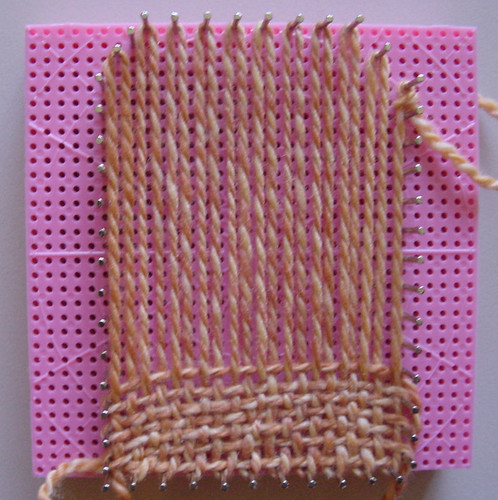
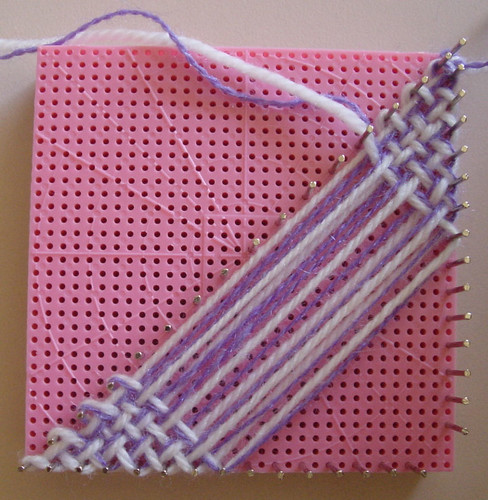
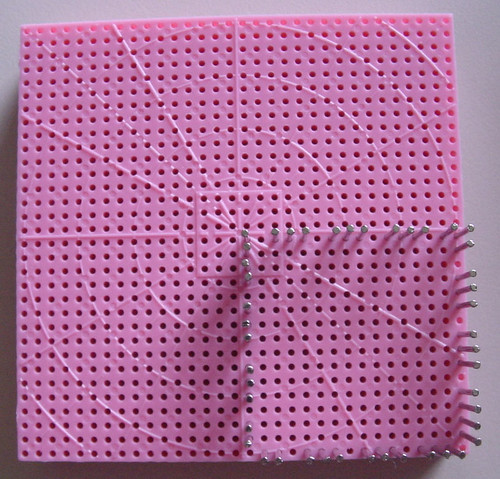
At this point I thought I was just about finished, but then I spied my Magic Looms so I thought I’d have a go at that style of knotting as well.
I used fingering weight handspun yarn and put the pins in as shown below.
With this style of weaving/knotting, you really need to put your thumb over the pins as you go or the yarn will pop off the top quite easily. Once you get into the habit, there’s no problem with yarn popping off. I actually found it easier to use than the magic looms.
One thing the instructions suggest that I didn’t try was to use the Adjust-O-Peg loom as a wire jig for making dip film flowers. These are a type of flower made by dipping a wire frame into a liquid resin.
I’m thinking of having a go using the loom to make wire frames for making these great wire edged flowers from Polka Dot Pineapple.
Try some of the free downloadable books on Eloomanation.com to see what you can do with just the square weaving on this loom. I recommend the following books from that page:
Novelty Weaving Suggestions “Jiffy-Loom pattern, Original Ideas.” Glendale, California: Calcraft Corporation, 1937.
“Bucilla Dictionary of Magic-Loom Weaving Stitches.” Vol. 152. Bernhard Ulmann Co., Inc., 1948.
and
“Original Loomette Weaves.” Los Angeles, California: Loomette Studios, 1949
to start with 🙂
So there you have it. If there are any other looms that I might have that you’d like me to review please let me know and I’ll see what I can do!