
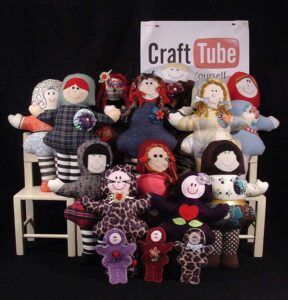
Betsy is a simple doll that can be decorated in an infinite number of ways. The patchwork version is great for using up scraps of fabric or old fashion samples.
I have supplied the pattern and directions for three different sizes of doll. The full size – 29.5cm/11½”, small size (to fit on commercially available sheets of felt) – 27cm/10½”, and a 12cm/5″ Christmas tree decoration.
Pattern
Materials
I have made this doll from cotton, denim, stretch knit, felt and fleecy fabrics. See the special instructions near the end of this tutorial for special directions used to make Betsy from felt or heavy fabric. If you make your doll from a very stretchy knit fabric it may end up quite a bit taller than the measurements given above..
You will need:
- The pattern. You can download it here
- Cardboard (to stick the pattern to)
- Something to trace the pattern onto your fabric with. I use dressmaker’s chalk or a fabric pen (something that won’t bleed into your fabric)
- 1 piece of fabric for the face 7 x 7cm
- -1 piece of fabric roughly 14 x 14cm of fabric for the hands
The following pieces are also included in the printable pattern so you don’t have to measure them
- 2 pieces of fabric for the bonnet 12 x 26cm
- 2 pieces of fabric for the shirt 7.6 x 26cm
- 2 pieces of fabric for the skirt 9 x 26cm
- 2 pieces of fabric for the legs 8 x 26cm
- 2 pieces of fabric for the shoes 8 x 26cm
- If you want your doll to wear a dress instead of a shirt and skirt, cut 2 pieces of fabric 14.6 x 26cm instead of the shirt and skirt pieces.
- Ribbon or purchased bows for the neck and shoe bows
- 2 pieces of ribbon 6mm or 1/4″ wide and 26cm long for the belt if desired
- Embroidery thread or fabric paint for face
- Threads to match fabric for sewing
- Small amount of yarn for fringe, if desired
- Stuffing
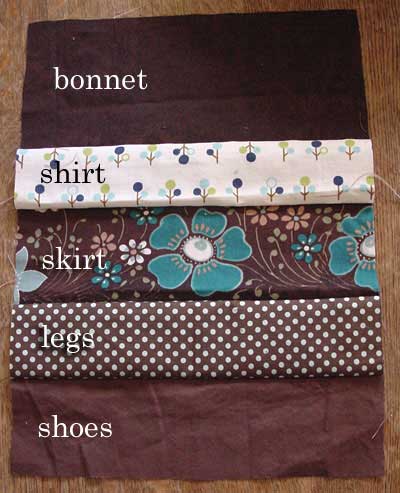 |
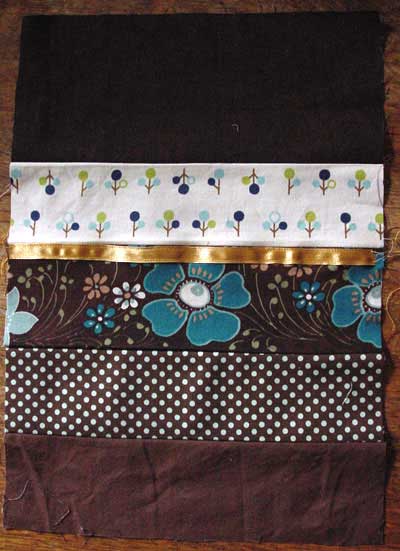
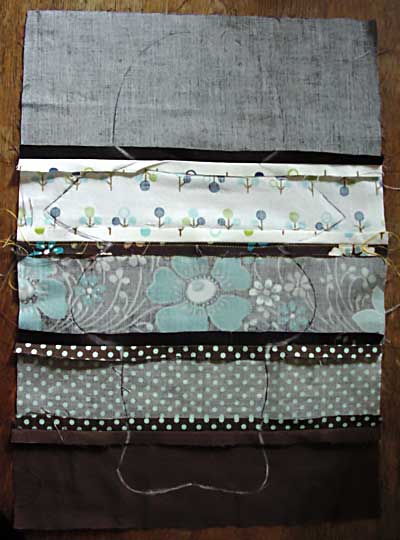
MethodSew the strips of fabric together in the following order (top to bottom). 1: Bonnet |
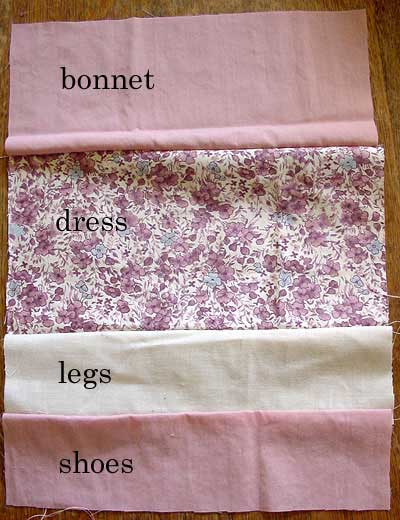 |
If you want your doll to wear a dress instead of a shirt and skirt use the dress pattern piece instead of the shirt and skirt pieces.
Seam allowances on the cut pieces are 1cm. If you prefer to work in inches, you can trim the patterns so the seam allowances are 1/4 inch before cutting out your fabric. |
 |
Finger press your seams open and iron.
If you’re using a fabric that can’t be ironed just finger press the seams open. |
 |
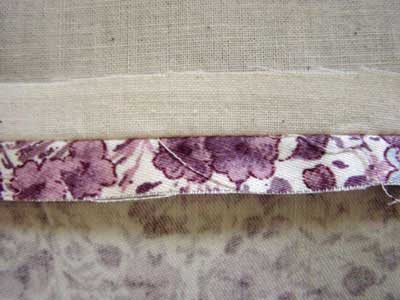
If you want your doll to wear a belt sew the 6mm or 1/4″ ribbon to both pieces of patchwork beneath the seam that lies between the skirt and shirt fabric. The top of the ribbon should sit on the seam line. |
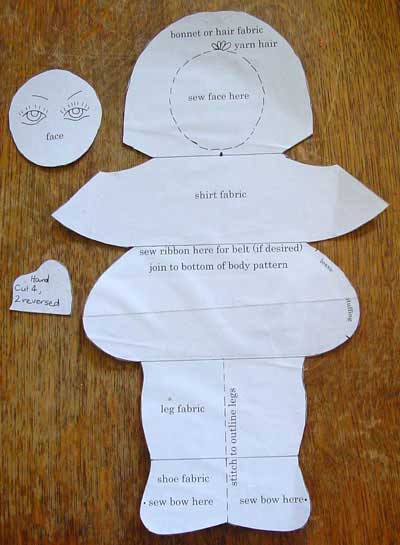 |
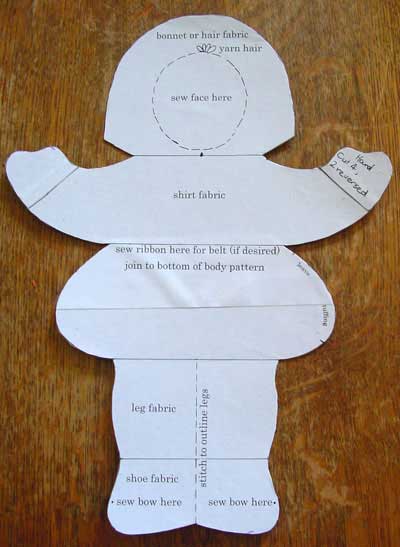
Stick the pattern to the cardboard and cut out. I used an old cereal box.
You will need to stick the two pieces of the main pattern together, overlapping them slightly. |
|
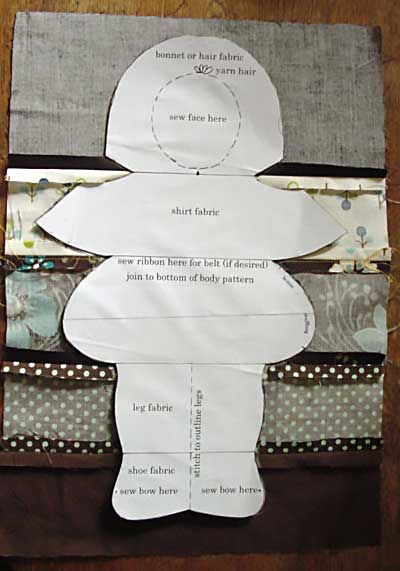
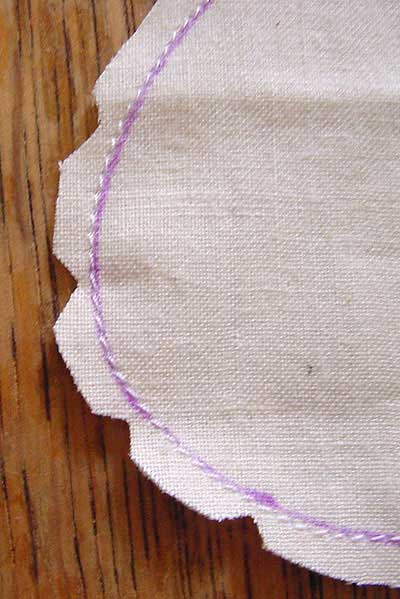
Trace the outline of the doll onto the back of one piece of your patchwork fabric, matching the seams with the marks on the pattern. This is the sewing line. |
 |
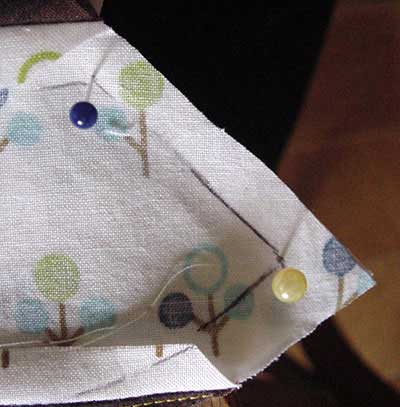
Place your pieces of patchwork with the right sides facing each other and pin.
Cut out, leaving 1/4 to 1/2 an inch (6 – 12mm) of fabric outside the lines for the seam allowance. Leave the pieces pinned together for now. |
 |
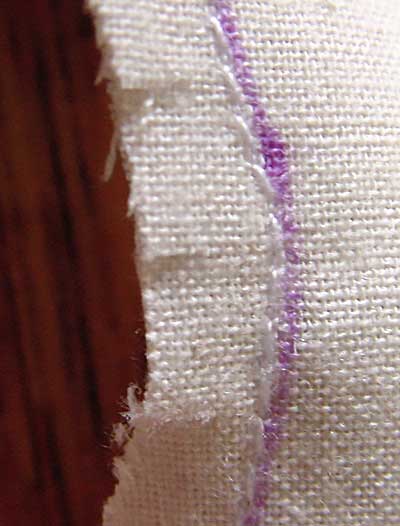
Next you will need to mark the sewing lines at the end of the arms onto the back piece so that you can sew on the hands.
Stick a pin through the corners of the sewing line at the end of one arm. |
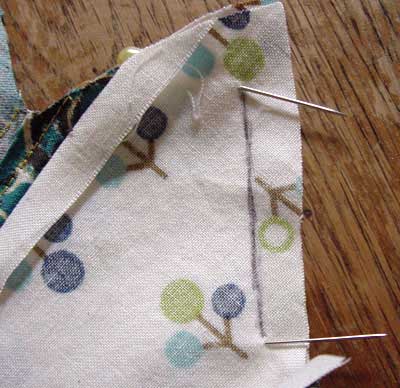 |
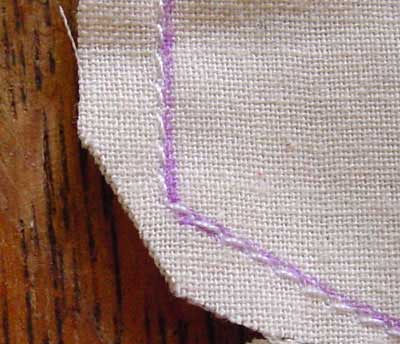
Turn the pieces over and draw a straight line between the pins. Now you know where to sew the hands on both pieces 🙂
Remove all the pins. |
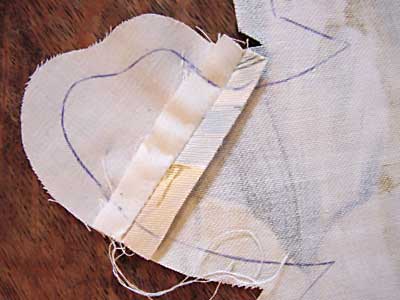 |
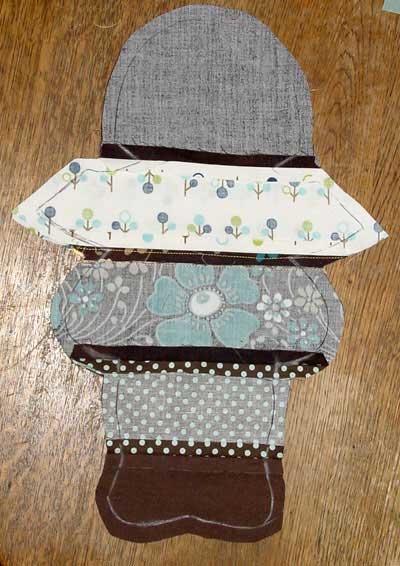
Cut out the hands and stitch them to the ends of the arms with the thumbs facing up. Make sure you match the sewing lines on the sleeves with the sewing lines on the hands.
Iron the seams open. Trace the sewing line onto the seams so you know where to sew. |
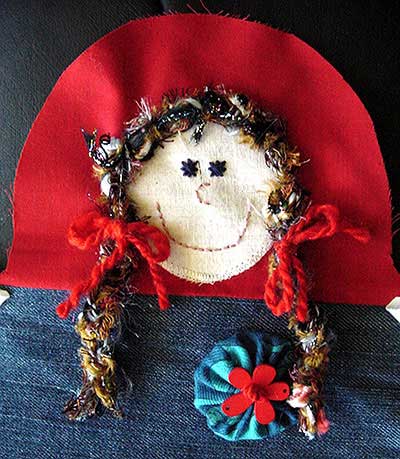 |
Sew the face onto one piece of your doll, in the spot marked on the pattern. You can hand sew using running stitch if you are using a fabric that won’t fray. Blanket stitch will also work well.
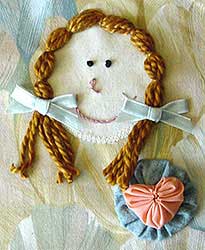
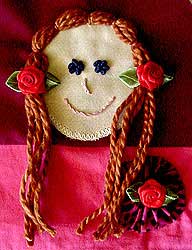
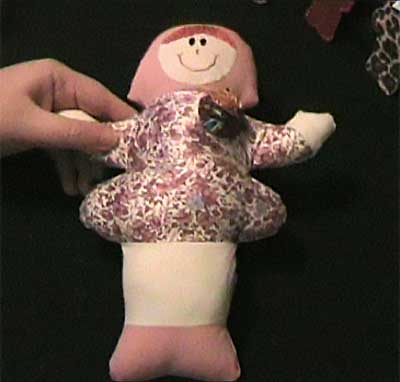
I fused my faces to the background fabric using vlisofix appliqué paper following the instructions on the backing. I then used my sewing machine and a zig-zag stitch to sew the faces on my dolls. The original 1930’s pattern suggested tucking a few loops of yarn under the top of the face before stitching it on to create a fringe. Paint or embroider the face in your choice of style. I have included the original 1930’s style face on the pattern but I stitched much simpler faces on my dolls. Work any embroidery or additional decoration on your doll. For this doll I used double cross stitches for the eyes, back stitch for the nose and mouth and stitched on a plait of knitting yarns for the hair. I added a fabric yo-yo/Suffolk puff with a flower bead to decorate her dress. |
 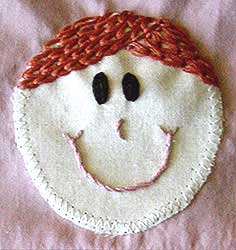 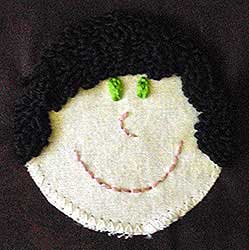  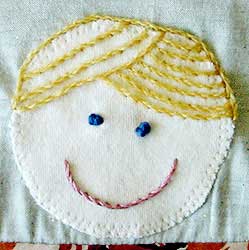 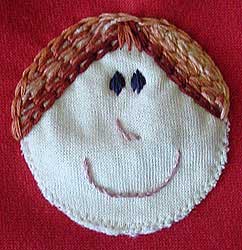 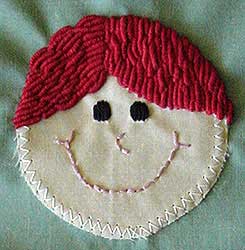 Some other face designs I have made using different embroidery stitches. Some other face designs I have made using different embroidery stitches. |
|
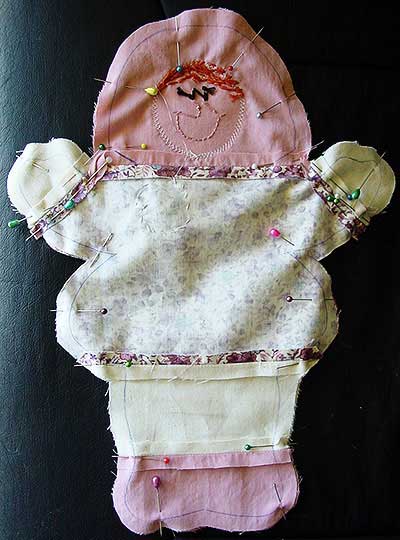 |
Pin the pieces with right sides together and stitch on the sewing line. Leave an opening for turning and stuffing.
In the pattern I have left the opening on the skirt but in my video on stuffing toys I left an opening along the side of the leg. Both work well but I find the leg position easier to sew closed afterwards. |
 |
Trim the seam allowances to 6mm – 1/4″
Clip or notch the seams as appropriate. Be careful when clipping stretchy fabrics such as stretch-knit or fleecy so they don’t run. Notch outward curves |
 |
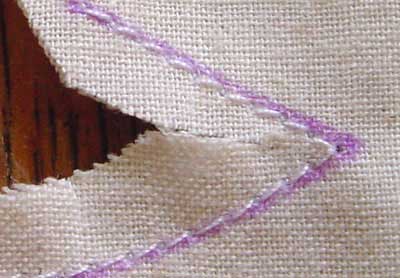
Clip inward curves |
 |
Clip Corners |
 |
Snip inner corners |
 |
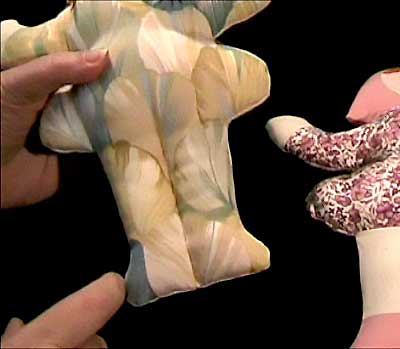
Turn right side out and stuff.
Since Betsy is quite a complex shape, I have made a video to show you some simple tricks that will make stuffing her a painless process 🙂 |
 |
Stitch the opening closed by hand. |
 |
Hand stitch the line between the legs from the bottom of the shoes to the skirt line.
You guessed it, I made a video to show this step as well! Sew bows to the neck and shoes if desired. |
 |
To make your doll from felt or heavy fabric
If you want to make your doll from felt or a heavy fabric such as furnishing fabric, cut it using the sewing line on the pattern as your cutting line. If you’re not using felt, try to use a fabric that won’t fray too much. |
 |
You’ll need to cut out two patterns for the hands and glue or tape them to the ends of the sleeves of your pattern or your doll won’t have any hands 🙂
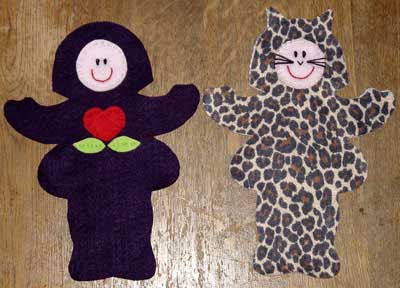
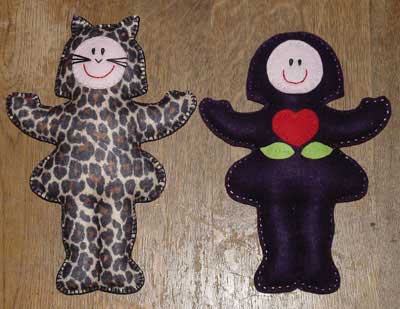
If you want to make your doll from two pieces of 12″ x 11″ craft felt, use the reduced pattern on page 12 of the pattern as the original sized pattern won’t fit. If you’re using felt yardage or homemade felt, and are making the full size doll, you’ll need 2 pieces of felt 30cm x 26cm – 12″ x 10″ Use a good quality felt that won’t split when you stuff your doll. I have used kunin felt for my dark purple doll and a printed acrylic felt for the kitty doll. Both were made with the reduced pattern. This is a great project for using handmade felt too. |
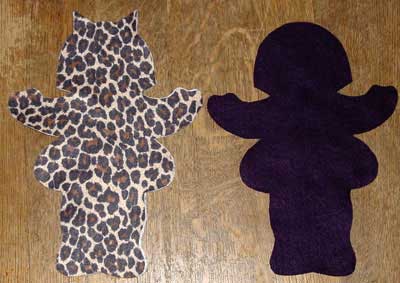 |
Trace the doll onto your felt and cut it out along the drawn line. You won’t be leaving a seam allowance as you did when making a doll with finer fabric that frays. You can cut two layers at once if your felt isn’t too thick.
Add any special additions to the shape of your doll before cutting out. For example, I added cat ears to my kitty doll. You could add pigtails, a bun, antlers, a crown, anything you can think of! |
 |
Attach the hair, face and any other embellishments or embroidery that you desire. |
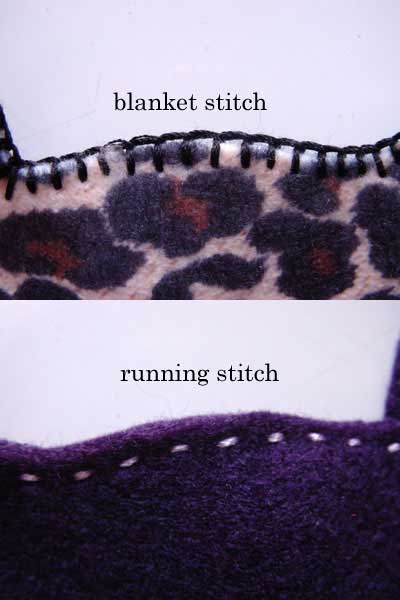 |
Place your pieces with the wrong sides together and oversew the edges. You can sew by hand with embroidery thread if desired. Blanket stitch, oversewing or a running stitch 3mm – 1/8″ from the edge of the fabric will all look nice.
You could also use a sewing machine with a straight or zigzag stitch. |
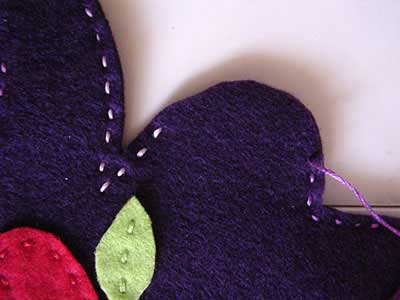 |
Leave a gap at the edge of the skirt for stuffing your doll.
Hide any knots inside the seam. |
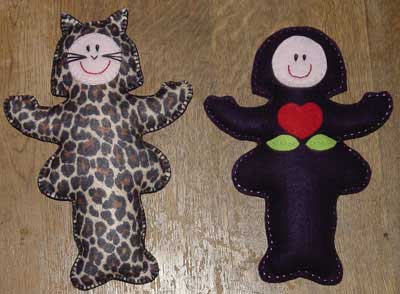 |
Stuff, then sew the opening closed.
Begin by stuffing the arms, then the head, torso, legs and finally the skirt. If you use a sewing machine with zig-zag stitch to sew your doll closed after stuffing be very careful not to break the needle. |
 |
Hand sew a vertical line to define the legs running from the bottom of the shoe to the bottom of the skirt. |
|
Sew on bows or other decorations if desired. |
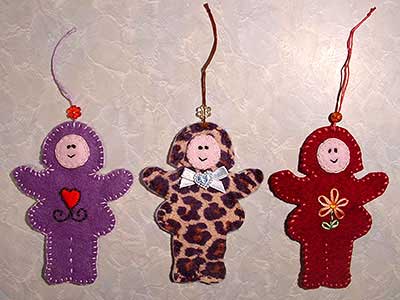 |
To make hanging Christmas decorations, use the tiny pattern on page 13 of the pdf and omit the stuffing. |
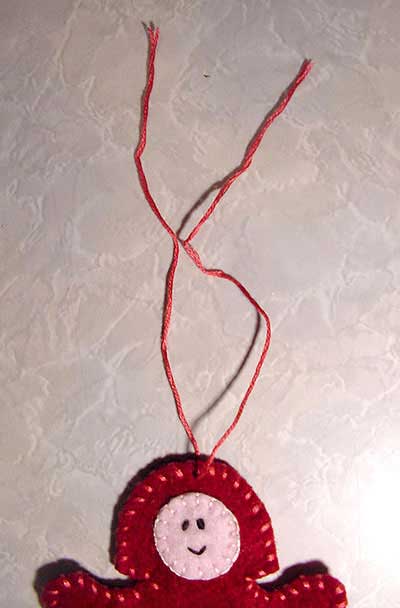 |
Add a loop at the top of the doll so you can hang it on your tree
Take a length of thread and thread it through the top of your doll |
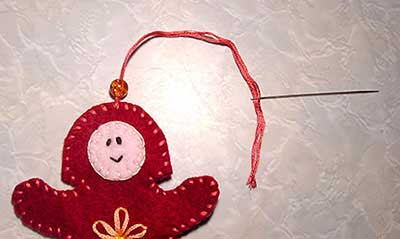 |
Tread on a bead.
Use one with a hole just large enough for your thread so that it won’t fall off. |
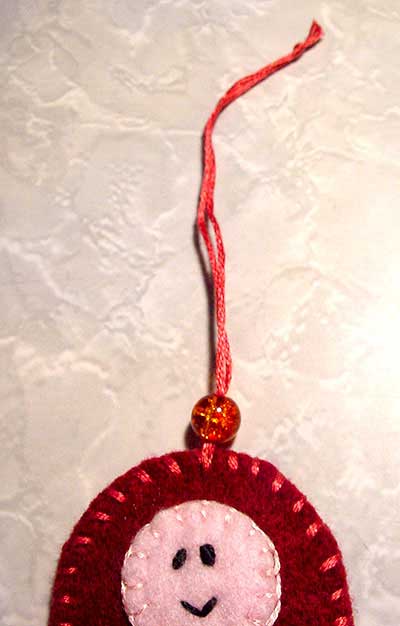 |
Tie a knot near the end of the thread. |
|
Variations:
There are an almost infinite number of ways to vary the Betsy doll. Here are just a few. Stick the hand pieces to the wrists on your pattern and cut the whole doll out of plain calico. |
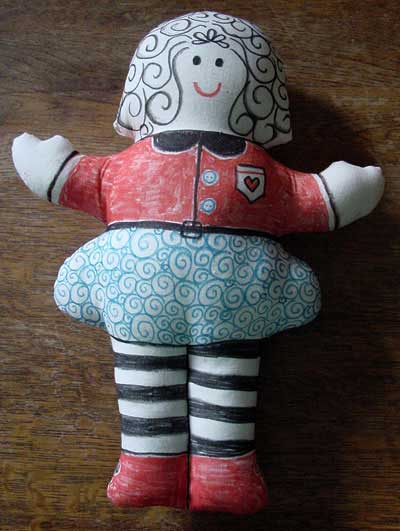 |
Omit the separate face piece, stuff and paint with fabric paints, or colour with fabric pens as I have done for the sample doll.
You will find it easier to colour the legs if you sew the dividing line after decorating your doll. This variation makes a great gift as a signature doll. Leave the dress plain and present it with some fabric pens so people can sign her dress. |
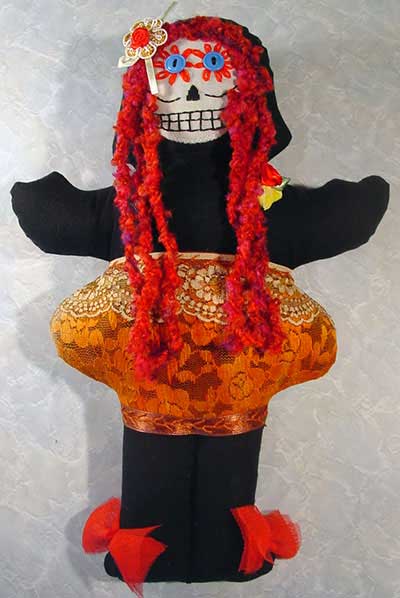 |
Cut the doll from one piece of fabric, add a face and decorate for a Day of the Dead doll. |
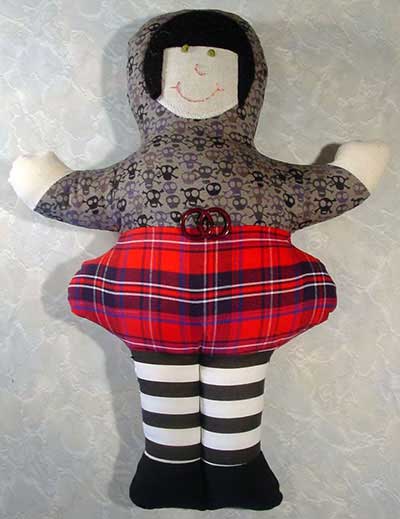 |
As well as changing the hairstyle (as mentioned in the felt doll section), you can also alter the shape of the doll’s clothing. I made the points on the bottom of the bonnet smoother and cut the shirt and bonnet from one piece of fabric for a hoodie. You will find the pattern on pages 9-11 of the downloadable pattern (altered body piece and patchwork piece for hoodie)
There are many other ways to individualise your dolls.
|
Copyright Sarah Bradberry January, 2010. All rights reserved.