Materials
4 oz, 4-ply worsted weight, washable yarn
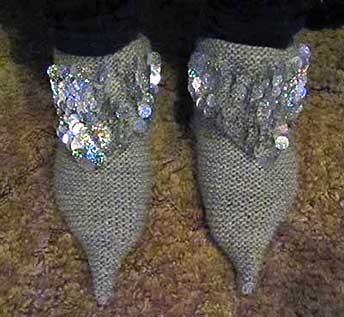
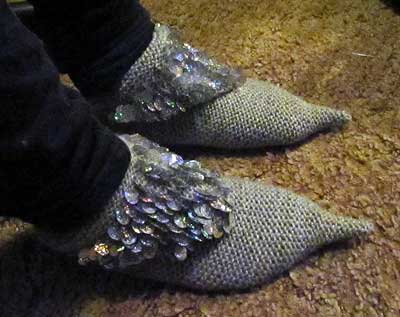
Pailettes. The sample slippers were knit with 1/2″ pailettes. Child size slippers use approx 100 pailettes per slipper. Adult slippers use approximately 160-170 pailettes per slipper.
#8 (US) needles for women’s sizes,
#6 for child’s sizes.
Pattern
This pattern is very similar to the popular dishcloth pattern we have all made and love, except no knit in border.
String the pailettes on the yarn. The holes are tiny, so you will have to make them larger by inserting your plastic darning needle into each hole – gently – you don’t want to tear the holes. Or use a hand-held paper hole punch and make a larger hole. Be sure you leave some space near the outer edge so the pailette won’t fall off once its knitted into the slipper. (Note from Sarah: I found it very easy to enlarge the holes with my darning needle)
Garter stitch – knit every row.
Cast on 3 stitches.
Row 1: Knit 1, slide pailette up yarn to snuggle close to the next stitch – knit that stitch – the pailette will stay put, knit 1.
Row 2: Increase in the FIRST and LAST stitch on the row by knitting in front and back of each stitch. 5 stitches on needle.
Row 3: Knit 1, slide pailette up and knit 1, knit 1, slide pailette up and knit 1, knit.
Row 4: Increase in the FIRST and LAST stitch on row. 7 stitches on needle.
Row 5: Knit across and slide pailette up EVERY THIRD STITCH: (k2, slide pailette-K1, K2, slide pailette-K1, K1).
Continue in this manner – Odd rows knit across, sliding pailettes every 3rd stitch. Even rows increase in first and last stitch. If you forget, here’s a simple guideline: Pailettes face OUT for odd rows, and FACE YOU for even rows.
Continue until you have 31 stitches (43 for adult size) on needle. At this point stop sliding pailettes on the odd rows, but continue to work increases on the even rows until you have 63 stitches on the needle. (51 for child size). Knit across.
Note from Sarah: To adjust the size, knit until the edge of your triangle is an inch or two longer then the recipient’s foot. Garter stitch is stretchy so even if they’re a little short they will stretch to fit.
Decrease:
Knit 2 stitches together, knit across row to last 2 stitches, knit 2 together. Next row knit across. Same guidelines apply here: Odd rows decrease by k2tog on FIRST and LAST stitch when pailettes face OUT. Knit across row when pailettes FACE YOU. Continue decreasing until there are 3 stitches on needle. Bind off.
Now comes the fun part!
You have knitted a square with a triangle of sparkles on one of the corners.
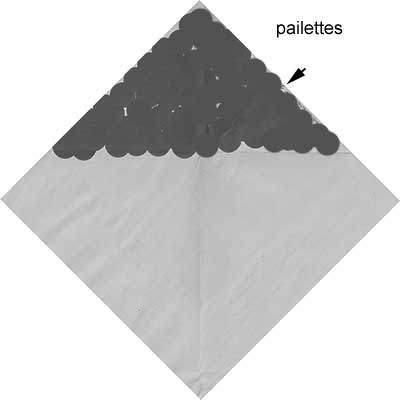
Turn this square so the point of the sparkles is at the top – with the pailettes FACE DOWN. Take the right side corner – Point A – and fold over the top of the left side corner – Point B.
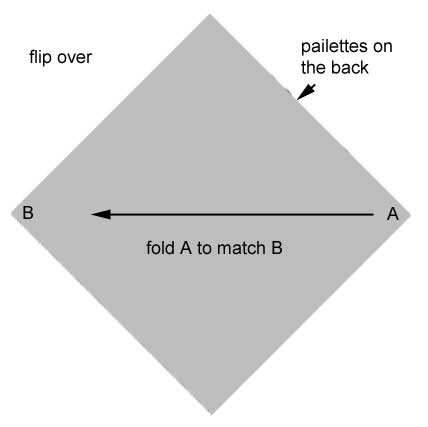
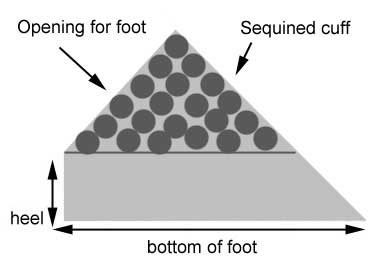
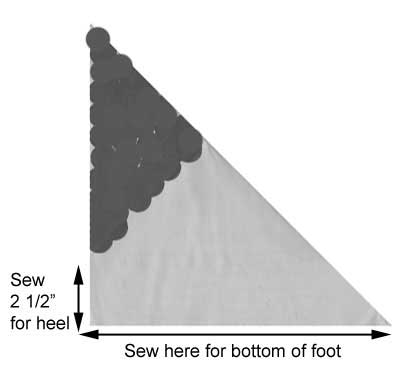
Sew the seam of the slipper from the bottom corner – Point C – toward Point A/B. This is the bottom of the slipper.
Continue sewing at Point AB up the remaining open side for 2-1/2 inches. This is the back of the heel.
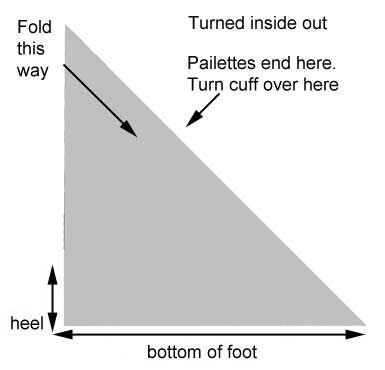
Turn the slipper inside out and fold the sparkly point down over the slipper to form a slanted cuff that tapers to nothing at the back (heel).

Copyright Elaine L. Baker. Email: [email protected]
