

Ribbon flowers can be stitched into all sorts of different shapes. Here’s how I made the one in the photograph.
 |
In addition to your ribbon, you will need a little piece of sticky tape, a sewing needle and some thread.
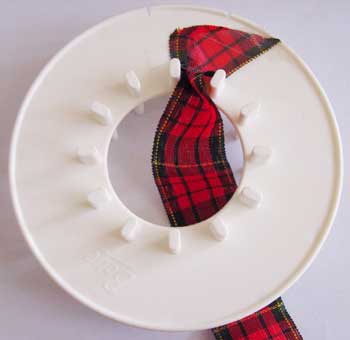
Stick the end of your ribbon to the back of your loom. This will save you lots of aggravation later on if your ribbon is quite stiff like mine. |
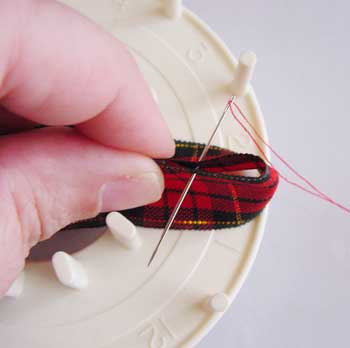 |
Wind your ribbon around the first petal and make a few stitches |
 |
Continue around, stitching the petals as you go. If your ribbon is soft you might be able to wind the whole flower and work all the stitching when you’ve taken it off the loom. My ribbon was very stiff and kept wanting to unwind so I stitched it as I went. |
 |
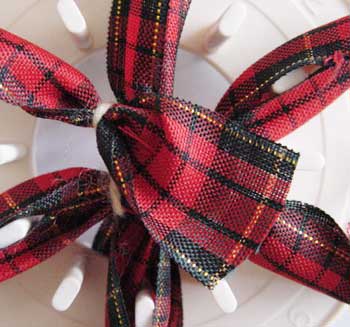
When you have wound all the petals make a basting stitch in the centre to hold everything in place. |
 |
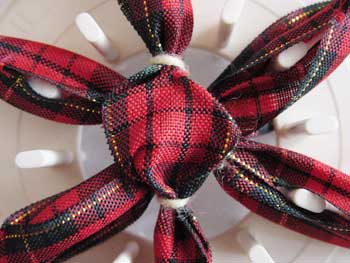
Tie the centre in place with a round of back stitches. |
 |
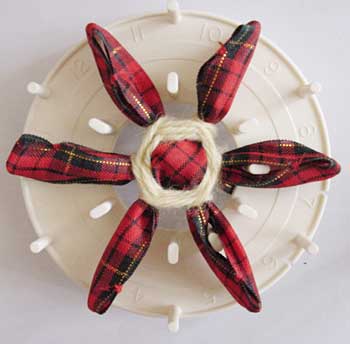
Tuck the ends of the ribbon under to form a pint and stitch down. |
 |
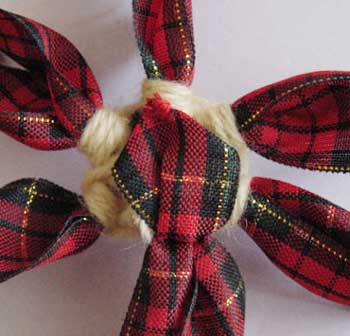
Finish winding your centre as desired. I finished off with three rounds of stem stitch worked with some tapestry wool. |
 |
Take your flower off the loom and remove the sticky tape from the end of the ribbon. Tuck the ends under to form a pint and stitch it neatly to the back. |
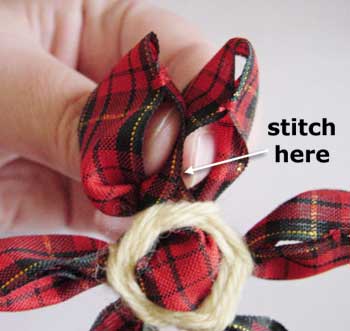 |
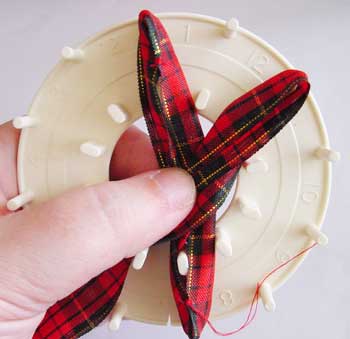
Hold a pair of petals side by side and stitch together a t the arrow in the photo. |
 |
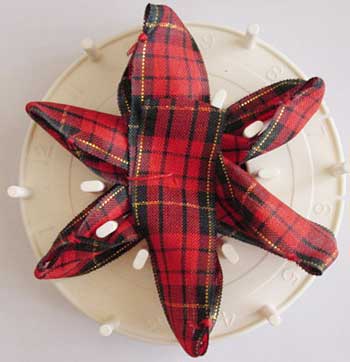
The finished flower! |
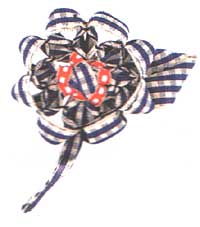 |
Try all sorts of different variations! The flower on the left (scanned from the Hana Ami loom instructions) has the petals stitched to each other at the outer edge and the bottom of the petals stitched closed near the centre. |
Copyright Sarah Bradberry March 2007. All rights reserved.