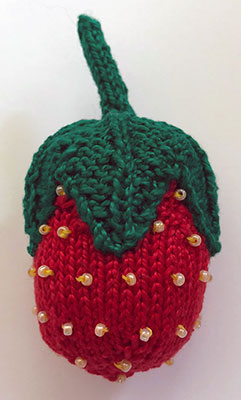
This pincushion pattern is based on one published in the Narracoorte Herald, Thursday, the 17th of July 1890.

Materials
- A small amount of size 5 knitting/crochet cotton in red and green
- A set of double pointed knitting needles in size 2mm
- A 5 inch (12.5cm) circle of red cotton fabric or something similar (you won’t need this if you are stuffing your strawberry with wool or toy filling).
- Yellow seed beads (optional)
- Needle and thread (for gathering the fabric and sewing on beads)
- Filling: either ground walnut shells, emery powder, sheep’s wool, or toy filling. Emery powder or ground walnut shells are the most traditional fillings for keeping your pins sharp, while sheep’s wool with a little lanolin still in it will keep them rust free. Sheep’s wool was more traditionally used to fill a tomato shaped pincushion to go with your pin-sharpening strawberry.
Gauge
Approximately 42 sts to 4 inches/10cm using size 5 crochet cotton on 2mm needles. Getting exact gauge is not critical for this project.
Size
The finished strawberry measures approximately 2 1/8 inches, or 5cm tall.
Pattern
The Berry

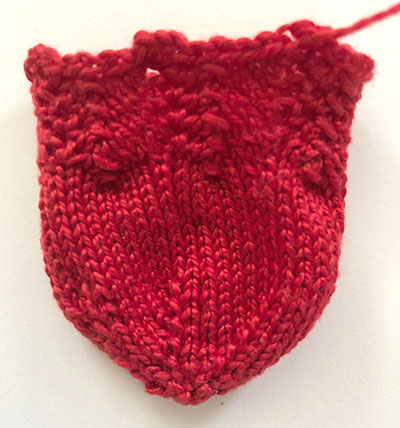
Cast on 6 stitches and join for knitting in the round.
Round 1: K6.
Round 2: *M1L, k1, repeat from * (12 sts).
Round 3 and all odd numbered rounds: Knit.
Round 4: *M1L, k2, repeat from * (18 sts).
Round 6: *M1L, k3, repeat from * (24 sts).
Round 8: *M1L, k4, repeat from * (30 sts).
Round 10: *M1L, k5, repeat from * (36 sts).
Round 12: *M1L, k6, repeat from * (42 sts).
Knit 11 rounds.
Rounds 24, 26, 28, 30 and 32: *M1L, k2, sl1-k2tog-psso, k1, (k1, p1) in next st, repeat from *.
Cast off.
The Leaves

The tips of the leaves are worked first, then all five are placed on a single needle and worked together so you don’t have to sew a bazillion seams.
Using green, cast on 2 stitches
Row 1 (RS): Kfb, p1 (3 sts).
Row 2: Kfb, p1, k1 (4 sts).
Row 3: Kfb, k1, p2 (5 sts).
Row 4: Kfb, k1, p1, k2 (6 sts).
Row 5: Kfb, p1, k1, p3 (7 sts).
Row 6: Kfb, k2, p1, k3 (8 sts).
Row 7: Kfb, p2, k1, p4 (9 sts).
Row 8: Kfb, k3, p1, k4 (10 sts).
Row 9: Kfb, p3, k1, p5 (11 sts).
Cut the thread, leaving a tail (this will be used later to sew on your leaves). Put this half-leaf onto a spare needle and make another 4. Don’t cut the thread on the last one as you will use it to continue knitting.
You will now have 5 half-leaves on a single needle. With the wrong side facing you, continue as follows
Row 10: (K2tog, k3, p1, k5) five times (50 sts).
Row 11: (P2tog, p3, k1, p4) five times (45 sts).
Row 12: (K2tog, k2, p1, k4) five times (40 sts).
Row 13: (P2tog, p2, k1, p3) five times (35 sts).
Row 14: (K2tog, k1, p1, k3) five times (30 sts).
Row 15: (P2tog, p1, k1, p2) five times (25 sts).
Row 16: (K2tog, p1, k2) five times (20 sts).
Row 17: (P2tog, k1, p1) five times (15 sts).
Row 18: (K3tog) five times (5 sts).
Cut the thread, thread it through the remaining stitches. Pull tight and fasten off.
The Stalk

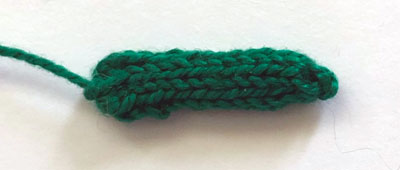
Using green, cast on 6 stitches and knit in the round for about one inch (2.5cm). Cut the thread, draw it through the stitches, pull tight and fasten off.
To Make Up
If you are using sheep’s wool or toy filling, stuff the red part of your strawberry, pull the thread tight to draw up the stitches and fasten off.
If you are filling your pin cushion with emery powder or ground walnut shells, take your circle of fabric and gather it as you would if making a round Suffolk Puff or fabric yo-yo.
Pull the gathering halfway, fill with your powder until it is about 3/4 full, then pull the thread tight and fasten it off. If there is still a small hole in the top, stitch it closed using small, close stitches.
Squash the stuffed fabric into a strawberry shape and place it inside the knitted covering. (This is why you only fill it 3/4 full. If you fill it up completely you won’t be able to squish it into shape).
If you still have an unstuffed section at the top of your strawberry, fill in the gap with scrap thread, or a tiny bit of toy filling.
Pull the thread on top of the knitted covering to close the hole until it is just small enough to be covered by the leaves. Don’t pull it tight.
Sew the stalk to the centre of the leaves.
Sew the leaves over the gathered end of the berry.
Optional: Sew tiny yellow seed beads onto your strawberry to look like seeds. You could embroider tiny straight lines using 3 strands of embroidery floss instead, if desired.

