Menu Close

Tag: upcycled

How to Line a Box with Fabric, Braid and Buttons

Today I have a brand new photo tutorial for you! Would you like to know how to line any wooden or sturdy cardboard box with a professional finish like this?

Needlework box lined with fabric

Then check out my new tutorial, “How to line a box with fabric”.

You can use these three techniques to transform anything from shoe boxes to hand made wooden boxes like mine.

I hope you enjoy learning this new skill, and making upcycled heirloom pieces from ordinary boxes.

signature

Upcycling Materials with a New Dye Job

My regular readers have probably figured out by now that I mostly use other people’s discarded materials from the op shop (that’s Australian for charity shop/thrift store). Sometimes that means the materials might need a bit of tweaking before they get used.

A week or so ago I was going through my needlepoint wool stash for a project and found I was missing a few colours that I needed, but I also had a few that I was never going to use. Out came the dye pots!

While I was at it, I thought I’d dye a few other things from the stash too.

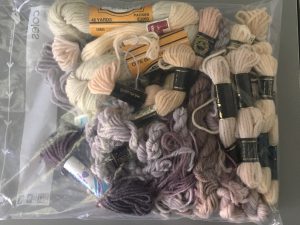
These are the needlepoint wools I started with.

I dyed them, along with other things using the immersion technique. You can find a tutorial on immersion dyeing here. I didn’t stir my dyepots because I wanted variegated effects on my threads and fabrics.

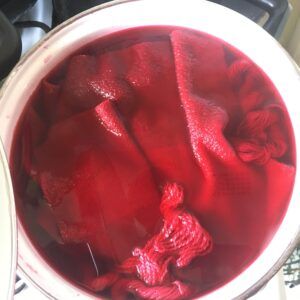
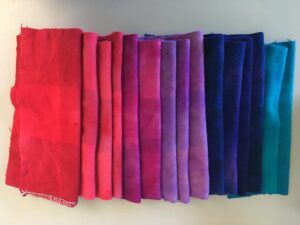
This is my first red dye pot ready to go onto the stove. I dyed needlepoint wools, blanket pieces and silk threads all in one pot.

Red dyepot

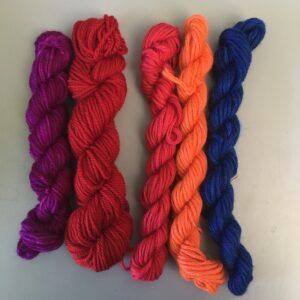
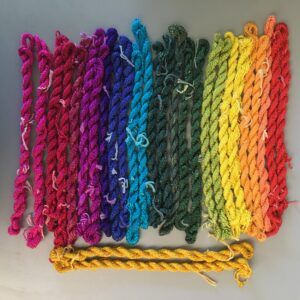
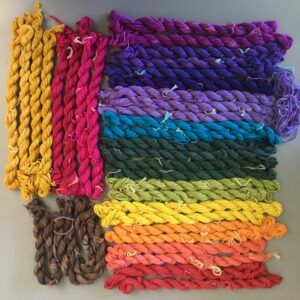
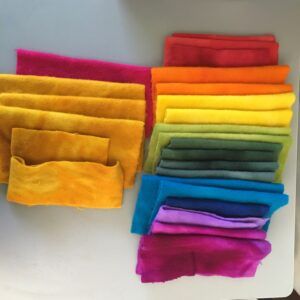
Here are the results of the yarns that I dyed. I did 20 different dye pots in all. Firstly, the needlepoint yarns in some of the colours I needed. The indigo blue was supposed to be purple but the silk threads in the dye pot sucked up all the pink before the wool had a chance.

Hand dyed needlepoint wools

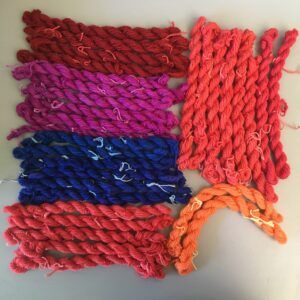
On the left: knitting yarns (machine washable wool), right: crewel wool.
I rummaged through my stash for some knitting yarn to dye purple since the needlepoint wool turned out blue.

Hand dyed knitting yarns and crewel wools

Skeins of rug wool

Hand dyed rug wool

Crepe spun silk thread. The dark pink skeins at the bottom (the top 2 pink) were first dyed red but turned out to have large white patches because I hadn’t untwisted the skeins properly. I over dyed them pink.

Hand dyed silk crepe thread

Silk twist. This thread has one thicker unspun ply twisted with a thread. It’s super shiny in person.
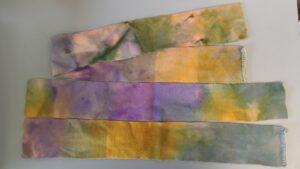
Hand dyed silk twist

Woven silk tape.

Hand dyed silk tape

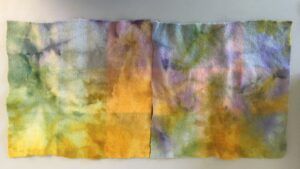
Along with the threads, I also dyed pieces of a vintage wool blanket that I bought from an op shop for a couple of dollars. Here you can see the original colour when I presoaked it before dyeing.

Vintage blanket soaking before dyeing

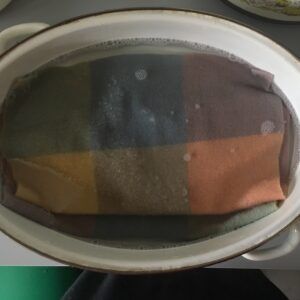
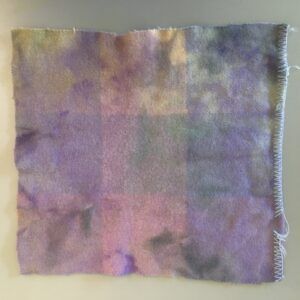
Those of you who have seen my TAST embroidery samplers will know I like to use a similar type of felted wool in my embroidery. It’s super expensive to buy if you want to use large amounts, so I’ve been collecting vintage wool blankets in colours I can dye.

Technically it’s not felt, it’s fulled or boiled wool blanketing but it’s often called hand dyed felt when you buy it.

Hand dyed vintage wool blanket

Hand dyed vintage wool blanket

Hand dyed vintage wool blanket

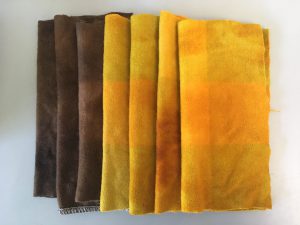
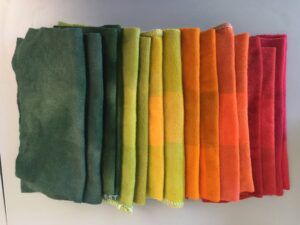
I was lucky enough to also find a large piece of velour style wool blanketing in a discarded embroidery kit, plus another piece, for a few dollars. I dyed that too.

Hand dyed "velour" wool blanketing

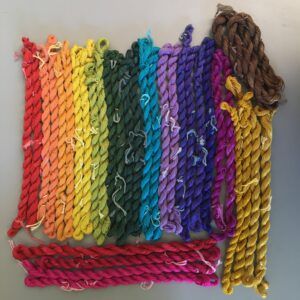
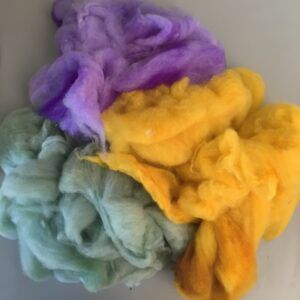
After all of that dyeing I had a jar of green dye left over after deciding I’d put too much green in one of the dye pots and I took half out. I grabbed a small bag of smushed up locks, gave them a presoak for half an hour and rainbow dyed them along with the left over vintage blanket.

Here’s a tutorial I wrote many years ago on rainbow dyeing.

Rainbow dyed wool locks

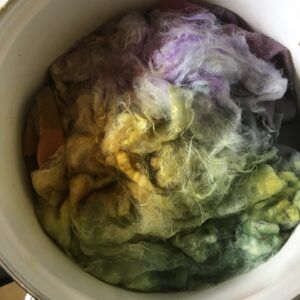
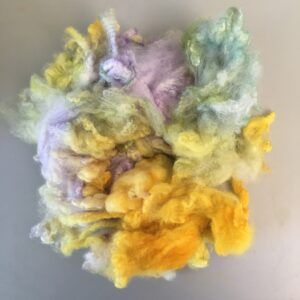
I can’t wait to use these pieces in something. I don’t know what yet but it will be embroidered and colourful!

Rainbow dyed vintage wool blanket

Rainbow dyed vintage wool blanket

Rainbow dyed vintage wool blanket

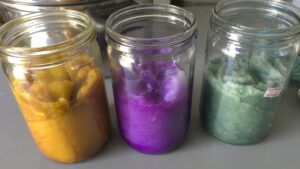
Which of course meant that I was now left with three half jars of dye! So I pulled pieces off a wool quilt batt, stuffed them in the jars for an hour to soak up as much as possible and steamed them for half an hour.

To steam yarns in jars like this you need a few things:

  1. Make sure you’re using proper canning jars. I used Fowler’s canning jars that I bought at the op shop. If you’re in the US you might know them as Mason jars.
  2.  A cake rack or other rack to put in the bottom of your saucepan.
  3.  A saucepan with a lid that is deep enough to take the jars and still seal properly when the lid is on.

Place your cake rack in the bottom of the saucepan. Place the jars on top. Add 3 or 4 inches of water to the saucepan. Add lid and simmer for 30 – 40 minutes. Check the water level every 10 – 15 minutes to make sure it isn’t boiling dry.

Hand dyed wool

I plan on spinning these wools into embroidery threads. Speaking of which, I still have 22 embroidery samplers I’ve finished to tell you about! Maybe I should get ironing…

signature

Recovering Lampshades

My latest finished project for 2016 is also a first for me! I covered a lampshade 🙂

First it looked like this.

Nasty thrifted lampshade before upcycling

Yech. You can’t tell from this photo how truly disgusting and nasty it was. It reminded me of this scene from Black Books:

Dirty from Black Books - the Cleaner

Now it looks like this, (it’s destined for my bed side table but I need to paint the table first).

Machine and hand sewn lampshade with lining

I bought this thrifted green lamp at one of the many local op shops quite a while ago and it had a tall olive green cylindrical lampshade on it. The shade was a lovely shape, but it didn’t have any supports holding the top and bottom rings together and I didn’t know how to recover it. So I bought the one shown above.

I realised I still had no idea how to cover a lampshade so I googled a lot until I found this tutorial from “The Stitch Sharer” blog.

Then I tested a whole load of colour options with my Singer 401. The orange tape is seam tape, while the others are bias binding. I keep my samples in a notebook for future reference.

Colour Tests for my Lampshade

As you can see, I chose to use the pale mint bias binding as I thought it went best with my other nick-nacks. The thread is Wonderfil Silco 40 tex (which I believe is 35wt?) cotton in colour SCM-08. It has a really lovely satin finish that gives you a bit of shine but not as much as rayon would.

It’s far from perfect but I’m happy enough with it and I did learn a lot should I ever want to make another one.

Things I learnt while recovering a manky old lampshade:

  1. When purchasing remnants from Spotlight, check for tea stains :-/
  2. There is a reason this particular shade was covered in fabric cut on the bias. The seams simply would not lay straight on the upright spokes. They all shifted to one side no matter what I did to control them. Bias cut fabric means you can cut the whole thing in one piece and it will fit even if you have to stretch it a bit. And you can hide the one wonky seam where you won’t see it. Unless you put it in front of a mirror.
  3. Allowing 2.5cm/1″ for the hemmed edges was nowhere near enough. I could have done with at least another 1cm/half inch.
  4. Check that the opening in the shade that goes over the bulb holder is the right size. Thank goodness for that sticky velcro stuff used for hanging pictures.

Now I start TAFE on Tuesday and I need a little bag to keep my tea mug safe in my backpack. I’d better get stitching!

signature

Upcycle a Man’s Shirt Into a Woman’s Blouse

If you’ve ever found a high quality man’s shirt while op shopping and wished it was a woman’s shirt, this article from 1936 will help! I’ve copied it here because I had to pull out all my vintage pattern drafting books to find the measurements for making the collar, since the illustration is a bit blurry. (Thankfully Mr Ross Hynes and the 1945 edition of the Home Dressmaker came to the rescue).

“The Shirt Off Father’s Back” from The Queenslander, December 31st 1936.

Home Sewing Hint By Ruth Wyeth Spears

Diagrams for upcycling a man's shirt into a woman's blouse, 1936

THERE have been a number of requests for ideas for using shirts that are worn out in the front at the neckline and that have frayed cuffs. Aprons are some times made from these. A clever mother we know also makes them into sun suits for a wee youngster. One of the most up-to-date ideas is for Mother and the girls to convert old shirts into tailored blouses.

If Father is the broad-shouldered type, it is generally necessary to rip the yoke of the shirt both back and front and add more gathers, as shown here at A, to take up the shoulder width. The yoke is then trimmed off at the arm hole line, as at B, and the sleeve stitched back in place. The neck is cut in a V line, as at C, to eliminate the worn spots. Then the sleeves are cut off straight around on the thread of the goods 5 inches below the bottom of the armhole as at D. This allows for a 2-inch hem. The cut off pieces of the front of the sleeves are used for the blouse collar and the collar facing. Sometimes it is necessary to use the pieces from both sleeves for the outside of the collar with a piecing in the centre back, and then use plain white material for the facing.

If white shirts are being made over, a half yard of white cotton broadcloth will make entirely new collars for six shirts. To make a pattern for the collar cut a piece of paper 3 inches deep, and 1 inch longer than half the portion of the neck edge to which the collar is to be joined. Shape this paper according to the dimensions shown here in diagram E. The short edge of this pattern is placed on a fold of the goods in cutting. When the collar has been cut and faced, sew it to the right side of the neck edge, with a strip of bias tape, as shown at F. Turn the tape down over the seam and sew as at G.

signature

Embroidered Brooches from Curtain Rings

Today’s free pattern is for the classic vintage curtain ring brooch made popular in the 1930’s. These little brooches became iconic during World War Two, when women would make them from anything they had on hand, from oddments of embroidery thread to electrical wire, adding buttons, badges and felt for a wider range of styles.

From the Brisbane Courier, January 12th 1933

Embroidered curtain ring brooches from 1933

THESE dainty little brooches are easily made by any clever needle woman, and the only materials required are brass curtain rings about 1 3/8in. across, and a few skeins of stranded cotton in bright colours. First button-hole closely all over the ring, pushing the stitches close together so that it is well covered. Turn the button-stitch edging towards the inside of the ring so that the foundation filling can be worked into it.

Centre filling for embroidered curtain ring brooches

Beginning in the centre  of the ring, work straight close threads across, and when the half is done turn the ring and darn across as in B, then complete the work to the other edge. At first it will be possible to darn the threads, but as the work becomes tighter it will be necessary to push the needle in and out from front to back, &c.

Now work your design in any pleasing colours. Lazy daisy stitches are used for the chrysanthemum, the original of which had a foundation of jade green, with the flower in lemon with an orange centre. The rose-tree design had a black background with brown for the stem, and the roses were worked with four French knots in green as centres, and satin stitches in coral worked in two third lengths all round to form the flower. The other designs can be worked in a similar way, sometimes the whole six strands of the thread being used, and sometimes only three or four when required for stems, leaves, and fine work. When finished tidy the wrong side and sew firmly on a small gilt safety pin and the brooch is finished.

signature