Menu Close

Category: Knitting

A Little Knitting History – Jazz Knitting

From The Sydney Morning Herald, Monday 13th March 1922

JAZZ KNITTING.

The old adage that there is nothing new under the sun was never better exemplified than in the “Jazz” or colour design knitting which has become such a rage in England this season.

Most war-time knitters will remember a modest little book entitled “How to Knit Initials and Battalion Colours,” which was published on the first War Chest day, and which gave directions how to twist the wool used for the design with that used for the ground colour in order to avoid loops at the back of the work. The book contained a series of charts marked off in squares as a guide to the worker. Expert knitters soon outgrew those simple diagrams, and evolved most intricate devices, one lady growing quite famous for her pictured socks. Now the idea which became so familiar to us in Australia has been rediscovered and under the name of jazz knitting is being utilised for the adornment of all manner of knitted garments. Jumpers have gay coloured borders in conventional or floral designs, knitted skirts and scarfs are similarly treated; dresses are decorated at the edge of neck, sleeves, and skirt, woolly bonnets for children have a dainty trail of forget-me-nots and rosebuds worked in the reveres which roll softly back from the face and the long gauntlet gloves, which are so fashionable, achieve an air of distinction by means of a motif in colours to match that upon the scarf or jumper. In fact, colour knitting is employed wherever we are accustomed to find the more familiar embroidery or beading. The work is easily done and takes but little longer than plain knitting. For those who have never attempted to knit a design in colour a few directions will prove helpful.

Designs for cross-stitch embroidery, beading, or filet crochet are very suitable for this work, and there are fascinating possibilities in working out the colour scheme. For instance, in a border design of conventionalised roses, connected by trailing stems, the flowers are of pale yellow with orange centres, the leaves und stems of autumn brown, the background itself being cream. Before beginning to work, it is wiser to mark out the design on squared paper – an exercise book ready ruled may be purchased at any stationers for a trifling sum. Each square represents a stitch, and it is far less tiring to the eye to follow these larger squares when knitting the design. The various colours to be used may be indicated with coloured chalks or by different symbols, such as dots, crosses, daggers, and stars. Next arrange where the design is to appear, and ascertain whether it will fit in without alteration. For instance, if you intend working a border in a jumper, count the number of stitches on your needles and divide by the number of stitches which are contained in each repeat of the design, remembering to place the centre of a motif exactly in the centre front and centre back. A little adjustment of the design may be found to be necessary, but this is easily effected if done before commencing the work. Colour pattern knitting is always done in stocking stitch with the pattern on the right (knit side), and the twisted in colours on the wrong (purl) side. Either wool or silk may be employed, but the pattern colour wool or silk must be of slightly heavier thickness than that used for the ground colour.
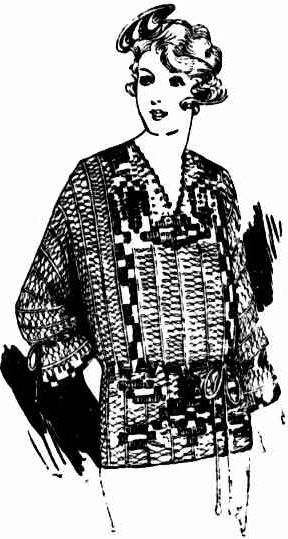
Jazz Knitting from te Sydney Morning Herald, 13th March 1922

It is better to join in a fresh strand for each repeat of the pattern, and so obviate carrying on the pattern wool across large spaces occupied by the background colour only. A little practice, however, will soon illustrate where this method is preferable. It is a good plan to weave in the coloured wool some six or eight stitches before commencing and after completing the pattern by passing it at each stitch over the wool with which you are knitting, being careful to keep it at the back of the work. Both wools are held in the hand, and are twisted round the little finger, just as though on thread were used. In making a stitch, insert the needle in the usual way, cross the wool not used over the wool to be used, hold the former down over the first finger and the left hand, and complete the stitch. It sounds rather complex but the motions become perfectly automatic after a very little practice. When you change the colour you will notice that it is not necessary to twist the wools. Purl stitches are worked in similar fashion, the only difference being that as both wools are then in front of the needle, the wool which is being held down must be held over the needle as well.

Remember to twist the thread which you are carrying along very loosely, or you will pucker the pattern. Remember, also, to read the chart from left to right, and then from right to left as you knit and purl alternately. By using a pin to mark your place you will avoid all possibility of mistake.

When the pattern is completed you can cut off all loose ends if you have woven in the wools when commencing and finishing each strand, otherwise all ends must be carefully and neatly run in at the back of the work with a darning needle.

Before making up the garment press each section separately on the right side with a hot iron used over a wet cloth.

signature

8 Ways to Weave in Your Ends – Knitting Tutorials

I’ve been a knitter of sorts for almost 40 years and can confidently say that if I can imagine it, I can knit it. However there’s one thing that I’ve never been 100% sure about: darning in my ends. My darns are always secure and neat but after hearing a judge at a knitting competition say that that best knitters darn in their ends so you can’t even find them, my confidence in my technique flew right out the window (along with any desire to enter any more knitting competitions).

The Purl Bee has set me straight with her tutorial on eight different ways to darn in your ends when knitting. I was doing it properly all along!

Weaving in Your Ends – Knitting Tutorials: Finishing Techniques – Knitting Crochet Sewing Embroidery Crafts Patterns and Ideas!.

The Purl Bee is a great blog, not just for this article. So even if you know how to darn in your ends when you knit, check it out anyway. You’ll be glad you did!

signature

How to Sew Name Labels Into Knitting & Crochet That Stretches and Charlie’s New Hat

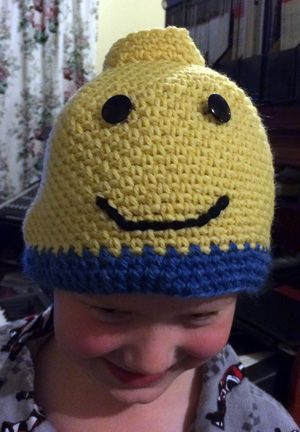
Charlie's Block Head hat

As promised, here is Charlie’s new hat! Not only is it proof that I can crochet, it’s also proof that sometimes I buy patterns that were written more recently than 1969 🙂

Here are the details, because this hat is so ridiculous that everyone should make one!

Pattern: Blockhead Man Hat by Darleen Hopkins – $4.50 US
Yarn: Cascade 220 (not superwash, just the regular kind)
Hook size: 5mm/US size H
Size: medium/large (Charlie likes his hats loose and long so he can pull them down over his ears but the smaller size really was going to be a bit tight)
Skill Level: Super easy but make sure to keep track of the end of your rounds!

Charlie insists he’s never going to take this hat off, so I had to sew a name label in it because of his school’s clothing policy (I.E. put a name label in all your kids clothes or we’ll look at you with the same expression we use on the 5 year olds when they’ve done something silly).

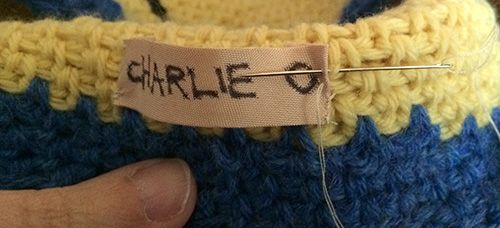
Of course, I could find neither the name label tape, nor the laundry marker that I bought for this purpose (It’s probably in my sewing box which is the only place I didn’t look), so I made a label with vintage seam tape and a Sharpie.

Fold the ends of the tape over and fasten the thread with a few stitches over the top of each other. Then over-sew to the hat, catching just the back of the stitches so it doesn’t show from the outside.

How to sew in a name label part 1

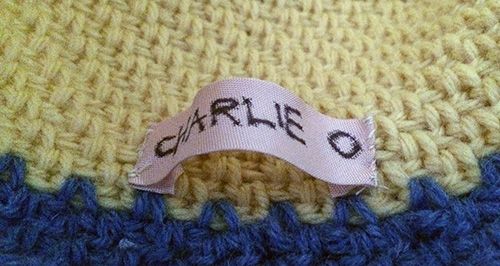
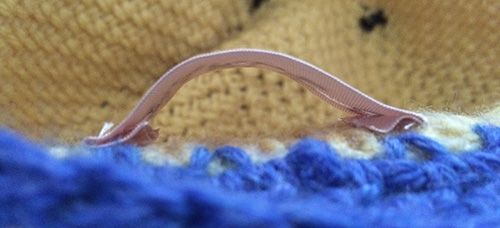
Make sure to leave a slight “bubble” in the label so that there is enough room for the crochet to stretch.

How to sew in a name label part 2

Here it is seen from the side.

How to sew in a name label part 3

I have my fingers crossed that Charlie doesn’t still manage to lose it. Whenever his Dad or I pick him up from school, he’s always managed to spread his belongings all over the classroom verandah so you never know!

Now I’m off to play with my our new Rainbow loom, which arrived during breakfast this morning!

signature

Choosing Buttons for Baby Garments

I love knitting for babies and one of my favourite things about it is the huge range of cute, and sometimes bizarre, novelty buttons that you can find to sew on them.

As a mother, however, the one thing I hate most about knitwear for babies is trying to do up the buttons on a cardigan wrapped around a 4 kilo mass of wriggling baby, especially when the buttons aren’t chosen to be functional.

If you’ve ever knit something for a baby and it has never been worn, it might not be because the parents are ungrateful un-knitworthy hand-made hating ingrates. They might be, but they might have just had a difficult time doing up the buttons. So from my years of experience doing up cardigans on wriggling babies, here is my guide to choosing buttons for baby garments.

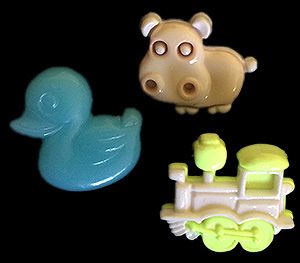
The irresistible but poky novelty button.

These are the type of buttons that have little poky bits sticking out everywhere but they’e cute so we must put them on all the things. Star shaped buttons are the WORST. Unfortunately they are also adorable.

These buttons should be used strictly as a decorative element, as trying to put them through a buttonhole that is in constant motion just causes yarn snags, sudden knitwear hatred and wild emotional swings (especially if the person trying to do them up is sleep deprived).

Novelty buttons
I am not a functional button!

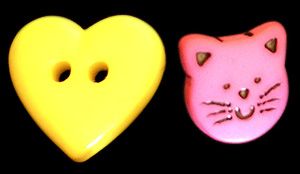
 The irresistible but mostly round novelty button.

This type of button works well on knitwear most of the time. If it has any part that sticks out, like the cat’s ears, they are smooth and won’t snag.

The only time I would avoid using buttons of this type is if my yarn is particularly splitty as it still might snag, but who wants to knit with that kind of yarn anyway?

Novelty buttons
I am cute and functional! Most of the time.

Round decorative buttons

These are my favourite type of buttons to put on baby wear. Printed with cute characters or flowers, special 3D look patterns or interesting moulded but completely smooth shapes. The buttons below are all vintage but you can still get printed buttons with classic children’s characters in most shops that sell buttons.

They’ll never snag the yarn, no matter what you’ve knit with, how wriggly the baby is or how tired the person trying to do them up.

Four round vitnage buttons

Putting my buttons where my mouth is

Figuratively speaking.

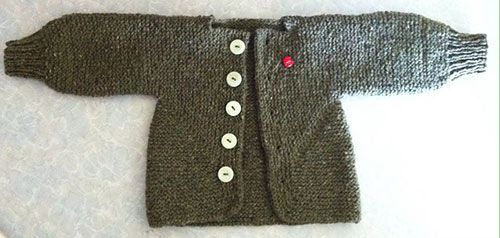
This is a baby surprise jacket that I knit for my nephew. I used vintage pale green buttons for fastening the front and a poky novelty ladybird button purely for decoration.

Baby surprise jacket
Two types of buttons used in the right spots.

I’d love to hear your thoughts on choosing buttons for baby and toddler knitwear so please feel free to leave a comment below!

signature

Free Knitting Pattern – Latvian Boy’s Hat from 1956 (Translated into English)

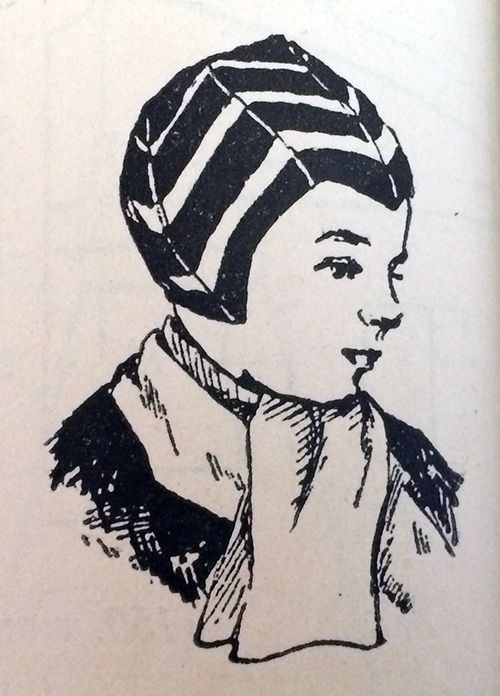
Boy's hat from Adījumu Raksti un Adīšanas Technika

Today I finished translating the boy’s hat from my vintage Latvian knitting book and have uploaded it for you to knit.

I test knit the pattern (I’ll show you my hat once it’s dry), and was very pleased to find that I translated it properly and managed to correct the errors and add the missing information (it didn’t say how long to knit before casting off).

I tried the finished hat on my son Charlie, who is about the size of the average seven year old, despite only being five, and it fit perfectly! All my experience in knitting hats paid off and I didn’t have to add or unknit any rows. Phew.

Now I wonder what to tackle translating next. There’s a very cute looking baby cardigan, or I could really challenge myself and see if I can make heads or tails of the chapter on knitting Latvian mittens…

signature