Menu Close

Year: 2018

A Bit of Arty Recycling with Foam Printmaking Blocks

Yesterday we took a family trip to the recycling yard (as you do), and I found some boxes of sticky foam sponge shapes, that I assume were meant to be used as packaging somehow.

The type of foam reminded me of the kind used to make Art Foamies, so I stuck them onto three cork place-mats, and now I have a new set of printing blocks!

Printing plate made from sponges and an old placemat

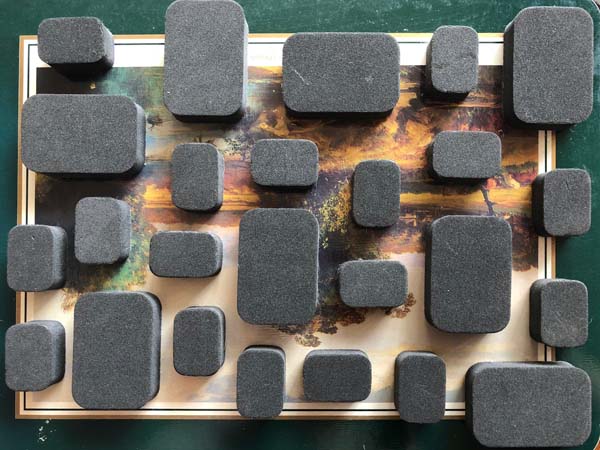
(Above) This one was inspired by the Mid Century Modern school of design. I might carve some little flower and motif stamps to print over the top. Or maybe some fish.

(Below) I decided to see what I could do with all of the pieces that had been cut up and the odd shapes. This block was inspired by the designs on the Pyrmont incinerator designed by Walter Burley Griffin in the 1930’s. I had the honour of seeing it shortly before it was demolished. The architectural detail was stunning even in the state of decay it was suffering in 1990.

Printing plate made from sponges and an old placemat

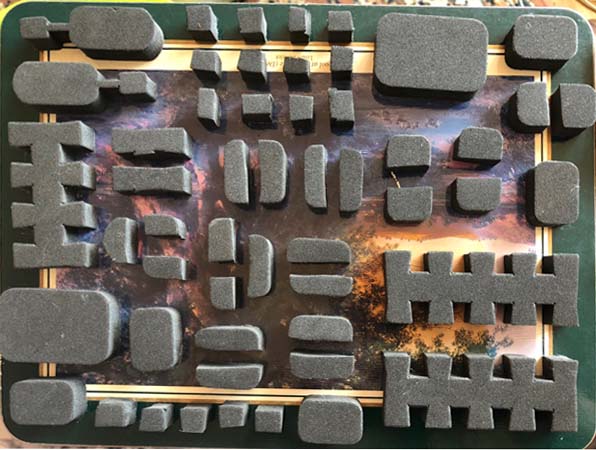
I used the last of the foamy sponge pieces at an angle, a bit like herringbone brickwork, only with two sizes of oblongs and great big gaps 🙂

Printing plate made from sponges and an old placemat

These are multi purpose plates. I can roll paint onto them using a foam brayer and print with them that way. I can sponge colours on for a multi-colour effect, or use them as texture plates with a gelli plate. I have so much experimenting to do! I think I’ll start with printing some fabric.

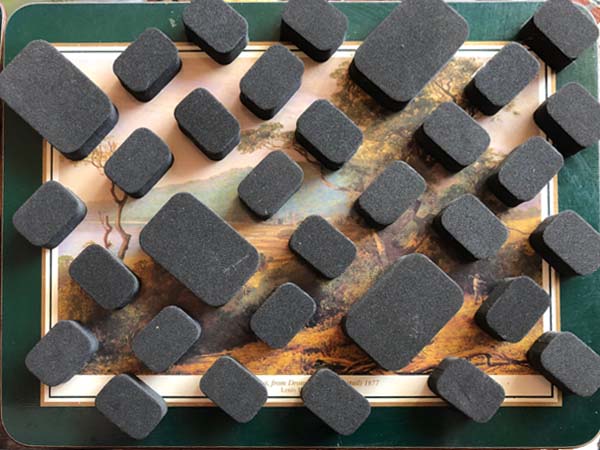
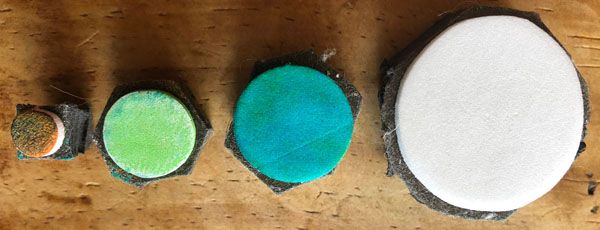
I also found this little bonus in one of the pots of foam pieces. It looks like the previous owner had a similar idea to mine as they had made a little set of round stamps.

Foam stamps

Do you like printing on fabric or using gelli plates? Leave a comment with a link to your work becuase I’d love to take a look!

Sarah

Today’s New Knitting Pattern – A Lace Lovely

Reversible knitted lace scarf
Today’s new knitting pattern is a beautiful lace scarf inspired by Shetland lace by Margaret Anderson of New Zealand. Written in 1936 for a knitting competition in an Australian knitting magazine, I think you’ll agree that Miss Anderson was robbed when she only tied for 6th place!

Margaret’s Reversible Scarf

I know I asked yesterday if anyone would like a pattern for a baby jacket or an edging but I couldn’t wait to get a new pattern up. They’ll be next!

Sarah

Welcome to the New Knitting-and.com!

A relaxing cup of tea

Welcome to the beginning of the 23rd year of Knitting-and.com! To celebrate over 22 years online, I’ve updated the whole site. Yep, the whole thing.

You’ll find all your favourite things that were here before, like the knitting pattern for the Feather and Fan Comfort Shawl, the Baby Surprise Jacket tips page, and a heck of a lot of flower loom tutorials.

You’ll also find you’ll be scrolling a lot less to find things (yay!), there’s a comment section at the bottom of every tutorial and pattern so you can leave a note right on the pattern if you need to, AND (!!!) everything still prints without any of the stuff you don’t need when you’re not online.

The difference between the on screen and print versions of Knitting-and.com
Check it out! When you print a knitting pattern, the pattern is the only thing you get.

Even with all that, the thing I think you’ll like the most is something you can’t even see. I’ve made it eight bazillion times easier for me to add new content. That means more knitting patterns for lace edgings, more vintage embroidery books, more of everything!

You can subscribe right here to be notified every time I add new content. (If you previously subscribed to the Wiki or Blog, you will need to resubscribe).

[jetpack_subscription_form]

So grab a cup of tea in your favourite rainbow mug* and have a look around. I’ll see you soon with some more free knitting patterns. Would you like a baby cardigan or a new lace edging?

Sarah

  • I wish that rainbow mug were mine but alas, it’s stock photography. So sad. 😉

A Machine Stitch and Hand Embroidery Sampler

There are an almost infinite number of places to look for inspiration when it comes to designing hand embroidery and with the invention of the internet, we’ve never had access to more.

This machine sewn and hand embroidered sampler was inspired by an article written by Rebecca Ringquist, on Weallsew.com in 2015

The premise: pick a few stitches from your sewing machine. See what hand embroidery they inspire. I chose not only to replicate the stitches by hand, but also see what stitches might work with them if they were used together. I  worked on an old worn out and slightly stained piece of vintage hand work, as I did with my found embroidery pieces in my previous post.

Modern hand and machine embroidery on a vintage tray cloth.

The completed sampler shows the eight machine stitches I chose and all the stitch variations they inspired.

Modern hand and machine embroidery on a vintage tray cloth.

At the top of this photo you can see the machine stitch with asterisks were worked  short and long, woven and eventually morphed into eyelets. The diamond stitch became several fancy borders before turning into a traditional triangular filling stitch.

Modern hand and machine embroidery on a vintage tray cloth.

I also used the triangular filling stitch on the crossed petals on the right, along with woven detached picots, satin, fly chain and back stitch.

Modern hand and machine embroidery on a vintage tray cloth.

I repeated the zig-zag stitch with different threads before trying it on several different shapes. The diamond border on the centre right became a small motif, border and large area of back stitched trellis. Back stitched trellis and the triangular filling stitch have become firm favourites of mine, along with eyelets. I’d happily embroider them everywhere!

On the left you can see a machine stitched variation of feather stitch. I found that working it in feather stitch made it a bit sloppy unless worked very small, and my favourite two versions are those on the right.

Modern hand and machine embroidery on a vintage tray cloth.

Finally, the leaf stitch was worked in both sizes offered by my sewing machine. I worked it in variations including detached chain and chain stitch, back stitch and fly stitch.

To finish off the sampler, I threaded knitting wool along the crocheted edge to frame it.

I highly recommend both working on old, worn embroidery and making a sampler inspired by machine stitches. Even if your machine has only the most basic of zig-zags you could work a sampler with all sorts of variations by changing the length and width of your machine stitches and then seeing how many hand stitches they inspire. You can come up with some unexpected new hand stitches, and may even be inspired to use hand and machine stitching together.

If you do choose to stitch one, I’d love to see it! I’m tempted to go and work one with just zig-zag to see what I can come up with…

signature

Embroidered Samplers on Found Embroidery

I am an avid collector of vintage embroideries, especially ones with interesting floral designs. Finished ones, unworked ones, worn out and stained ones, if the price is right they come home with me, usually from our local op shop/charity thrift store for fifty cents to a few dollars.

Spectacular pieces go into my collection of pieces to use as they are, but I use the others as pieces of fabric to stitch on. Here are my two most recent pieces.

I loved the rose on this placemat but the stitching was quite worn, and it had a couple of cream coloured paint splotches that I didn’t notice until after I washed out the stains!

Running stitch on found embroidery.

I took some scrap threads and doubled them up to about the thickness of six strand floss and worked running stitch across the background to make the rose “pop” out from the background. I’m a big fan of running stitch! I tried to offset each row of stitching but didn’t worry if stitches were a little wonky. I also removed the crocheted lace edging so I can dye it and use it for something else.

This piece will end up becoming part of another project. At the moment I think I’ll use it as part of a cover for one of my stitch sampler books, but who knows?

Another damaged doily became this very simple modern eyelet sampler. Orange and green are my favourite colours but no amount of soaking would remove all of the rust and ink stains from this little mat. I decided I could either cover them or cut them out. Why not both?

I used scraps of various orange and green threads and worked round eyelets in the centre, a flower at each end, and leaves on the top and bottom. (Click the photo to see a larger version).

Since the stitching holding the crocheted edging was quite worn, I worked running stitch with dark brown through the holes, which frames the finished piece nicely, I think. I’d never worked eyelets before so this little fifty cent doily was both educational and fun to make. It’s small enough to fit in with my other samplers so it will probably get bound into one of my fabric books for future reference. I’m definitely going to stitch a lot more of the flowers like the orange and brown one on the right!

Instructions for working eyelets can be found here on the French Knots vintage embroidery website. I experimented with a few different stitches around the leaf shapes after working the satin stitch over the edge. Most are finished off with back stitch to tidy them up, but a couple have tiny satin stitch and rounds of chain and blanket stitch as decorative finished around the outside.

I have another sampler worked on found embroidery to show you tomorrow, so please come back then. I’m quite excited by the way it turned out!

signature