
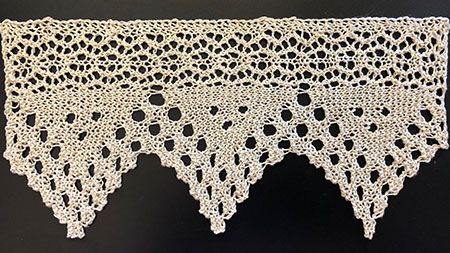
This week’s free knitting pattern is the Ramsay Knitted Edging from 1927. As always, I have rewritten it in modern knitting terms, charted it and check it for errors. Enjoy!

This week’s free knitting pattern is the Ramsay Knitted Edging from 1927. As always, I have rewritten it in modern knitting terms, charted it and check it for errors. Enjoy!
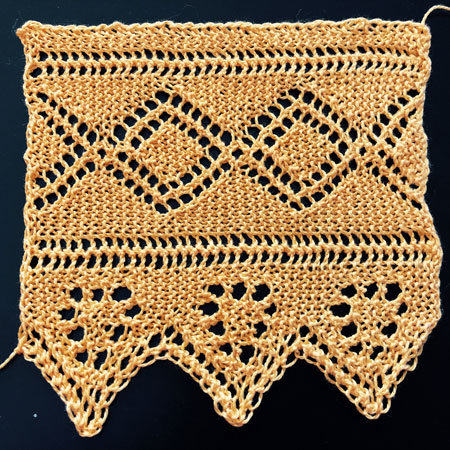
This week’s knitting pattern is based on a knitted doily edging from 1884. The reason it took me two weeks to get this one online, rather than giving it to you last week is because I had to rework the way the diamonds transition from one to the next, and kept changing my mind about how to do it, which meant a LOT of knitting.
I hope you enjoy the new pattern for the Knitted Diamond and Flag Border.
If you enjoy knitted lace edgings, don’t forget to check out the whole collection! My collection of knitted collars (because they’re usually just big edgings), insertions and edgings.
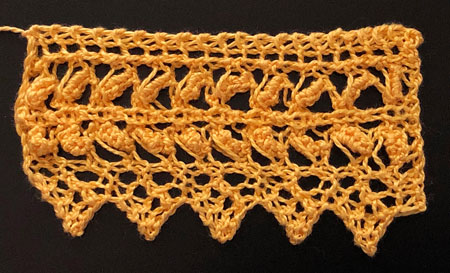
Today’s knitting pattern is a very unusual lace edging rescued from the advice column of the Melbourne Leader from 1884. I’m a sucker for any 19th century lace edging that doesn’t have a picture of the finished lace, because they’re usually ignored or missed by modern knitters and are sometimes very special, like this one.
Check out the knitting pattern for “Uncommon Lace”. I’ve updated, charted and test knit it so you don’t have to.
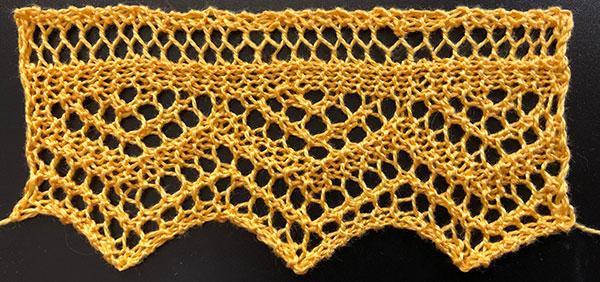
Today’s new knitting pattern is a special request from a reader. Martine’s Point Lace is a classic wave style pointed edging with a zig-zag edging and open lace header. I have written the pattern out in words and charted it for knitters like me who prefer a chart.
I hope you enjoy the knitting pattern for Martine’s Point Lace.
I’m still sewing the suffolk puff/yoyo coverlet together, enjoying my Farscape marathon and taking breaks with a little hairpin lace experimentation 🙂
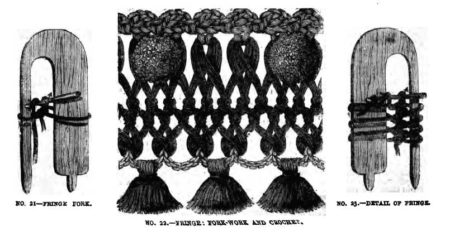
After seeing pictures of hairpin lace fringe forks in The Young Ladies Journal (downloadable from Google.com) I thought I’d have a go and see if I could find the best way to make fringe and I think I came up with a nice technique. Here’s what a traditional fringe and fork would have looked like (from the Young Ladies Journal):
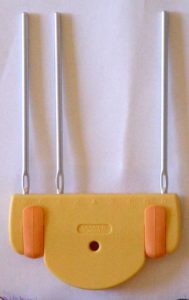
so I set my Clover loom up like this to imitate the traditional fork:
Here are the fringes I came up with.
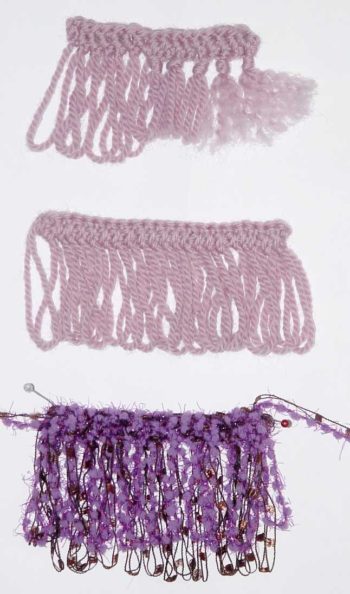
Top: 1 double crochet (US single crochet) worked in the regular way (through the stitch) and then the short loops were chained together as a cable edge. I tied some loops in a knot, then snipped the ends and fluffed out the fringe for another look. I don’t like this fringe as I find the header to be all floppy and unattractive.
Middle: This is the technique I like for a plain fringe. I worked one double crochet per row again, but instead of working through the middle of the loop, I worked under both threads, trapping the whole loop within the stitch. You do have to put a thread through the small loops when you take it off the loom or they will threaten to undo. I threaded the small loops like a cable edge on this sample again. This made a nice tidy and firm header.
Bottom: The same as the middle sample but worked with two novelty yarns held together and a larger crochet hook. The purple yarn shrank when I soaked it overnight. I would have preferred if they had remained the same length. Now I guess I should try some fancier fringes like the ones in the Victorian needlework books! I will be documenting these techniques properly by adding a new section on hairpin lace to the website. Eventually…
I’ve also decided on a motif for my next tatting project!
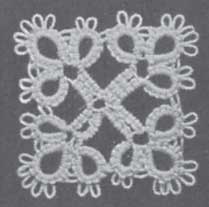
It’s from the Priscilla Tatting Book #1 and I think I’ll make it in size 20, blue thread. I don’t have much blue size 20 thread left so I’m going to see what they have at the needlework store on Thursday. Now, back to sewing all those suffolk puffs together!